Briny, tangy, and unapologetically bold, the humble dill pickle rarely gets the spotlight it deserves in a main course. We relegate it to a supporting role on burgers or chop it into relish, but its true potential lies dormant, waiting for the right partner. This recipe is its grand debut, a moment where that zesty, garlicky crunch isn’t just an afterthought—it’s the star of the show, working in perfect harmony with salty Parmesan and juicy, crispy chicken.
Prepare yourself for a flavor combination that will genuinely surprise and delight you. We’re talking about chicken so shatteringly crisp it sings, a savory crust infused with nutty cheese, and a bright, acidic kick from dill pickles in every single bite. This isn’t just another breaded chicken recipe; it’s an experience that hits all the right notes—salty, savory, tangy, and utterly addictive.
The Crispy Dill Pickle Parmesan Chicken Difference
- Bold Flavor Fusion: The magic is in the combination. The sharp, vinegary bite of the dill pickle cuts through the richness of the Parmesan and fried chicken, creating a perfectly balanced and crave-worthy flavor profile that you won’t find anywhere else.
- The Pickle Brine Secret: We use pickle juice not just for flavor, but as a tenderizing brine. This simple technique ensures the chicken is incredibly moist and juicy on the inside, infusing it with a subtle tang from the very first step.
- Unbeatable Crunch: By using a specific Panko breadcrumb and Parmesan mixture and employing a double-dredge technique, we guarantee an extra-crispy, golden-brown crust that stays crunchy, even after it’s topped with juicy pickles.
The Building Blocks
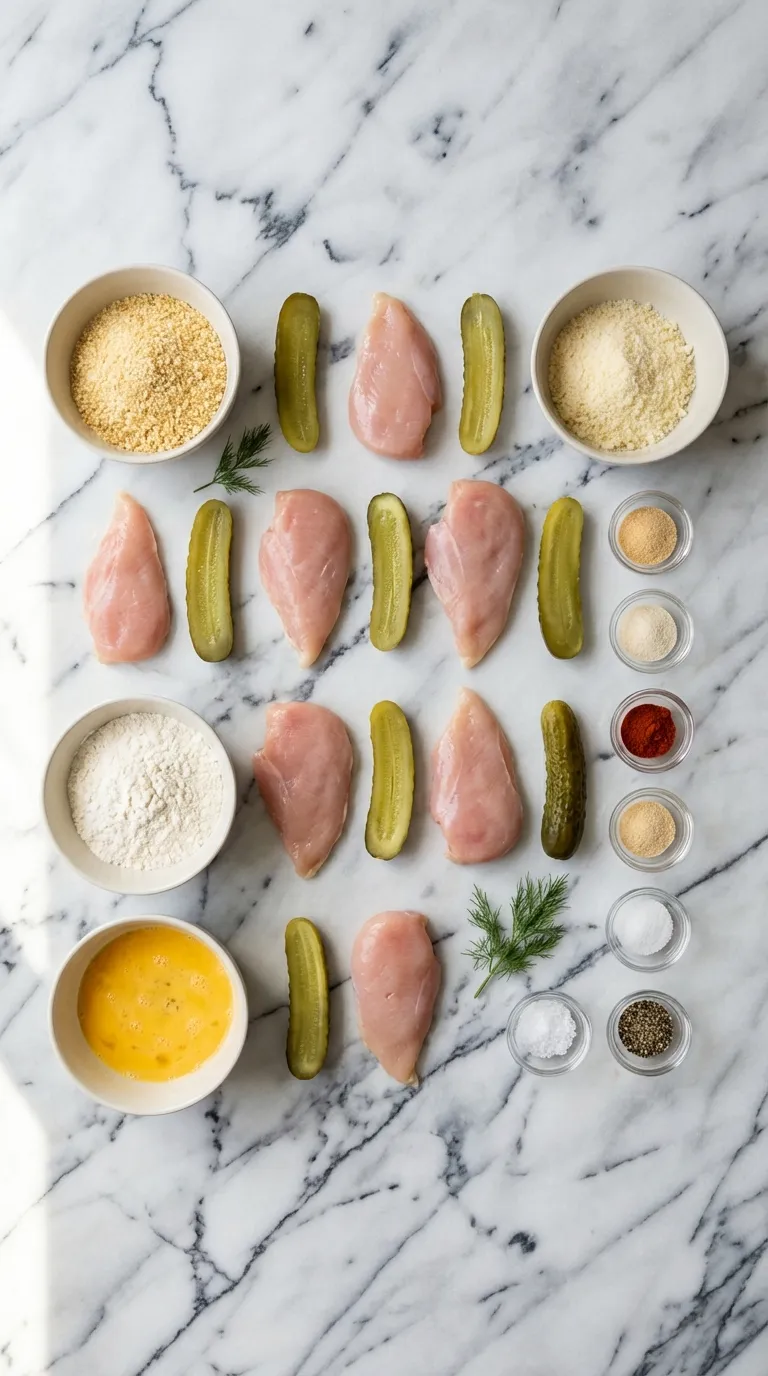
- Boneless, Skinless Chicken Breasts: The canvas for our masterpiece. You can also use chicken tenderloins for pre-portioned strips.
- Dill Pickle Juice: (This is non-negotiable!) The secret weapon for our brine. It tenderizes the chicken and infuses it with a deep, tangy flavor from the inside out.
- All-Purpose Flour: The first layer of our dredge, which helps the egg wash adhere properly to the chicken.
- Large Eggs: The binder that holds our delicious crust together.
- Panko Breadcrumbs: (The key to crunch!) These Japanese-style breadcrumbs are lighter and flakier than traditional breadcrumbs, resulting in a superior, airy crispness.
- Grated Parmesan Cheese: (Use freshly grated!) It gets mixed into the breadcrumbs, creating a savory, salty, and cheesy crust that browns beautifully. It offers a much better flavor than the pre-shredded kind.
- Garlic Powder & Onion Powder: These aromatics add a foundational savory depth to the breading mixture.
- Smoked Paprika: Adds a touch of color and a subtle, smoky warmth that complements the other flavors.
- Salt & Black Pepper: To season every layer perfectly.
- Dill Pickle Slices: The star topping! Use your favorite brand of crunchy dill pickles.
- High-Smoke-Point Oil for Frying: Canola, vegetable, or avocado oil are all excellent choices for achieving that perfect golden-brown finish without burning.
Swaps & Alternatives
Don’t have everything on hand? No problem. This recipe is flexible, and a few smart swaps can save you a trip to the store.- No Panko? You can use regular dried breadcrumbs, but the texture will be a bit denser. For a fun twist, try crushed pretzels, similar to what you’d find in a Pretzel Chicken recipe.
- Chicken Thighs: Boneless, skinless chicken thighs can be used for an even juicier result. Just be sure to pound them to an even thickness.
- Spice It Up: Add a pinch of cayenne pepper or a teaspoon of hot sauce to the egg wash for a spicy kick.
- Different Cheese: While Parmesan is classic, a blend of Parmesan and Pecorino Romano would add an even sharper, saltier bite.
- Air Fryer Method: If you’re looking to reduce the oil, this recipe works wonderfully in an air fryer. It’s a great technique, much like in this Air Fryer Parmesan Crusted Chicken. Just spray the breaded chicken with cooking spray and cook at 400°F (200°C) for 15-20 minutes, flipping halfway.
Gourmet Variations
Ready to take this dish to the next level? These simple additions can transform your crispy chicken into a truly gourmet experience that will have everyone asking for the recipe.First, consider making a homemade dill ranch or a spicy aioli for dipping. A creamy, herby sauce is the perfect counterpoint to the crispy, tangy chicken. Simply mix ranch dressing with fresh chopped dill or mayonnaise with sriracha, garlic, and a squeeze of lemon.
Another fantastic twist is to add fresh herbs directly into your breading. A tablespoon of finely chopped fresh dill or parsley in the Panko mixture will add a vibrant, fresh flavor that brightens up the entire dish. If you love dill, you know how it can elevate a recipe, just like in a refreshing Chilled Cucumber And Dill Soup.
Finally, for an extra layer of indulgence, melt a slice of provolone or mozzarella cheese over the chicken during the last minute of cooking. This turns it into a delicious hybrid, reminiscent of a classic Chicken Parmesan Casserole but with that signature pickle kick.
How to Make Crispy Dill Pickle Parmesan Chicken
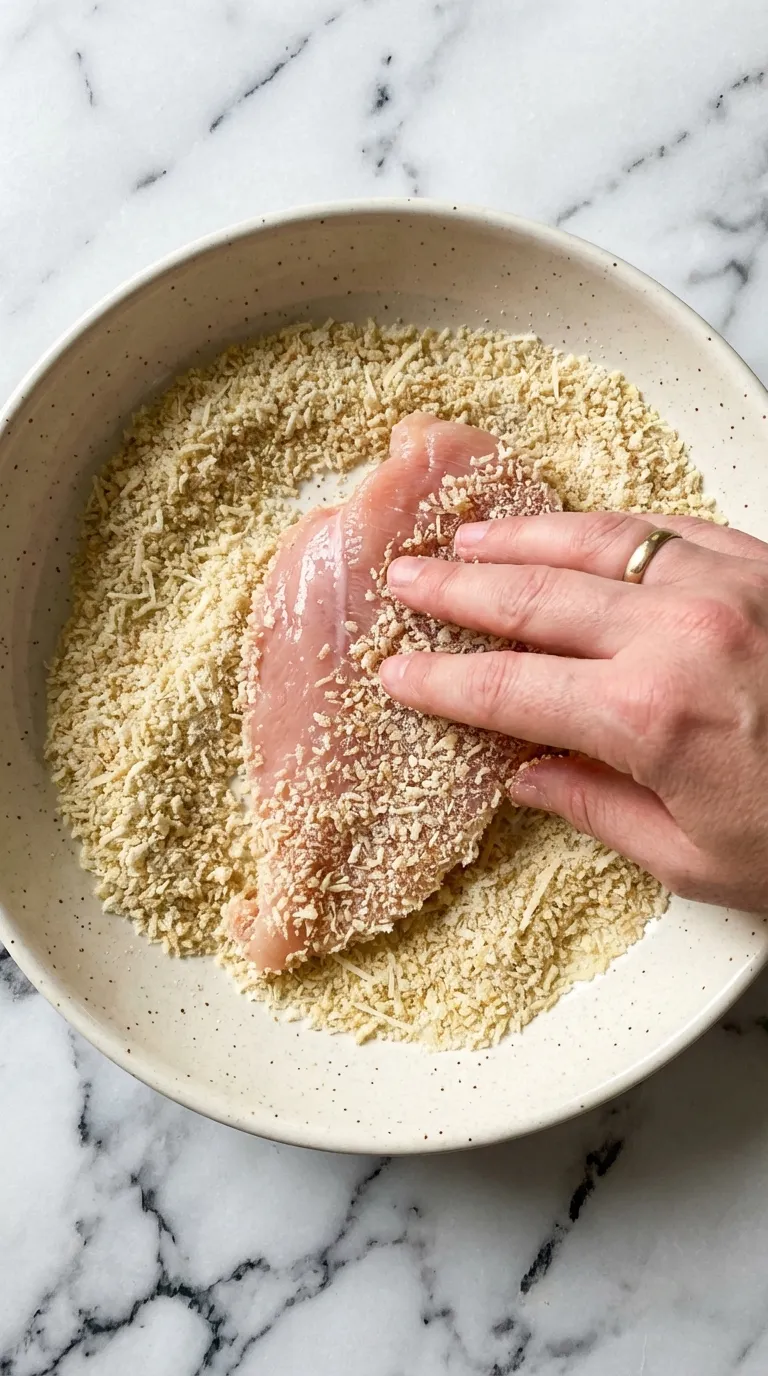
1. Prepare and Brine the Chicken
First, prepare your chicken. If you’re using chicken breasts, slice them in half horizontally to create thinner cutlets. Place the cutlets between two pieces of plastic wrap and use a meat mallet or rolling pin to pound them to an even thickness of about 1/2 inch. This ensures they cook quickly and evenly.Place the pounded chicken into a shallow dish or a zip-top bag. Pour the dill pickle juice over the chicken, ensuring it’s fully submerged. Let it brine in the refrigerator for at least 30 minutes, but for the best flavor and tenderness, aim for 1 to 2 hours.
2. Set Up Your Dredging Station
While the chicken is brining, prepare your three-station dredging setup. You’ll need three shallow dishes (pie plates work perfectly). In the first dish, combine the all-purpose flour, a pinch of salt, and pepper.In the second dish, whisk the eggs until they are smooth and uniform. In the third dish, combine the Panko breadcrumbs, grated Parmesan cheese, garlic powder, onion powder, smoked paprika, and another generous pinch of salt and pepper. Mix well to ensure the seasonings and cheese are evenly distributed throughout the Panko.
3. Bread the Chicken Cutlets
Remove the chicken from the pickle brine and pat it dry with paper towels. This step is crucial; a dry surface helps the breading adhere properly. Working one piece at a time, dredge a chicken cutlet in the flour mixture, shaking off any excess.Next, dip the flour-coated chicken into the egg wash, allowing any excess to drip off. Finally, press the chicken firmly into the Panko-Parmesan mixture, coating both sides completely. Gently press the breading onto the chicken to ensure it sticks. Place the breaded cutlet on a wire rack and repeat with the remaining chicken.
4. Cook to Golden Perfection
You can either pan-fry or air-fry the chicken. For pan-frying, pour about 1/2 inch of oil into a large, heavy-bottomed skillet and heat it over medium-high heat. The oil is ready when a breadcrumb sizzles immediately upon contact.Carefully place a few pieces of chicken in the hot oil, being sure not to overcrowd the pan. Cook for 3-4 minutes per side, or until the crust is a deep golden brown and the chicken is cooked through (reaching an internal temperature of 165°F or 74°C). Remove the chicken from the skillet and place it on a clean wire rack to drain.
5. Assemble and Serve
Once all the chicken is cooked, it’s time for the final, glorious step. Arrange the crispy chicken cutlets on a serving platter. Top each piece generously with your favorite dill pickle slices. For an extra flourish, you can sprinkle a little more grated Parmesan cheese over the top.The final presentation of these extra-crispy breaded chicken strips topped with sliced pickles and parmesan cheese on a white plate is simple yet stunning, promising a delicious meal ahead. Serve immediately while the chicken is hot and the crust is at its crispiest.
Avoid These Pitfalls
- Soggy Breading: This often happens for two reasons: not patting the chicken dry after brining, or the oil not being hot enough. Make sure your oil is shimmering and sizzles instantly before adding the chicken.
- Overcrowding the Pan: Frying too many pieces at once will drop the oil temperature, causing the chicken to steam instead of fry. This leads to a greasy, soggy crust. Cook in batches for the best results.
- Breading Falls Off: Be sure to press the Panko mixture firmly onto the chicken. Also, once the chicken is in the pan, resist the urge to move it around too much. Let it form a solid crust before flipping it once.
Perfect Pairings
This chicken is the undeniable star, so the side dishes should be complementary without stealing the show. The tangy, salty profile of the chicken pairs beautifully with creamy, starchy, or fresh and simple sides.A classic choice is a heaping portion of creamy mashed potatoes or a rich and cheesy macaroni and cheese. The smooth textures are a wonderful contrast to the crispy chicken. For a lighter option, a simple green salad with a lemon vinaigrette or a side of steamed green beans provides a fresh, clean counterpoint.
Of course, you can never go wrong with french fries or crispy roasted potatoes. The combination is reminiscent of a classic pub meal, but elevated with that unique pickle and Parmesan twist. For a summer meal, this chicken would be fantastic alongside grilled corn on the cob, much like you’d serve with Grilled Ranch Garlic Parmesan Chicken Skewers.
Know someone who loves Crispy Dill Pickle Parmesan Chicken? Share this recipe with them
What is the purpose of brining the chicken in pickle juice?
The pickle juice serves two main purposes: it acts as a tenderizing brine to make the chicken incredibly moist and juicy, and it infuses the meat with a deep, tangy flavor from the inside out.
Can I make this recipe in an air fryer instead of pan-frying?
Yes, this recipe works very well in an air fryer. For the air fryer method, spray the breaded chicken with cooking spray and cook at 400°F (200°C) for 15-20 minutes, flipping the chicken halfway through.
How do I keep the breading crispy and prevent it from falling off?
To ensure a crispy crust that adheres well, make sure to pat the chicken dry after brining, press the Panko mixture firmly onto the chicken, ensure your oil is hot enough before frying, and avoid overcrowding the pan. Once in the pan, let a solid crust form before flipping.
What kind of breadcrumbs are best for this recipe?
Panko breadcrumbs are highly recommended because they are lighter and flakier, which results in a superior, airy crispness. If you don’t have Panko, you can use regular dried breadcrumbs, but the texture will be denser.
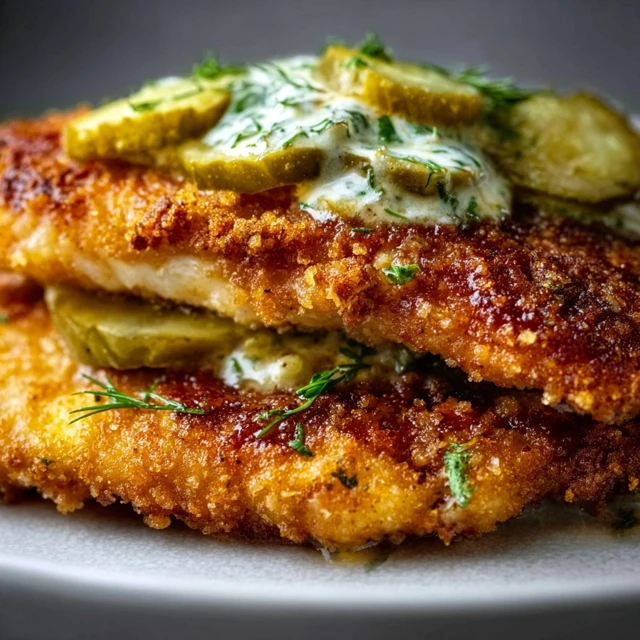

Addicting Crispy Dill Pickle Parmesan Chicken

Equipment
- Meat Mallet or Rolling Pin
- Plastic Wrap
- Shallow dish or zip-top bag (for brining)
- Three shallow dishes (for dredging)
- Whisk
- Large heavy-bottomed skillet
- Tongs
- Wire rack
- Paper towels
- instant-read thermometer
- Measuring cups and spoons
- Knife and cutting board
- Serving platter
Ingredients
- 2 large boneless, skinless chicken breasts about 1.5 lbs total
- 1 cup dill pickle juice, from a jar of dill pickles
- ½ cup all-purpose flour
- 2 large eggs
- 1 ½ cups Panko breadcrumbs
- ¾ cup freshly grated Parmesan cheese
- 1 teaspoon garlic powder
- 1 teaspoon onion powder
- ½ teaspoon smoked paprika
- 1 teaspoon salt, divided
- ½ teaspoon black pepper, freshly ground
- 1 cup high-smoke-point oil for frying e.g., canola, vegetable, or avocado oil
- 1 cup dill pickle slices, for topping
Instructions
- Prepare and Brine Chicken: Slice chicken breasts horizontally into thinner cutlets. Place between plastic wrap and pound to an even 1/2-inch thickness. Place chicken in a shallow dish or zip-top bag, cover with dill pickle juice, and refrigerate to brine for at least 30 minutes, or up to 2 hours.
- Set Up Dredging Station: Prepare three shallow dishes. In the first, combine flour, a pinch of salt, and pepper. In the second, whisk the eggs until smooth. In the third, combine Panko breadcrumbs, grated Parmesan, garlic powder, onion powder, smoked paprika, and the remaining salt and pepper.
- Bread the Chicken: Remove chicken from the brine and pat completely dry with paper towels. Dredge each cutlet first in the flour mixture (shaking off excess), then dip in the egg wash (letting excess drip off), and finally press firmly into the Panko-Parmesan mixture to coat both sides thoroughly. Place breaded cutlets on a wire rack.
- Pan-Fry the Chicken: Pour about 1/2 inch of oil into a large, heavy-bottomed skillet and heat over medium-high heat until shimmering (a breadcrumb should sizzle instantly). Working in batches to avoid overcrowding, cook the chicken for 3-4 minutes per side until deep golden brown and cooked through (internal temperature reaches 165°F / 74°C).
- Drain and Serve: Transfer the cooked chicken to a clean wire rack to drain any excess oil.
- Assemble: Arrange the crispy chicken on a serving platter. Top each piece generously with dill pickle slices and an optional sprinkle of extra Parmesan cheese. Serve immediately while hot and crispy.
Notes
Air Fryer Method: For a lower-oil version, spray the breaded chicken with cooking spray. Air fry at 400°F (200°C) for 15-20 minutes, flipping halfway through, until golden and cooked through.
Pro Tips: Ensure the chicken is patted completely dry after brining for the best breading adhesion. Do not overcrowd the pan when frying, as this will lower the oil temperature and result in soggy chicken. Let the chicken form a crust before flipping to prevent the breading from falling off.
Serving Suggestions: Pairs well with creamy mashed potatoes, macaroni and cheese, or a simple green salad with a lemon vinaigrette.