Every grain of sushi rice holds a quiet, sticky secret, a promise of vinegar-kissed perfection that transforms a simple bowl of starch into the very soul of Japanese cuisine. It’s not just about boiling water and adding rice; it’s a ritual of washing, seasoning, and fanning that rewards patience with a texture so uniquely tender and resilient it practically begs to be shaped into nigiri or rolled into maki.
Forget the gummy, mushy mess from takeout containers. This guide is your backstage pass to crafting restaurant-quality sushi rice at home, the kind that clings together with a gentle, glossy sheen and a perfectly balanced sweet-tangy flavor. We’re going to demystify every step, from the perfect rinse to the crucial hang-dry phase, so you can build the foundation for unforgettable sushi bowls, hand rolls, and beyond.
The Sushi Rice Difference
- Authentic Sticky Texture: The precise ratio of short-grain rice to water, combined with the proper washing technique, creates the ideal sticky-but-separate grains that hold their shape without turning into paste.
- Perfectly Balanced Seasoning: A warm mixture of rice vinegar, sugar, and salt is folded into the hot rice, creating the signature sweet-savory-tangy flavor that defines sushi rice.
- Foolproof Technique: This method eliminates guesswork with clear visual cues for rinsing, cooking, and cooling, ensuring success even for first-time sushi makers.
The Essential Components
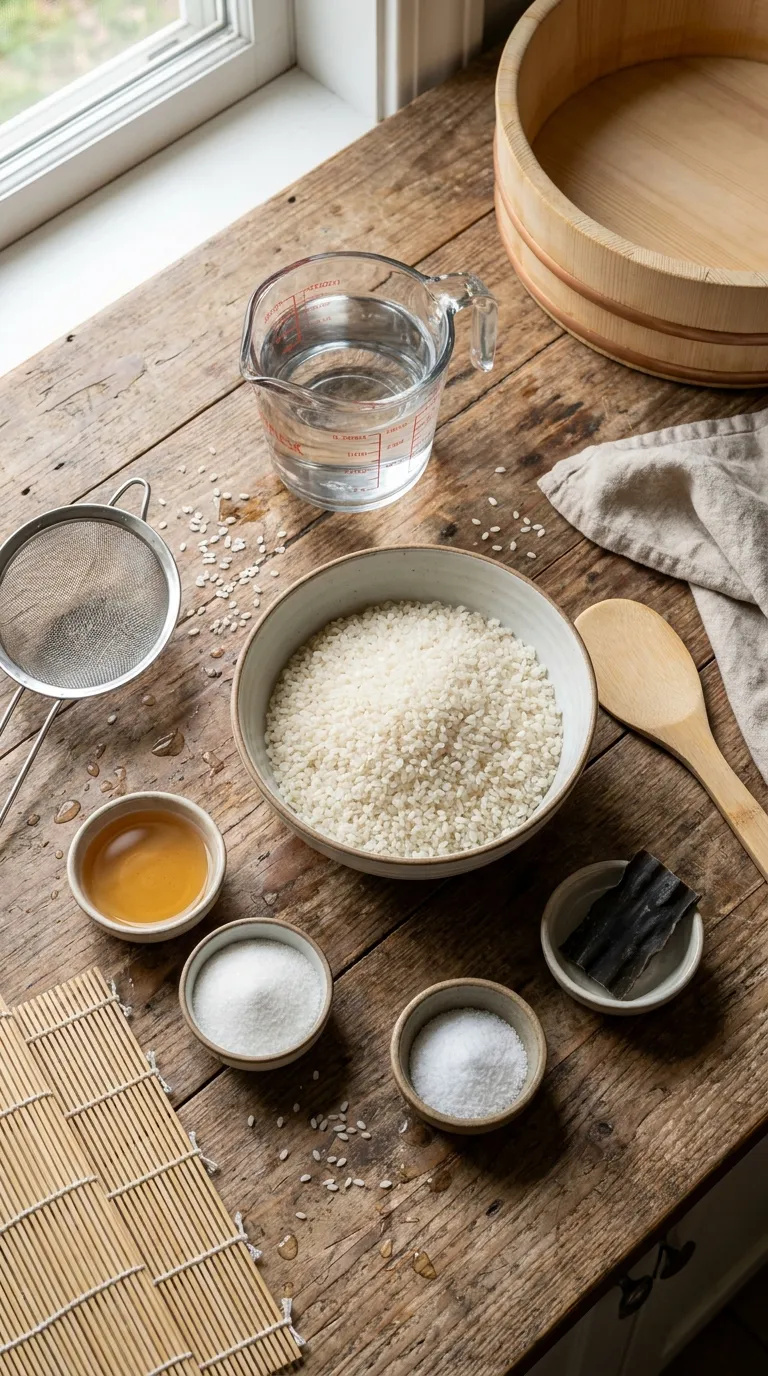
- 2 cups Japanese short-grain sushi rice: (Crucial for the correct sticky texture; long-grain rice will not work)
- 2 ½ cups cold water: (For cooking the rice)
- ⅓ cup rice vinegar: (Use unseasoned rice vinegar for control over the final flavor)
- 3 tablespoons granulated sugar: (Balances the acidity of the vinegar)
- 1 ½ teaspoons kosher salt: (Enhances all the flavors; do not use table salt as it can be too harsh)
- 1 piece kombu (dried kelp) – optional: (Adds a subtle umami depth to the cooking water)
Swaps & Alternatives
- No sushi rice? Calrose or other medium-grain white rice can work in a pinch, though the texture will be slightly less sticky.
- No rice vinegar? A combination of apple cider vinegar and a tiny splash of water can mimic the acidity, but the flavor will be noticeably different.
- Reduce sugar? You can cut the sugar to 2 tablespoons for a less sweet rice, but the traditional balance will be altered.
- No kombu? Simply omit it. The rice will still be delicious, just without that extra layer of umami.
- Need a larger batch? The ratio remains the same: 1 cup rice to 1 ¼ cups water, with 2 ½ tablespoons of vinegar mixture per cup of cooked rice.
Level Up This Recipe
Once you’ve mastered the basics, these simple twists can elevate your sushi rice to new heights.- Toasted Sesame Finish: After seasoning, fold in 1 tablespoon of toasted sesame seeds and a drizzle of toasted sesame oil for a nutty, aromatic profile.
- Citrus Zest: Add the finely grated zest of one yuzu (or lemon) to the vinegar mixture for a bright, fragrant lift.
- Spicy Kick: Whisk a teaspoon of gochujang or sriracha into the vinegar mixture for a fiery, modern take on sushi rice.
- Herb Infusion: Tear a few shiso leaves or a sprig of cilantro into the rice while it cools for a fresh, herbal note.
How to Make Sushi Rice
1. The Essential Rinse
Place the rice in a fine-mesh strainer and rinse it under cold running water. Swirl the rice gently with your hand. The water will turn milky white. Continue rinsing until the water runs almost completely clear, about 2-3 minutes. This removes excess surface starch, which is the number one cause of gummy rice.2. The Rest and Cook
Transfer the rinsed rice to a heavy-bottomed pot with a tight-fitting lid. Add the 2 ½ cups of cold water and the kombu (if using). Let the rice soak for 30 minutes. This allows the grains to hydrate evenly. After soaking, remove the kombu. Bring the rice to a boil over medium-high heat, then immediately reduce the heat to low, cover, and simmer for 18 minutes. Do not lift the lid during this time.3. The Crucial Steam
After 18 minutes, turn off the heat but keep the lid on. Let the rice steam for another 10 minutes. This step allows the moisture to redistribute evenly throughout the grains, ensuring a perfectly tender texture. While the rice steams, prepare the seasoning.4. Prepare the Sushi Vinegar
In a small saucepan or microwave-safe bowl, combine the rice vinegar, sugar, and salt. Warm the mixture gently, stirring, until the sugar and salt are completely dissolved. Do not let it boil. Set it aside to cool slightly while the rice finishes steaming.5. Season and Cool (The Hangiri Method)
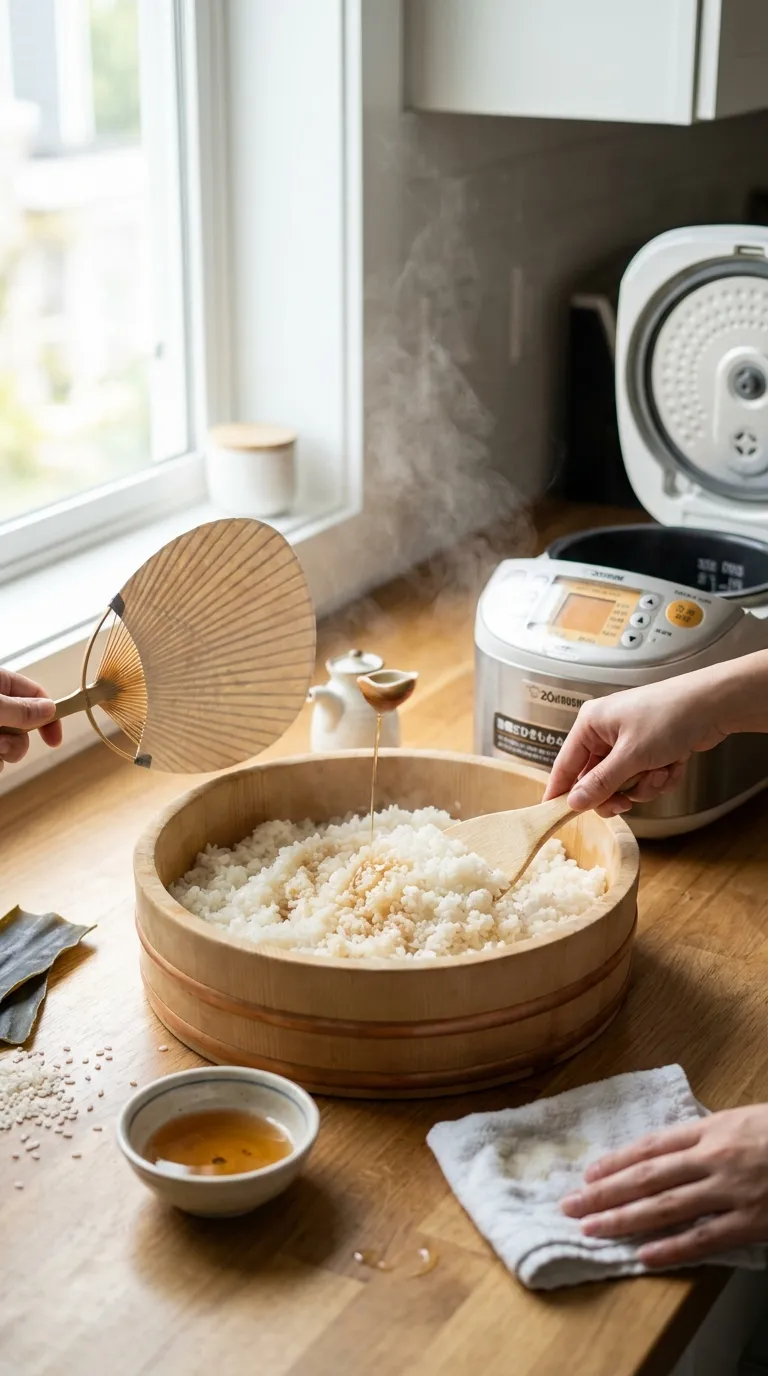
Transfer the hot steamed rice to a large, wide, non-metallic bowl (a wooden hangiri is traditional, but a glass or ceramic bowl works perfectly). Drizzle the warm vinegar mixture evenly over the rice. Using a rice paddle or a wooden spoon, cut through the rice with a slicing motion to separate the grains. Be gentle—you want to coat the rice, not mash it. As you mix, fan the rice with a paper plate or a magazine to cool it rapidly. This gives the rice a beautiful, glossy sheen. Continue mixing and fanning until the rice reaches room temperature.Common Mistakes to Avoid
- Skipping the Rinse: This guarantees a gummy, paste-like texture. Always rinse until the water is mostly clear.
- Lifting the Lid: Peeking releases steam and disrupts the cooking process. Trust the timer and keep the lid on.
- Over-mixing the Vinegar: Stirring too aggressively will break the grains and turn the rice into mush. Use a gentle cutting and folding motion.
- Refrigerating Hot Rice: Never put hot seasoned rice in the fridge. It will dry out and become hard. Cool it completely at room temperature before covering.
Perfect Pairings
This sushi rice is the blank canvas for countless creations. Use it immediately for the best texture.- Form it into classic nigiri topped with fresh salmon or tuna.
- Layer it in a bowl with spicy tuna, avocado, and cucumber for a quick poke-style meal.
- Use it as the base for a spectacular Salmon Sushi Bake or this Ultimate Salmon Sushi Bake, both of which are pure comfort food heaven.
- Pair it with a crisp, refreshing Asian Cucumber Salad for a perfect textural contrast.
- For a different take on a rice bowl, try the Vibrant Honey Lime Chicken Rice Stack or the Next Level Cheesy Taco Rice for a fusion twist.
- Leftover sushi rice is fantastic for a quick stir-fry, like this Thai Pineapple Fried Rice With Chicken.
First time making sushi rice? I hope this guide made it easy. Let me know how it turned out!
Why is it important to rinse sushi rice until the water runs clear?
Rinsing the rice removes excess surface starch, which is the primary cause of gummy, paste-like rice. The article emphasizes that skipping this step guarantees a poor texture, so rinsing until the water is mostly clear (about 2-3 minutes) is essential for achieving the ideal sticky-but-separate grains.
What is the purpose of fanning the rice while mixing in the vinegar seasoning?
Fanning the rice rapidly cools it down as you mix in the vinegar mixture. This process gives the rice a beautiful, glossy sheen and helps achieve the perfect tender and resilient texture that is characteristic of restaurant-quality sushi rice.
Can I use long-grain rice or a different type of vinegar if I don’t have the specified ingredients?
No, long-grain rice will not work because it lacks the high starch content needed for the correct sticky texture. For vinegar, you can use a combination of apple cider vinegar and a splash of water as a substitute, but the flavor will be noticeably different from the traditional taste.
What is the most common mistake that leads to gummy sushi rice?
The most common mistake is skipping the rinsing step. The article explicitly states that not rinsing the rice guarantees a gummy, paste-like texture. Additionally, over-mixing the vinegar or lifting the lid during cooking can also ruin the texture.

Master Perfect Sushi Rice at Home

Equipment
- Fine-mesh strainer
- Heavy-bottomed pot with tight-fitting lid
- Small saucepan or microwave-safe bowl
- Large wide non-metallic bowl (wooden hangiri, glass, or ceramic)
- Rice paddle or wooden spoon
- Paper plate or magazine (for fanning)
- Measuring cups and spoons
- Knife
Ingredients
- 2 cups Japanese short-grain sushi rice
- 2 ½ cups cold water
- ⅓ cup unseasoned rice vinegar
- 3 tablespoons granulated sugar
- 1 ½ teaspoons kosher salt
- 1 piece kombu dried kelp
Instructions
- Place the rice in a fine-mesh strainer and rinse under cold running water, swirling gently with your hand, until the water runs almost completely clear (about 2-3 minutes).
- Transfer the rinsed rice to a heavy-bottomed pot with a tight-fitting lid. Add the cold water and kombu (if using). Let the rice soak for 30 minutes.
- After soaking, remove the kombu. Bring the rice to a boil over medium-high heat, then immediately reduce the heat to low, cover, and simmer for 18 minutes. Do not lift the lid.
- After 18 minutes, turn off the heat but keep the lid on. Let the rice steam for another 10 minutes.
- While the rice steams, prepare the sushi vinegar: In a small saucepan or microwave-safe bowl, combine the rice vinegar, sugar, and salt. Warm gently, stirring, until the sugar and salt are completely dissolved. Do not let it boil. Set aside to cool slightly.
- Transfer the hot steamed rice to a large, wide, non-metallic bowl. Drizzle the warm vinegar mixture evenly over the rice.
- Using a rice paddle or wooden spoon, cut through the rice with a slicing motion to separate the grains and coat them with the vinegar. Be gentle to avoid mashing the rice.
- As you mix, fan the rice with a paper plate or magazine to cool it rapidly. Continue mixing and fanning until the rice reaches room temperature and has a glossy sheen.
- Use the sushi rice immediately for the best texture, or keep it covered at room temperature for up to a few hours.