Perfectly cooked sushi rice is the quiet, unassuming foundation upon which the entire symphony of a sushi roll is built, and getting it right at home is less about magic and more about understanding a simple, elegant chemistry. This recipe strips away the intimidation, handing you the keys to that glossy, perfectly seasoned, and delightfully sticky grain that will transform your homemade sushi from a sad approximation into a genuine celebration.
Forget the takeout menus, because once you master this core technique, you’ll be rolling your own spicy tuna, crafting vibrant bowls, and impressing guests with a skill that feels far more complex than it actually is. We’re talking about rice that’s tender enough to melt in your mouth, yet sturdy enough to hold its shape, with a subtle sweet-tangy vinegar seasoning that makes every single grain sing.
The Homemade Sushi Rice Difference
- Perfectly Sticky, Never Gummy: The precise water-to-rice ratio and rinsing technique ensure each grain is distinct yet clings together beautifully for rolling.
- Authentic Seasoning Balance: We’re using the classic trio of rice vinegar, sugar, and salt, heated just enough to dissolve, creating that signature sweet-tangy profile without being overpowering.
- Foolproof Method: From the initial rinse to the gentle folding of the seasoning, every step is designed for success, eliminating the guesswork and common pitfalls.
The Essential Components
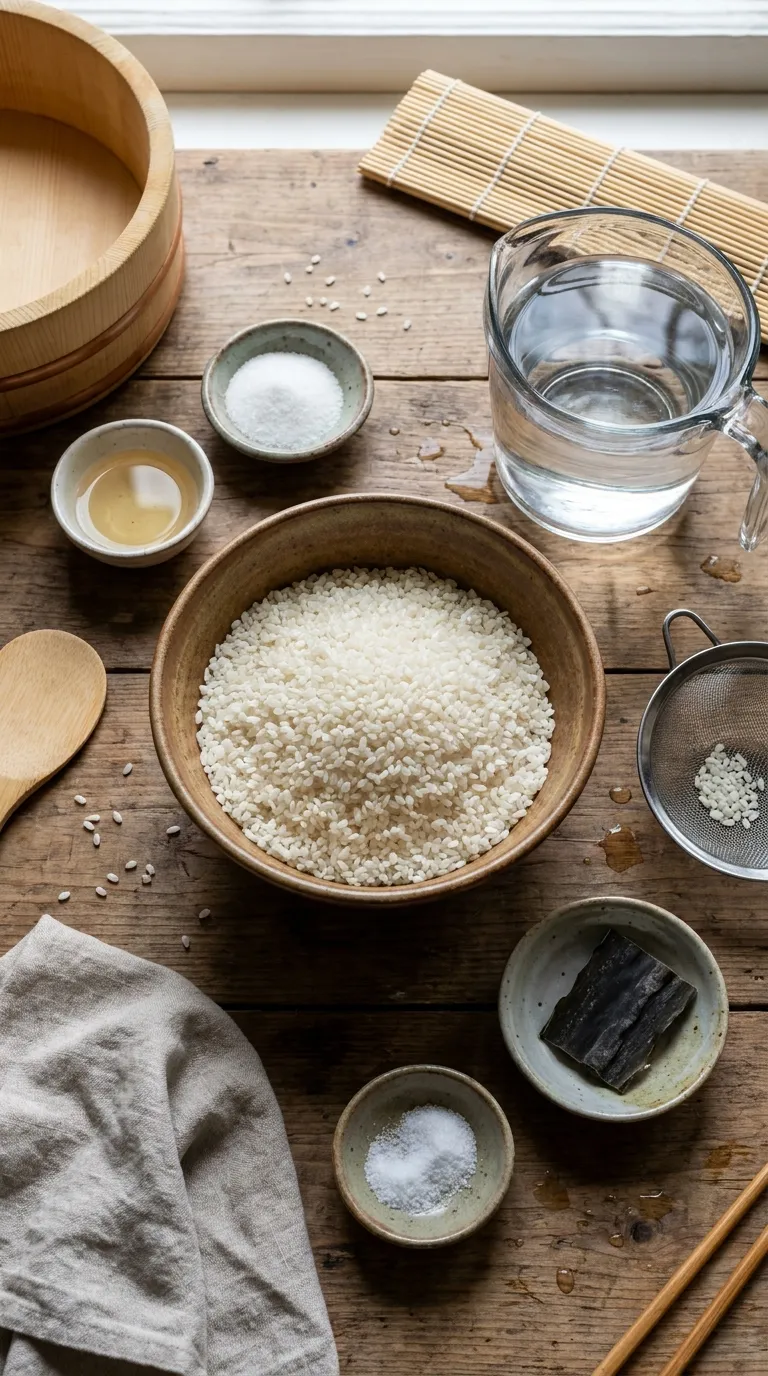
- 2 cups Japanese short-grain white rice (like Nishiki or Botan): This is crucial. Long-grain rice will not work; it lacks the specific starch profile needed for that signature sticky texture.
- 2 ½ cups cold water: The exact ratio for perfect doneness. Using cold water allows for a more even absorption.
- ⅓ cup rice vinegar: The soul of the seasoning. Use a good quality, seasoned or unseasoned vinegar. Avoid distilled white vinegar.
- 3 tablespoons granulated sugar: Balances the acidity of the vinegar and provides that subtle sweetness.
- 1 ½ teaspoons kosher salt: Essential for seasoning and enhancing the overall flavor of the rice.
- 1 (3-inch) piece of kombu (dried kelp) – optional but recommended: Adds a layer of subtle umami to the rice as it cooks.
Pantry Substitutions
While the core ingredients are best left unchanged, here are a few flexible swaps if you’re in a pinch.- No rice vinegar? You can use apple cider vinegar in a pinch, but the flavor will be noticeably different and fruitier. Reduce the sugar slightly.
- No kombu? Simply omit it. The rice will still be delicious, it just won’t have that extra layer of savory depth.
- Need a lower sugar option? You can reduce the sugar to 2 tablespoons, or use a monk fruit/erythritol blend designed for baking, using 2 tablespoons.
- No short-grain rice? Medium-grain rice can work in a pinch, but the texture will be slightly less sticky. Avoid long-grain at all costs.
- Using seasoned rice vinegar? If your vinegar is already seasoned (check the label for sugar and salt), simply omit the sugar and salt from the recipe, or add them to taste.
Chef’s Twists
Once you’ve mastered the basic recipe, it’s fun to play with the flavor profile. These simple additions can elevate your rice for specific dishes.- Yuzu Sushi Rice: Add 1 teaspoon of yuzu juice or a strip of yuzu zest to the vinegar mixture for a bright, citrusy note that’s incredible with white fish.
- Toasted Sesame Sushi Rice: After seasoning the rice, fold in 1 tablespoon of toasted sesame seeds and a drizzle of toasted sesame oil for a nutty, aromatic twist perfect for Firecracker Korean Ground Beef & Rice Bowls.
- Spicy Sushi Rice: Whisk 1-2 teaspoons of sriracha or gochujang into the warm vinegar mixture before folding it into the rice. This is fantastic for spicy tuna or crab rolls.
- Herb-Infused Rice: Add a few fresh shiso leaves or a sprig of cilantro to the rice cooker pot before cooking for a subtle herbal background.
How to Make Homemade Sushi Rice
1. The Critical Rinse
Place the rice in a fine-mesh sieve and rinse it under cold running water. Use your hand to gently swirl the grains. The water will turn milky white. Continue rinsing until the water runs almost completely clear. This removes excess surface starch, which is the number one cause of gummy, mushy rice.2. Cook the Rice
Transfer the rinsed and drained rice to a heavy-bottomed pot (or your rice cooker). Add the 2 ½ cups of cold water and the piece of kombu, if using. If using a pot, bring it to a boil over medium-high heat. Once boiling, reduce the heat to low, cover tightly, and simmer for 18 minutes. Do not lift the lid. After 18 minutes, turn off the heat and let it steam, still covered, for another 10 minutes.3. Prepare the Sushi Vinegar
While the rice is cooking, combine the rice vinegar, sugar, and salt in a small saucepan. Warm it over low heat, stirring occasionally, just until the sugar and salt have completely dissolved. Do not let it boil. Once dissolved, remove it from the heat and let it cool slightly.4. Season the Rice (The Hangiri Method)
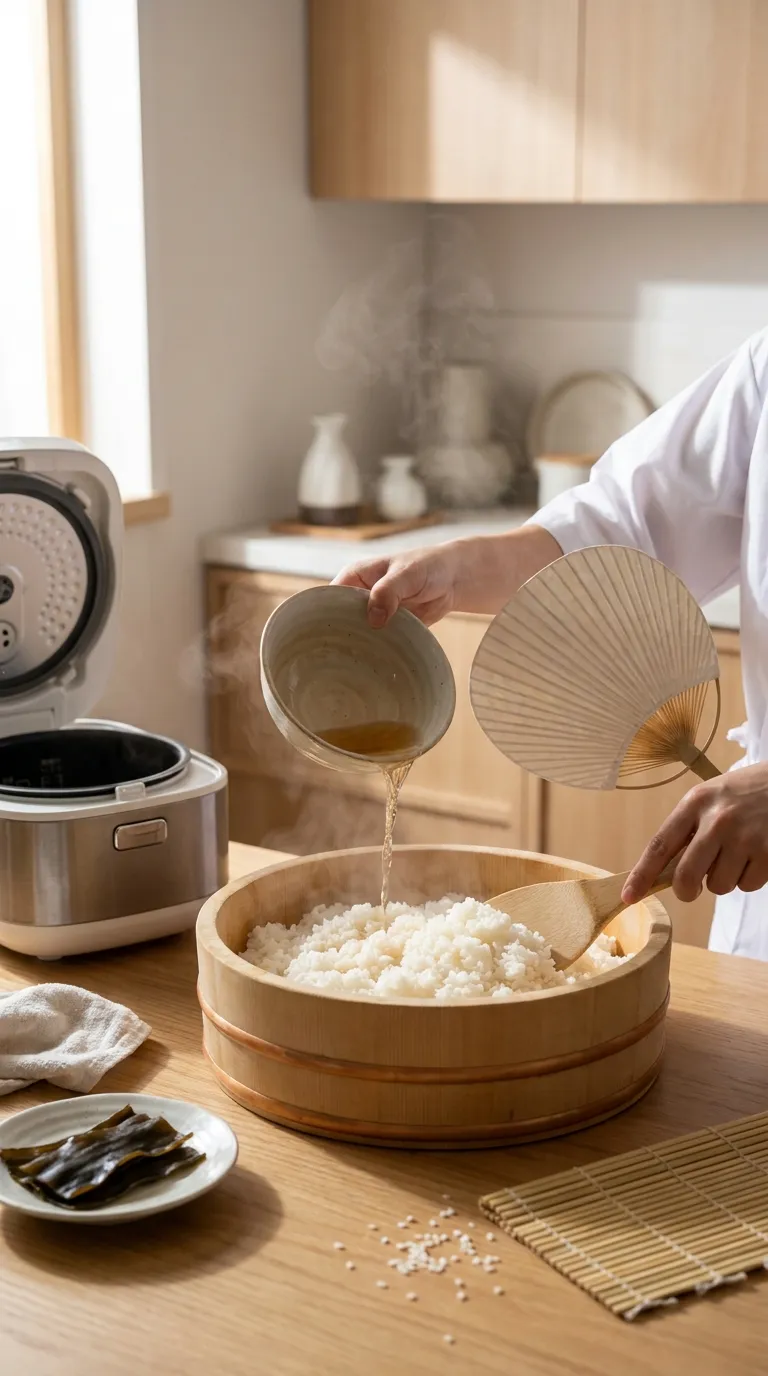
This is the most important step. Dump the hot cooked rice into a large, shallow, non-metallic bowl (a wooden hangiri is traditional, but a glass or ceramic bowl works perfectly). Remove the kombu. Use a rice paddle or a wooden spoon to spread the rice out in an even layer. Drizzle the warm vinegar mixture evenly over the rice.5. The Cutting and Folding Motion
Using a slicing and folding motion with your paddle, gently incorporate the vinegar into the rice. Do not stir or mash the rice. You want to separate the grains, not break them. As you fold, fan the rice with a paper plate or a magazine to help it cool and achieve that beautiful glossy sheen. Continue folding and fanning for about 2-3 minutes, until the rice has cooled to body temperature.6. Keep It Covered
Once the rice is seasoned and cooled, transfer it to a clean bowl. Cover it with a damp, clean kitchen towel. This prevents the rice from drying out and forming a crust. Your sushi rice is now ready to use. It is best used within a few hours.Troubleshooting Guide
- Rice is too mushy or gummy: You likely didn’t rinse it enough, or you used too much water. Next time, rinse until the water is almost clear and measure your water carefully.
- Rice is too dry or hard: You may have cooked it on too high a heat, or you didn’t let it steam long enough. Ensure you use a tight-fitting lid and don’t peek while it cooks.
- Vinegar seasoning is too strong: You can slightly dilute the vinegar mixture with a tablespoon of water next time, or simply use a little less of the mixture on your rice. You don’t have to use all of it.
- Rice is breaking apart: You were too aggressive when folding in the vinegar. Use a gentle cutting and folding motion, and avoid stirring or mashing the grains.
Perfect Pairings
Now that you have a bowl of perfect sushi rice, the world is your oyster. It’s the star of the show, but it also plays a beautiful supporting role.- For Classic Sushi Rolls: Use this rice as the base for any maki roll. It pairs perfectly with fresh fish, avocado, and cucumber.
- For Sushi Bowls (Chirashi): Serve the rice in a bowl topped with your favorite sashimi, a drizzle of soy sauce, and a side of Asian Cucumber Salad for a refreshing crunch.
- For Baked Sushi: This rice is the perfect foundation for a Salmon Sushi Bake or the Ultimate Salmon Sushi Bake. The seasoned rice holds up beautifully to being baked.
- For Onigiri (Rice Balls): The sticky texture of this rice makes it ideal for shaping into onigiri. Fill them with tuna mayo or pickled plum for a perfect snack.
- As a Side Dish: Believe it or not, this rice is incredible alongside non-Asian dishes. Try it with a Vibrant Honey Lime Chicken Rice Stack or a Next Level Cheesy Taco Rice for a fusion twist that will blow your mind.
First time making Homemade Sushi Rice? I hope this guide made it easy. Let me know how it turned out!
What is the most important step to prevent sushi rice from becoming gummy or mushy?
The most critical step is rinsing the rice thoroughly under cold water until the water runs almost completely clear. This removes excess surface starch, which is the primary cause of gummy, mushy rice.
Can I use long-grain rice or regular white vinegar for this sushi rice recipe?
No, you should use Japanese short-grain white rice (like Nishiki or Botan) because it has the specific starch profile needed for the sticky texture. For vinegar, use rice vinegar, not distilled white vinegar, as it provides the essential sweet-tangy flavor.
How should I mix the vinegar seasoning into the cooked rice without breaking the grains?
Use a gentle slicing and folding motion with a rice paddle or wooden spoon. Drizzle the warm vinegar mixture over the rice spread in a shallow bowl, then cut and fold to separate the grains. Avoid stirring or mashing, as this will break the rice and make it mushy.
What can I do if my seasoned rice vinegar is already flavored with sugar and salt?
If using seasoned rice vinegar, check the label for added sugar and salt. You can simply omit the sugar and salt from the recipe, or add them to taste after seasoning the rice.

Homemade Sushi Rice Easy High Protein

Equipment
- fine mesh sieve
- Heavy-bottomed pot with tight-fitting lid (or rice cooker)
- Small saucepan
- Large shallow non-metallic bowl (wooden hangiri, glass, or ceramic)
- Rice paddle or wooden spoon
- Paper plate or magazine (for fanning)
- Clean Kitchen Towel
- Measuring cups and spoons
Ingredients
- 2 cups Japanese short-grain white rice like Nishiki or Botan
- 2 ½ cups cold water
- ⅓ cup rice vinegar
- 3 tablespoons granulated sugar
- 1 ½ teaspoons kosher salt
Instructions
- Rinse the rice: Place the rice in a fine-mesh sieve and rinse under cold running water, gently swirling the grains with your hand, until the water runs almost completely clear. This removes excess surface starch.
- Cook the rice: Transfer the rinsed and drained rice to a heavy-bottomed pot (or rice cooker). Add the 2 ½ cups of cold water and the piece of kombu, if using. If using a pot, bring to a boil over medium-high heat, then reduce heat to low, cover tightly, and simmer for 18 minutes. Do not lift the lid. After 18 minutes, turn off the heat and let it steam, still covered, for another 10 minutes.
- Prepare the sushi vinegar: While the rice is cooking, combine the rice vinegar, sugar, and salt in a small saucepan. Warm over low heat, stirring occasionally, just until the sugar and salt have completely dissolved. Do not let it boil. Remove from heat and let cool slightly.
- Season the rice: Dump the hot cooked rice into a large, shallow, non-metallic bowl. Remove the kombu. Use a rice paddle or wooden spoon to spread the rice out in an even layer. Drizzle the warm vinegar mixture evenly over the rice.
- Fold and fan: Using a slicing and folding motion, gently incorporate the vinegar into the rice. Do not stir or mash. As you fold, fan the rice with a paper plate or magazine to help it cool and achieve a glossy sheen. Continue folding and fanning for about 2-3 minutes, until the rice has cooled to body temperature.
- Keep covered: Transfer the seasoned rice to a clean bowl and cover with a damp, clean kitchen towel to prevent it from drying out. Use within a few hours.