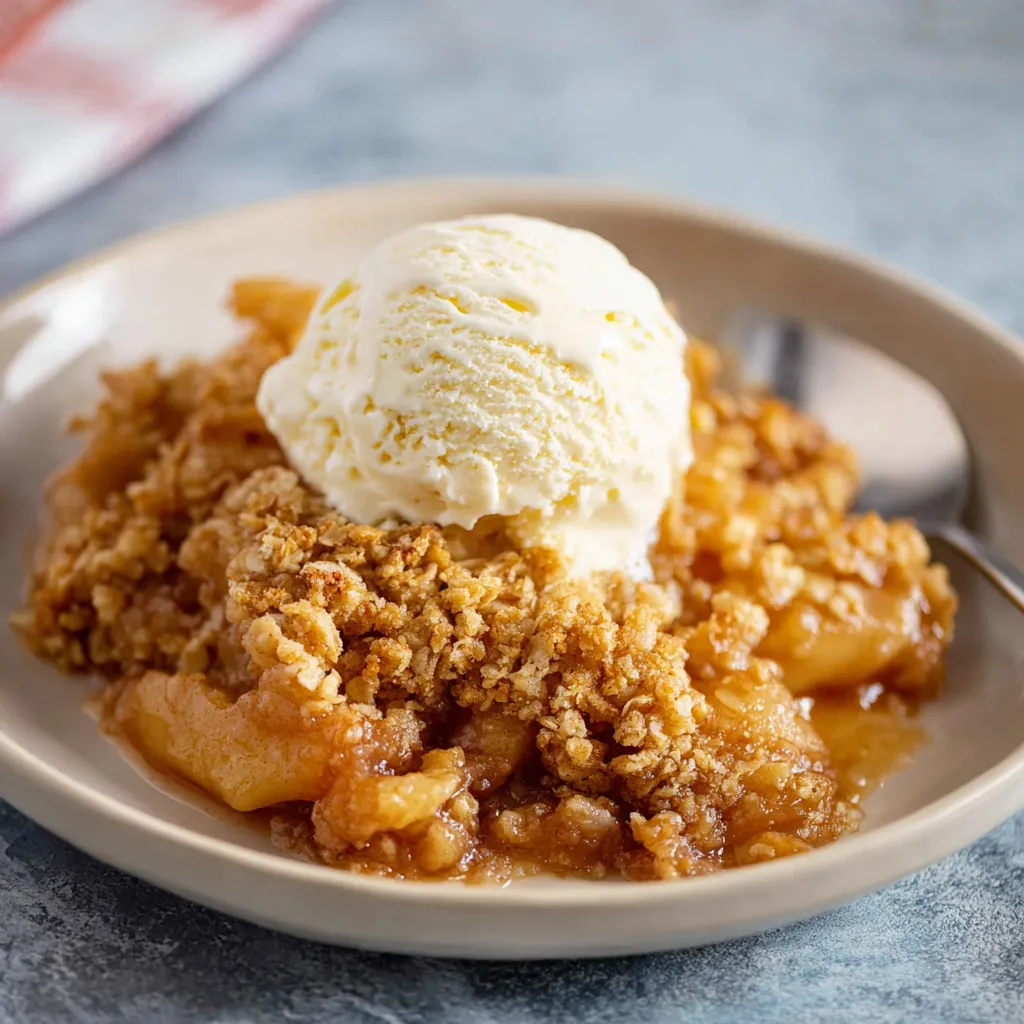
I still remember the very first apple crisp my grandmother baked; the entire house filled with a cinnamon-spiced aroma that promised pure comfort. It was a simple dessert, but it made ordinary evenings feel incredibly special. Today, I’m thrilled to share all my tips and tricks for creating the most delectable Ultimate Apple Crisp that will transport you right back to those warm, nostalgic moments and create new ones for years to come – I promise it’ll be a family favorite!
Why This Apple Crisp Recipe is the *Best*
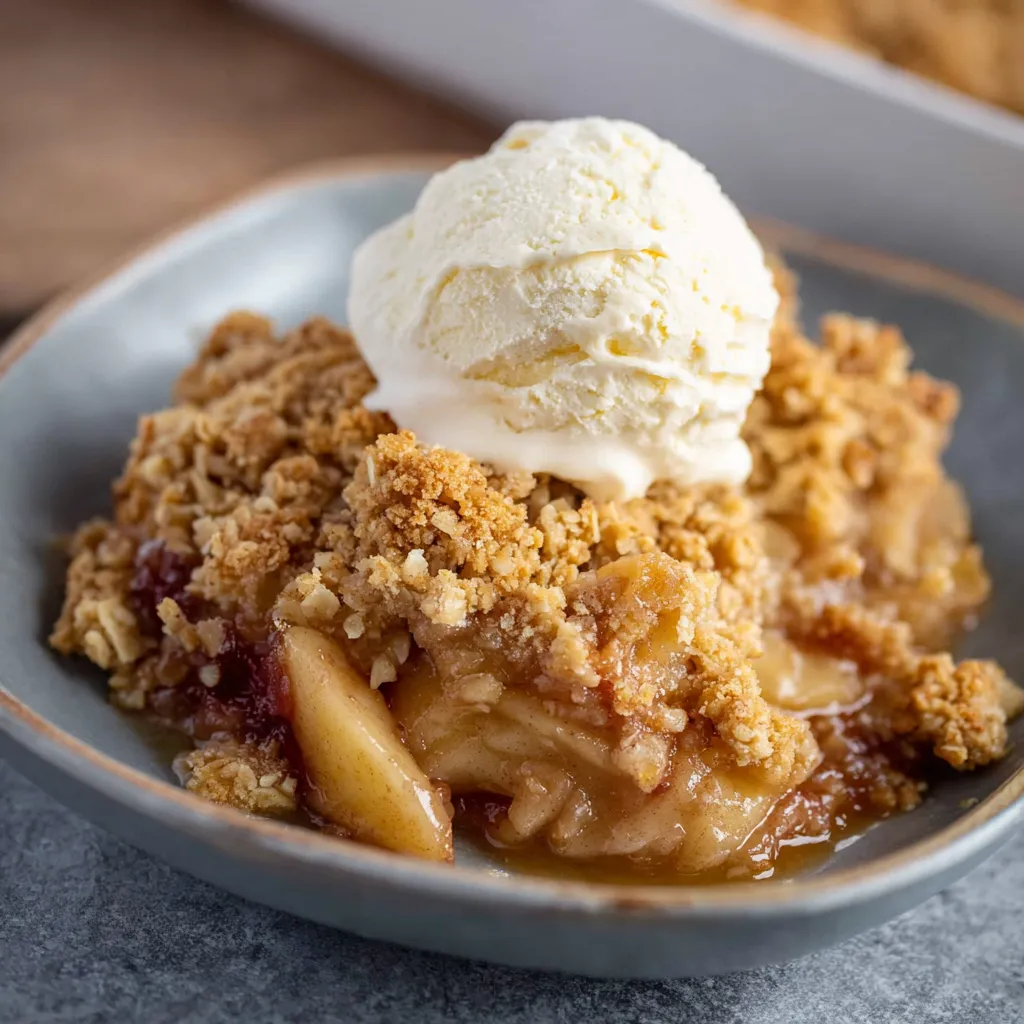
Okay, friends, let’s talk apple crisp. Not just any apple crisp, but the apple crisp. The kind that makes you close your eyes and savor every single bite. The kind that has everyone asking for seconds (and thirds!). What makes this recipe so special? It’s all about the perfect balance of sweet, tart, and crunchy. We’re talking tender, spiced apples nestled under a buttery, oat-filled topping that will have you swooning. And the best part? It’s surprisingly easy to make! Trust me, even if you’re a baking novice, you can absolutely nail this.
Ingredients You’ll Need
Let’s gather our ingredients! Here’s what you’ll need to make apple crisp magic happen:
For the Apple Filling:
- Apples: 6-8 medium apples (Granny Smith, Honeycrisp, or a mix are great!)
- Lemon Juice: 1 tablespoon (to prevent browning and add a little zing)
- Brown Sugar: ½ cup (for that caramel-y sweetness)
- Granulated Sugar: ¼ cup (for balanced sweetness)
- All-Purpose Flour: 2 tablespoons (to thicken the filling)
- Cinnamon: 1 teaspoon (because apple crisp isn’t apple crisp without cinnamon!)
- Nutmeg: ¼ teaspoon (a warm, subtle spice that adds depth)
- Salt: Pinch (enhances the flavors)
- Butter: 2 tablespoons, cut into small pieces (for richness)
For the Crisp Topping:
- All-Purpose Flour: 1 cup (the base of our crispy topping)
- Rolled Oats: 1 cup (for that signature crisp texture)
- Brown Sugar: ¾ cup (adds moisture and caramel flavor)
- Granulated Sugar: ¼ cup (balances the sweetness)
- Cinnamon: ½ teaspoon (because you can never have too much cinnamon!)
- Salt: Pinch (again, flavor enhancer!)
- Cold Butter: ½ cup (1 stick), cut into small cubes (the key to a crumbly topping!)
Step-by-Step Instructions: Creating Apple Crisp Perfection
Alright, let’s get baking! Follow these simple steps, and you’ll be enjoying a warm, comforting apple crisp in no time.
- Preheat your oven to 375°F (190°C). This is important! You want a nice, even temperature for baking.
- Prepare the apples. Peel, core, and slice the apples into approximately 1/4-inch thick pieces. I like to aim for uniform slices so they cook evenly.
- Combine the apple filling ingredients. In a large bowl, gently toss the sliced apples with lemon juice, brown sugar, granulated sugar, flour, cinnamon, nutmeg, and salt. Make sure all the apples are coated with the mixture. The mixture should smell wonderfully fragrant!
- Add the butter. Dot the apple mixture with the small pieces of butter. This adds richness and helps create a slightly saucy filling.
- Prepare the crisp topping. In a separate bowl, combine the flour, rolled oats, brown sugar, granulated sugar, cinnamon, and salt.
- Cut in the cold butter. This is the most important part of the topping! Use a pastry blender or your fingers to cut the cold butter into the dry ingredients until the mixture resembles coarse crumbs. The butter should be evenly distributed throughout the mixture. You can also use a food processor, pulsing until the mixture resembles coarse crumbs. Avoid over-processing!
- Assemble the apple crisp. Pour the apple filling into a 9×13 inch baking dish. Sprinkle the crisp topping evenly over the apples. Make sure the topping covers the entire surface.
- Bake! Bake for 30-40 minutes, or until the topping is golden brown and the apple filling is bubbly. The filling should be visibly bubbling around the edges of the topping.
- Let it cool slightly. Allow the apple crisp to cool for at least 15-20 minutes before serving. This allows the filling to thicken slightly and prevents you from burning your tongue!
- Serve and enjoy! Serve warm, preferably with a scoop of vanilla ice cream, a dollop of whipped cream, or a drizzle of caramel sauce. Because why not?!
Success Tips: Your Apple Crisp Secret Weapons
Want to make sure your apple crisp is a total knockout? Here are my top tips for apple crisp success:
- Choose the right apples. A mix of tart and sweet apples creates the most complex and delicious flavor. Granny Smith apples provide tartness, while Honeycrisp or Fuji apples add sweetness and crispness.
- Keep the butter cold. Cold butter is absolutely essential for a crumbly, crispy topping. If the butter is too warm, it will melt and create a dense, greasy topping. Pop it back into the freezer for a few minutes if it gets too soft while you’re working.
- Don’t overbake! Overbaking will result in a dry topping and mushy apples. The apple crisp is done when the topping is golden brown and the filling is bubbly.
- Adjust the sweetness to your liking. Taste the apple filling before adding the topping and adjust the amount of sugar to suit your preferences. If you prefer a tarter crisp, reduce the amount of sugar slightly.
- Make it ahead! You can assemble the apple crisp ahead of time and store it in the refrigerator for up to 24 hours before baking. This is perfect for entertaining! You can also bake it ahead of time and reheat it gently in the oven before serving.
Variations: Spice Things Up!
Ready to get creative? Here are a few fun variations to try:
- Add nuts. Stir chopped pecans, walnuts, or almonds into the crisp topping for added crunch and flavor.
- Use different spices. Experiment with different spices, such as ginger, cardamom, or allspice, to create a unique flavor profile.
- Add fruit. Add other fruits, such as cranberries, blueberries, or peaches, to the apple filling for a burst of flavor.
- Make it gluten-free. Use gluten-free all-purpose flour and certified gluten-free oats to make this recipe gluten-free.
- Add caramel. Drizzle caramel sauce over the apple crisp before or after baking for an extra touch of indulgence.
Serving Suggestions: The Perfect Apple Crisp Pairings
Apple crisp is delicious on its own, but it’s even better with the right accompaniments! Here are a few of my favorite serving suggestions:
- Vanilla ice cream: A classic pairing! The cold, creamy ice cream melts perfectly over the warm apple crisp.
- Whipped cream: Light and airy whipped cream adds a touch of elegance.
- Caramel sauce: A drizzle of caramel sauce takes this dessert to the next level.
- Cheddar cheese: Don’t knock it ’til you try it! A slice of sharp cheddar cheese alongside a warm apple crisp is a surprisingly delicious combination.
- Coffee or tea: A warm beverage is the perfect complement to a comforting apple crisp.
Other Apple Delights
If you’re craving more apple goodness, be sure to check out these other delicious apple recipes:
- For a quick and fun treat, try these Apple Fritter Bites. They’re addictive!
- Planning a party? Caramel Apple Cheesecake Dip is always a crowd-pleaser.
- These Apple Crisp Mini Cheesecakes combine two classic desserts into one amazing bite.
- Start your day with the cozy flavor of Baked Apple Cider Donuts.
- Enjoy a slice of warm and comforting Cinnamon Apple Bread with your morning coffee.
- For a fun and interactive dessert, try Caramel Apple Nachos.
- These Caramel Apple Bars are perfect for a potluck or bake sale.
- These Apple Pie Cookies are a cute and portable way to enjoy the flavors of apple pie.
- And for a delightful handheld treat, you can’t go wrong with Fried Peach or Apple Pies.
Storage Instructions: Keeping Your Apple Crisp Fresh
If you happen to have any leftovers (which is unlikely!), here’s how to store them:
- Refrigerator: Store leftover apple crisp in an airtight container in the refrigerator for up to 3 days.
- Reheating: Reheat apple crisp in the oven at 350°F (175°C) for 10-15 minutes, or until warmed through. You can also reheat it in the microwave, but the topping may not be as crispy.
- Freezing: You can freeze unbaked apple crisp for up to 3 months. Wrap it tightly in plastic wrap and then foil. When ready to bake, thaw overnight in the refrigerator and bake as directed. Baked apple crisp can also be frozen, but the topping may become slightly soggy upon thawing.
The Ultimate Apple Crisp Recipe
Here’s the complete recipe for your convenience!
Ingredients:
For the Apple Filling:
- 6-8 medium apples (Granny Smith, Honeycrisp, or a mix)
- 1 tablespoon lemon juice
- ½ cup brown sugar
- ¼ cup granulated sugar
- 2 tablespoons all-purpose flour
- 1 teaspoon cinnamon
- ¼ teaspoon nutmeg
- Pinch of salt
- 2 tablespoons butter, cut into small pieces
For the Crisp Topping:
- 1 cup all-purpose flour
- 1 cup rolled oats
- ¾ cup brown sugar
- ¼ cup granulated sugar
- ½ teaspoon cinnamon
- Pinch of salt
- ½ cup (1 stick) cold butter, cut into small cubes
Instructions:
- Preheat oven to 375°F (190°C).
- Peel, core, and slice apples into 1/4-inch thick pieces.
- In a large bowl, toss apples with lemon juice, brown sugar, granulated sugar, flour, cinnamon, nutmeg, and salt.
- Dot apple mixture with butter pieces.
- In a separate bowl, combine flour, oats, brown sugar, granulated sugar, cinnamon, and salt.
- Cut in cold butter until mixture resembles coarse crumbs.
- Pour apple filling into a 9×13 inch baking dish. Sprinkle crisp topping evenly over apples.
- Bake for 30-40 minutes, or until topping is golden brown and filling is bubbly.
- Let cool slightly before serving.
- Serve warm with vanilla ice cream, whipped cream, or caramel sauce.
Enjoy!
Conclusion: Your Apple Crisp Awaits!
There you have it – everything you need to create the most incredible Ultimate Apple Crisp. I truly hope you give this recipe a try. From the warm, spiced aroma filling your kitchen to the satisfied smiles around the table, this dessert is guaranteed to bring joy. Happy baking, friends! I can’t wait to hear about your apple crisp adventures!
What are the best types of apples to use for this apple crisp recipe?
The recipe suggests using a mix of apples for the best flavor. Granny Smith apples provide tartness, while Honeycrisp or Fuji apples add sweetness and crispness.
How do I ensure the crisp topping is actually crumbly and crispy and not dense?
The key to a crumbly topping is to use cold butter and cut it into the dry ingredients until the mixture resembles coarse crumbs. Avoid over-processing the mixture if using a food processor.
Can I prepare the apple crisp ahead of time?
Yes, you can assemble the apple crisp ahead of time and store it in the refrigerator for up to 24 hours before baking. You can also bake it ahead of time and reheat it gently in the oven before serving.
How should I store leftover apple crisp?
Store leftover apple crisp in an airtight container in the refrigerator for up to 3 days. You can reheat it in the oven at 350°F (175°C) for 10-15 minutes, or in the microwave (though the topping may not be as crispy).
Best Ever Apple Crisp
Equipment
- 9×13 inch baking dish
- Large bowl
- Medium bowl
- pastry blender or fork
- Measuring cups and spoons
- Peeler
- Apple corer (optional)
- Cutting board
- Knife
- Oven
- Pot holders or oven mitts
Ingredients
- 6-8 medium apples Granny Smith, Honeycrisp, or a mix
- 1 tablespoon lemon juice
- ½ cup brown sugar
- ¼ cup granulated sugar
- 2 tablespoons all-purpose flour
- 1 teaspoon cinnamon
- ¼ teaspoon nutmeg
- Pinch of salt
- 2 tablespoons butter, cut into small pieces
- 1 cup all-purpose flour
- 1 cup rolled oats
- ¾ cup brown sugar
- ¼ cup granulated sugar
- ½ teaspoon cinnamon
- Pinch of salt
- ½ cup 1 stick
Instructions
- Preheat oven to 375°F (190°C).
- Peel, core, and slice apples into 1/4-inch thick pieces.
- In a large bowl, toss apples with lemon juice, brown sugar, granulated sugar, flour, cinnamon, nutmeg, and salt.
- Dot apple mixture with butter pieces.
- In a separate bowl, combine flour, oats, brown sugar, granulated sugar, cinnamon, and salt.
- Cut in cold butter until mixture resembles coarse crumbs. Use a pastry blender, fork, or your fingers to work the butter into the dry ingredients.
- Pour apple filling into a 9×13 inch baking dish. Sprinkle crisp topping evenly over apples.
- Bake for 30-40 minutes, or until topping is golden brown and filling is bubbly.
- Let cool slightly for at least 15-20 minutes before serving.
- Serve warm with vanilla ice cream, whipped cream, or caramel sauce.
