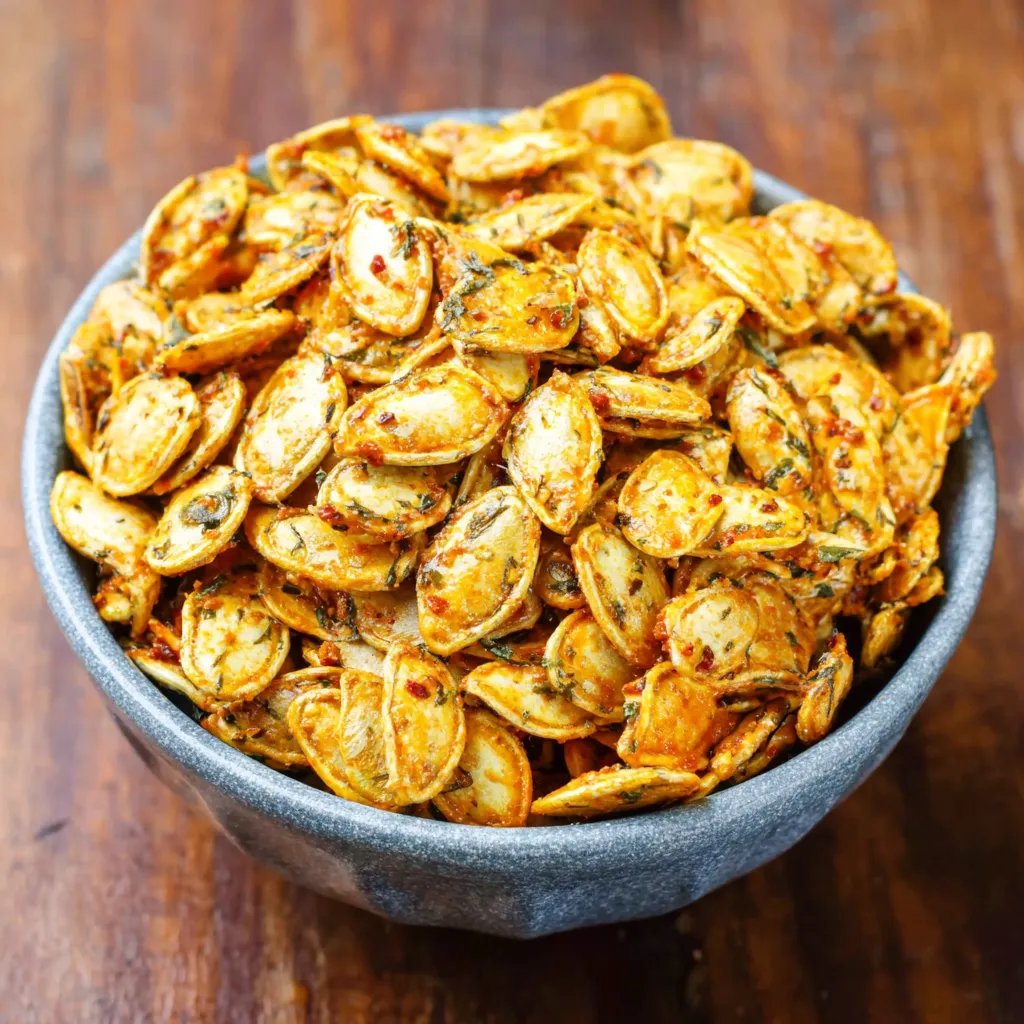
I still remember the first time I roasted pumpkin seeds. It was Halloween night, years ago, and the whole house smelled like pumpkin guts and a hint of cinnamon from the PUMPKIN SPICE CAKE ROLL my mom was baking. Back then, I thought roasting the seeds was some kind of strange ritual, but now, it’s one of my favorite fall traditions and a *genuinely* delicious way to celebrate the season. Today, I’m sharing all my secrets for the most amazing Roasted Pumpkin Seeds: Quick and Flavorful Snack you’ll ever make!
The Joy of Roasted Pumpkin Seeds: A Fall Staple
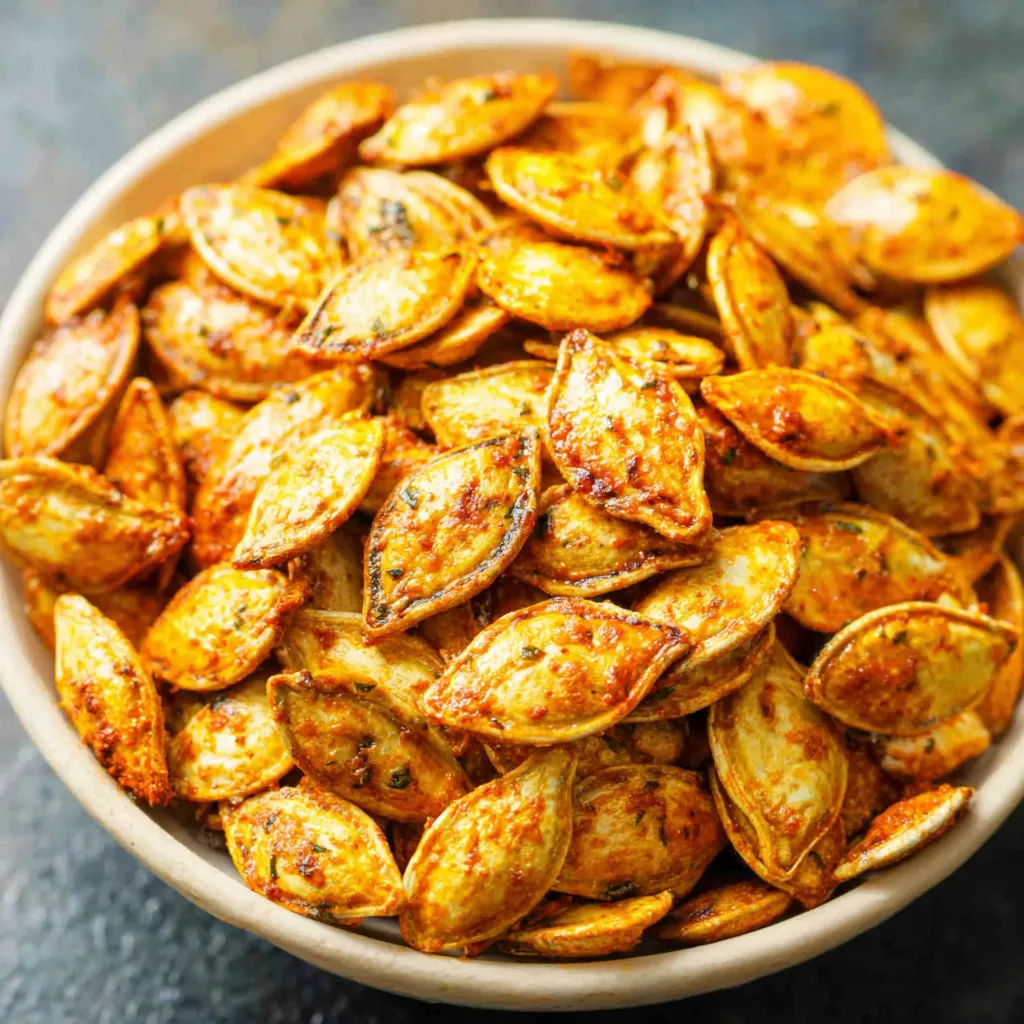
Okay, friend, let’s talk about pumpkin seeds! They’re often overlooked, tossed aside like unwanted bits after carving our jack-o’-lanterns. But I’m here to tell you that these little treasures are culinary gold. When roasted properly, pumpkin seeds transform into a crunchy, savory, and unbelievably addictive snack. And the best part? Making Roasted Pumpkin Seeds: Quick and Flavorful Snack is incredibly easy, even if you’re a beginner in the kitchen.
We’re talking minimal ingredients, simple steps, and a huge payoff in flavor and texture. Plus, they are a healthy, satisfying snack that you can feel good about eating. So ditch the processed chips and let’s embrace the deliciousness of homemade roasted pumpkin seeds!
Step-by-Step Guide to Perfect Roasted Pumpkin Seeds
Ready to embark on this crunchy adventure? Follow these easy steps, and I promise you’ll be munching on perfectly roasted pumpkin seeds in no time. Don’t worry if you’ve never done this before; I’ll guide you every step of the way.
- Separate the Seeds: First, scoop out the seeds and pulp from your pumpkin. This is where things can get a little messy, but it’s all part of the fun! Use your hands to separate the seeds from the stringy pulp as much as possible. A large bowl filled with water can help. The seeds will float to the top, making it easier to scoop them out.
- Rinse and Clean: Place the seeds in a colander and rinse them thoroughly under cold running water. Rub the seeds together to remove any remaining pulp. You want them as clean as possible. This is crucial for achieving that perfect crunch.
- Dry the Seeds: Spread the cleaned seeds in a single layer on a clean kitchen towel or paper towels. Pat them dry as thoroughly as possible. This is a *super* important step! The drier the seeds, the crispier they will be when roasted. Let them air dry for at least an hour, or even better, overnight. I usually do this while I’m enjoying a slice of my favorite PUMPKIN CREAM CHEESE BARS and sipping some coffee.
- Preheat the Oven: Preheat your oven to 300°F (150°C). Lower temperature is key to preventing burning and ensures that the seeds are properly dried and develop that perfect roasted flavor.
- Seasoning Time: In a bowl, toss the dried pumpkin seeds with olive oil (or melted butter) and your choice of seasonings. A good starting point is about 1 tablespoon of oil for every 1 1/2 cups of seeds.
- Spread on Baking Sheet: Spread the seasoned seeds in a single layer on a baking sheet lined with parchment paper. Parchment paper makes cleanup a breeze and prevents the seeds from sticking. Make sure the seeds aren’t overcrowded, or they’ll steam instead of roast.
- Roast: Place the baking sheet in the preheated oven and roast for 45-60 minutes, flipping the seeds every 15-20 minutes. Keep a close eye on them to prevent burning. They’re ready when they’re golden brown and crispy. You’ll start to smell that nutty, roasted aroma fill your kitchen – pure bliss!
- Cool and Enjoy: Remove the baking sheet from the oven and let the seeds cool completely on the baking sheet before serving. This allows them to crisp up even further. Once cooled, store them in an airtight container at room temperature.
Flavor Variations: Spice Up Your Seeds!
The beauty of roasted pumpkin seeds is that you can customize them to your liking. Here are a few of my favorite flavor combinations to get you started:
- Classic Salted: Simple is sometimes best! Toss the seeds with olive oil and a generous pinch of sea salt.
- Spicy: Add a pinch of cayenne pepper, chili powder, and smoked paprika to the olive oil for a fiery kick. If you’re looking for something cozy to sip alongside, consider the PUMPKIN COLD FOAM MAGIC.
- Sweet and Savory: Combine brown sugar, cinnamon, and a pinch of salt for a delightful sweet and savory treat. Perfect for fall!
- Garlic Parmesan: Toss the seeds with garlic powder, grated Parmesan cheese, and a drizzle of olive oil.
- Everything Bagel: Sprinkle the seeds with everything bagel seasoning for a burst of flavor and texture.
Don’t be afraid to experiment with your own favorite spices and herbs! The possibilities are endless.
Success Tips for Perfect Roasted Pumpkin Seeds
Want to guarantee perfect, crispy pumpkin seeds every time? Here are a few of my top tips and tricks:
- Dry, Dry, Dry!: I can’t stress this enough – make sure the seeds are completely dry before roasting. This is the key to achieving that irresistible crunch.
- Don’t Overcrowd: Spread the seeds in a single layer on the baking sheet. If they’re too crowded, they’ll steam instead of roast.
- Low and Slow: Roasting at a lower temperature (300°F/150°C) prevents burning and allows the seeds to dry out properly.
- Flip ‘Em: Flipping the seeds every 15-20 minutes ensures even roasting and prevents them from sticking to the baking sheet.
- Cool Completely: Let the seeds cool completely on the baking sheet before serving. They’ll continue to crisp up as they cool.
Troubleshooting: Common Issues and Solutions
Sometimes, things don’t go exactly as planned in the kitchen. Here are some common issues you might encounter when roasting pumpkin seeds and how to fix them:
- Seeds are Burning: If your seeds are burning, lower the oven temperature or reduce the roasting time. Also, make sure they’re spread in a single layer on the baking sheet.
- Seeds are Still Soggy: If your seeds are still soggy after roasting, they probably weren’t dry enough to begin with. Try roasting them for a longer time at a lower temperature, keeping a close eye on them.
- Seeds are Sticking to the Baking Sheet: Use parchment paper to prevent the seeds from sticking. If they’re still sticking, try adding a little more oil or butter.
Health Benefits of Pumpkin Seeds
Not only are roasted pumpkin seeds delicious, but they’re also packed with nutrients! Here are just a few of the health benefits of these little powerhouses:
- Rich in Nutrients: Pumpkin seeds are a good source of magnesium, zinc, iron, and healthy fats.
- Antioxidant-Rich: They contain antioxidants that help protect your body against damage from free radicals.
- May Improve Sleep: Pumpkin seeds are a natural source of tryptophan, an amino acid that can help promote sleep.
- Supports Prostate Health: Some studies suggest that pumpkin seeds may help support prostate health.
- May Lower Blood Sugar: Pumpkin seeds may help regulate blood sugar levels.
So go ahead and enjoy your roasted pumpkin seeds guilt-free! They’re a delicious and nutritious snack that you can feel good about eating.
Serving Suggestions: Beyond Snacking
While roasted pumpkin seeds are fantastic on their own, they can also be used in a variety of other dishes. Here are a few creative ways to incorporate them into your meals:
- Salad Topping: Sprinkle roasted pumpkin seeds on top of your favorite salad for added crunch and flavor. They would be a great addition to a fall harvest salad with cranberries and feta.
- Soup Garnish: Use them as a garnish for soups, like pumpkin soup or butternut squash soup.
- Trail Mix: Add roasted pumpkin seeds to your homemade trail mix for a boost of nutrients and crunch.
- Granola: Incorporate them into your homemade granola for a healthy and delicious breakfast or snack.
- Bread and Muffins: Add them to your favorite bread or muffin recipes for added texture and flavor. I think they would be amazing in a batch of Pumpkin Bars!
Making Roasted Pumpkin Seeds a Tradition
For me, making Roasted Pumpkin Seeds: Quick and Flavorful Snack is more than just a recipe; it’s a cherished tradition. It’s a way to celebrate the fall season, connect with loved ones, and enjoy the simple pleasures of life. Get the family involved in scooping, separating, and seasoning. It’s a fun activity for everyone! Maybe afterward, enjoy a slice of PUMPKIN COBBLER HEAVEN!
I hope you’ll give this recipe a try and see for yourself how easy and delicious it is to make your own roasted pumpkin seeds. Once you taste them, you’ll never want to throw those seeds away again!
Storing Your Roasted Pumpkin Seeds
If you manage to resist devouring all of your roasted pumpkin seeds in one sitting (which is a *serious* challenge!), proper storage is key to maintaining their crunch and flavor. Here’s how to keep them fresh for as long as possible:
- Cool Completely: Before storing, ensure your pumpkin seeds are completely cool. Warm seeds will create condensation inside the container, making them soft and potentially causing them to spoil faster.
- Airtight Container: The best way to store roasted pumpkin seeds is in an airtight container. This will protect them from moisture and air, which can make them lose their crispness. Glass jars, plastic containers with tight-fitting lids, or even resealable bags work well.
- Room Temperature: Store your container of pumpkin seeds at room temperature, away from direct sunlight and heat. A pantry, cupboard, or cool, dark shelf is ideal.
- Avoid Refrigeration: Refrigerating roasted pumpkin seeds is not recommended, as the moisture inside the refrigerator can make them soggy.
- Shelf Life: Properly stored roasted pumpkin seeds can last for 1-2 months. However, their flavor and texture are best within the first few weeks.
- Signs of Spoilage: If your pumpkin seeds develop an off odor, taste stale, or become soft, it’s best to discard them.
By following these simple storage tips, you can enjoy your delicious roasted pumpkin seeds for weeks to come, adding a touch of fall flavor to your snacks and meals.
Beyond the Basic Pumpkin: Seed-Saving Tips
If you’re a gardener or just love the idea of being more sustainable, saving your pumpkin seeds for planting next year is a rewarding process. Plus, you’ll have a ready supply of seeds for roasting! Here’s how to save pumpkin seeds for future planting:
- Choose a Healthy Pumpkin: Select a pumpkin from a healthy plant that produced well. Avoid pumpkins that show signs of disease or damage.
- Harvest Mature Seeds: When you carve your pumpkin, make sure the seeds are fully mature. They should be plump and firm, not small and underdeveloped.
- Clean Thoroughly: As with roasting, separating the seeds from the pulp is key. Rinse the seeds thoroughly under cold running water, removing any lingering pulp.
- Dry Completely: This is critical for preventing mold growth during storage. Spread the seeds in a single layer on a paper towel or screen in a well-ventilated area. Allow them to dry for several days or even a week, turning them occasionally to ensure even drying. The seeds should be brittle and snap easily when bent.
- Store Properly: Once the seeds are completely dry, store them in an airtight container in a cool, dark, and dry place. A glass jar or envelope works well. You can also add a desiccant packet (like those found in vitamin bottles) to absorb any residual moisture.
- Label and Date: Don’t forget to label your container with the type of pumpkin and the date you harvested the seeds. This will help you keep track of them and ensure you’re using the oldest seeds first.
- Viability: Pumpkin seeds can remain viable for several years if stored properly. However, their germination rate may decrease over time, so it’s best to use them within a few years of harvesting.
By saving your own pumpkin seeds, you’re not only preserving a piece of your garden’s bounty but also ensuring a supply of seeds for future pumpkin patches and, of course, more batches of delicious roasted pumpkin seeds! It’s a small act that connects you to the cycle of nature and adds an extra layer of satisfaction to your fall harvest.
Conclusion
So there you have it! Everything you need to know about making your own Roasted Pumpkin Seeds: Quick and Flavorful Snack. From cleaning and drying to roasting and seasoning, I hope this guide has inspired you to give it a try. Trust me, once you taste the difference between store-bought and homemade, you’ll never go back. Happy roasting, and happy fall!
Why is it important to dry the pumpkin seeds thoroughly before roasting?
Drying the seeds completely before roasting is crucial for achieving that irresistible crunch. The drier the seeds, the crispier they will be when roasted.
What temperature should I roast my pumpkin seeds at, and for how long?
Preheat your oven to 300°F (150°C) and roast the seeds for 45-60 minutes, flipping them every 15-20 minutes. Keep a close eye on them to prevent burning. They’re ready when they’re golden brown and crispy.
How should I store roasted pumpkin seeds to keep them fresh?
Store cooled roasted pumpkin seeds in an airtight container at room temperature, away from direct sunlight and heat. Avoid refrigeration, as it can make them soggy. Properly stored, they can last for 1-2 months, but their flavor and texture are best within the first few weeks.
What are some flavor variations I can try on my roasted pumpkin seeds?
Some flavor variations include classic salted, spicy (with cayenne pepper, chili powder, and smoked paprika), sweet and savory (with brown sugar and cinnamon), garlic parmesan, and everything bagel seasoning. Don’t be afraid to experiment with your own favorite spices and herbs!
Addictive Roasted Pumpkin Seeds
Equipment
- Large bowl
- Colander
- Clean kitchen towel or paper towels
- Baking Sheet
- Parchment paper
- Mixing bowl
- Spatula
- Airtight container
Ingredients
- Pumpkin seeds from one pumpkin
- 1 tablespoon olive oil or melted butter
- 1 teaspoon sea salt
- Optional: cayenne pepper
- Optional: chili powder
- Optional: smoked paprika
- Optional: brown sugar
- Optional: cinnamon
- Optional: garlic powder
- Optional: grated Parmesan cheese
- Optional: everything bagel seasoning
Instructions
- Separate the seeds from the pumpkin pulp. A large bowl filled with water can help; the seeds will float to the top.
- Rinse the seeds thoroughly under cold running water in a colander, rubbing them to remove any remaining pulp.
- Dry the seeds completely. Spread them in a single layer on a clean kitchen towel or paper towels and pat them dry. Let them air dry for at least an hour, or preferably overnight.
- Preheat oven to 300°F (150°C).
- In a bowl, toss the dried pumpkin seeds with olive oil (or melted butter) and your choice of seasonings.
- Spread the seasoned seeds in a single layer on a baking sheet lined with parchment paper, ensuring they are not overcrowded.
- Roast for 45-60 minutes, flipping the seeds every 15-20 minutes, until golden brown and crispy. Monitor closely to prevent burning.
- Remove from oven and let the seeds cool completely on the baking sheet. This allows them to crisp up further.
- Store in an airtight container at room temperature.
