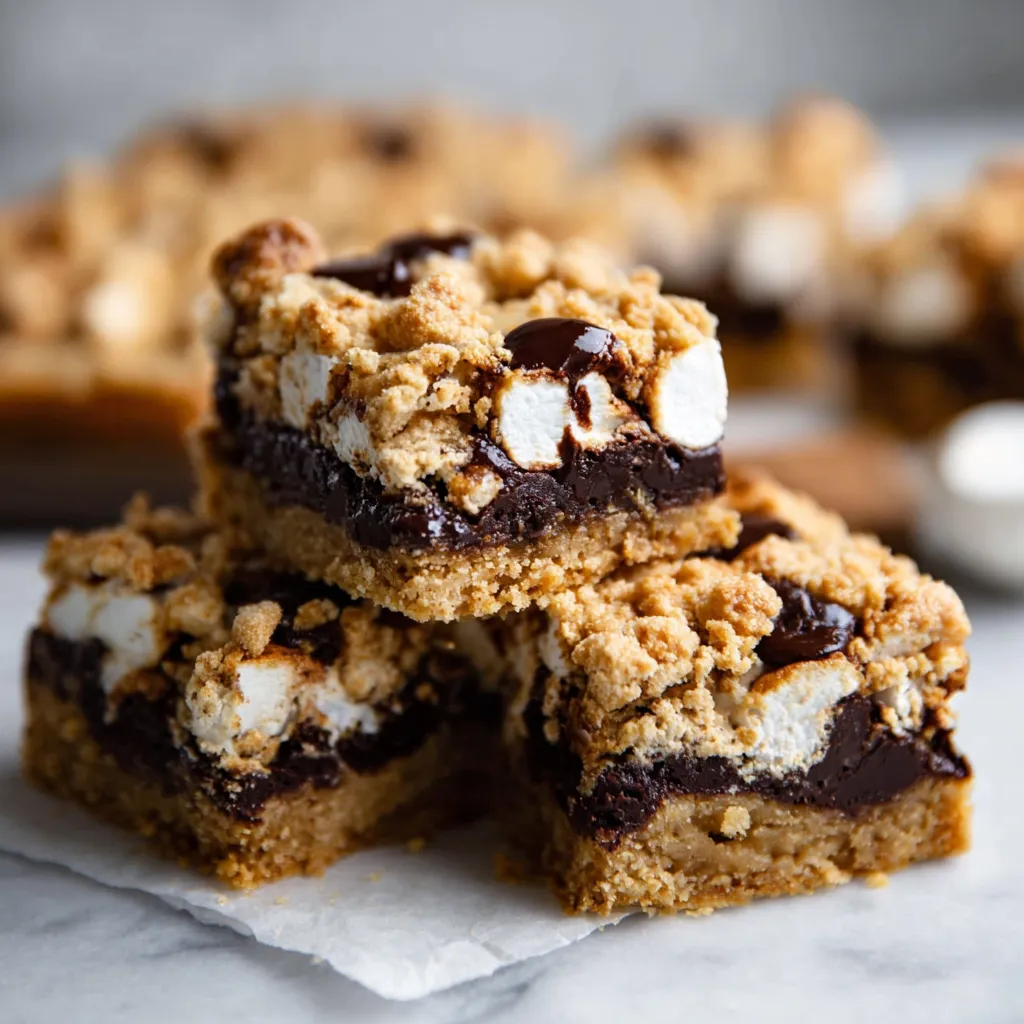
I’ll never forget the summer camping trips with my family, where the highlight was always the s’mores around the campfire. The gooey marshmallow, the melting chocolate, the crunchy graham cracker – it was pure perfection. I wanted to capture that nostalgic feeling in a different form, and that’s when I started experimenting with s’mores cookie bars. Today, I’m sharing all my secrets for the most amazing S’mores Cookie Bars you’ll ever make!
The Ultimate S’mores Cookie Bars Recipe
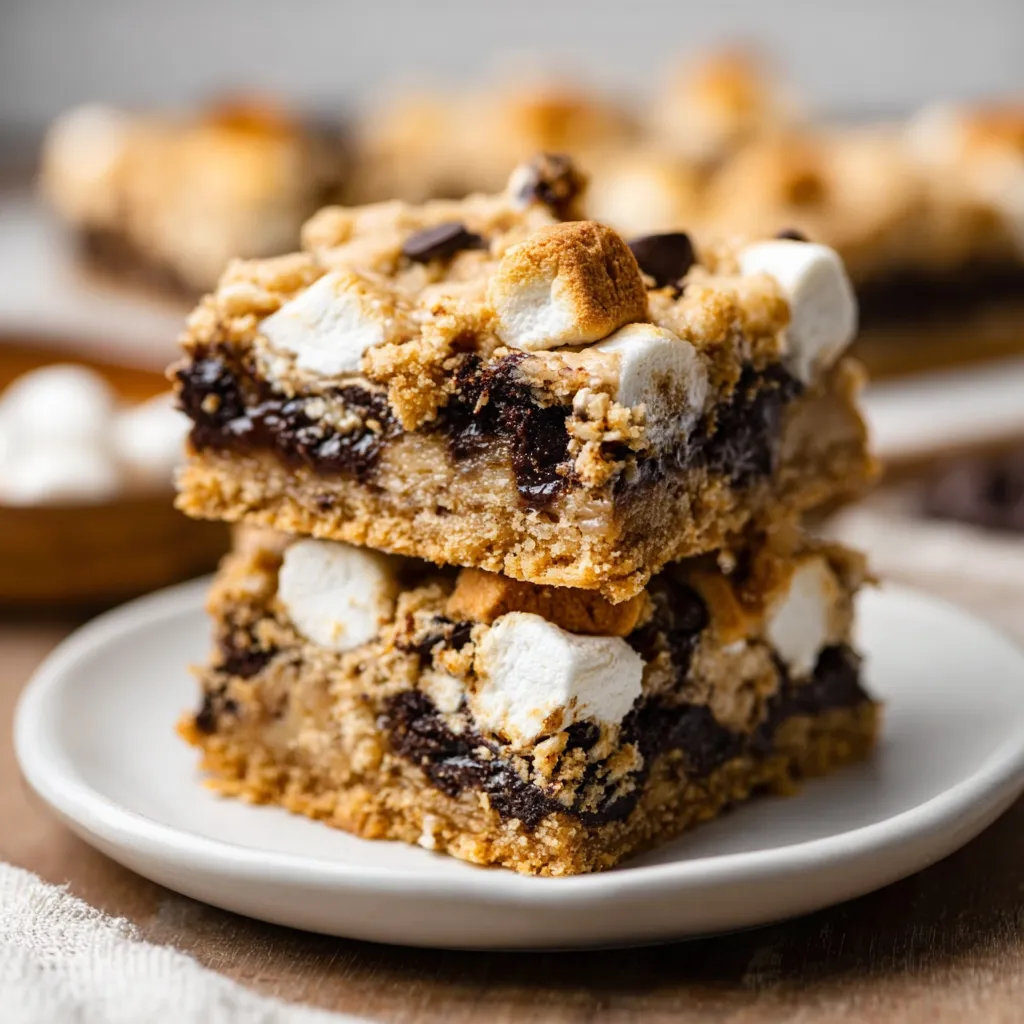
Get ready to experience s’mores in a whole new way! These S’mores Cookie Bars are incredibly easy to make, packed with flavor, and guaranteed to be a crowd-pleaser. We’re talking a chewy, buttery cookie base, a generous layer of melted chocolate, gooey marshmallows, and those essential graham cracker pieces that make s’mores what they are. Trust me, once you try these, you’ll be making them all the time. Think of it as a portable, shareable campfire treat! These are truly one of my favorite things to bake.
Ingredients You’ll Need
- For the Cookie Base:
- 1 cup (2 sticks) unsalted butter, softened
- ¾ cup granulated sugar
- ¾ cup packed light brown sugar
- 2 large eggs
- 1 teaspoon vanilla extract
- 2 ¼ cups all-purpose flour
- 1 teaspoon baking soda
- 1 teaspoon salt
- For the S’mores Topping:
- 1 (12-ounce) package semi-sweet chocolate chips
- 3 cups mini marshmallows
- 1 ½ cups coarsely crushed graham crackers (about 12 full sheets)
Equipment You’ll Need
- 9×13 inch baking pan
- Mixing bowls
- Electric mixer (handheld or stand mixer)
- Measuring cups and spoons
- Rubber spatula
- Parchment paper (optional, for easy removal)
Let’s Bake! Step-by-Step Instructions
- Preheat your oven to 350°F (175°C). This is crucial for even baking!
- Prepare your baking pan. Grease a 9×13 inch baking pan or line it with parchment paper, leaving an overhang for easy removal. Parchment paper makes cleanup a breeze.
- Cream the butter and sugars. In a large mixing bowl, beat the softened butter, granulated sugar, and brown sugar together on medium speed until light and fluffy, about 3-4 minutes. This is where you build the foundation for a tender cookie base.
- Add the eggs and vanilla. Beat in the eggs one at a time, then stir in the vanilla extract. Make sure each egg is fully incorporated before adding the next.
- Combine the dry ingredients. In a separate bowl, whisk together the flour, baking soda, and salt. This ensures even distribution of the leavening agent.
- Gradually add the dry ingredients to the wet ingredients. Add the dry ingredients to the wet ingredients in two additions, mixing on low speed until just combined. Be careful not to overmix; overmixing develops the gluten in the flour, which can result in tough cookie bars. The dough will be thick.
- Press the dough into the prepared pan. Press the cookie dough evenly into the bottom of the prepared baking pan. I find it easiest to use my fingers to gently press the dough into place. Make sure the dough is evenly distributed to ensure even baking.
- Bake the cookie base. Bake for 20-25 minutes, or until the edges are golden brown and the center is set. The cookie base should be lightly golden brown and firm to the touch. Don’t overbake!
- Remove from the oven and immediately sprinkle with chocolate chips. As soon as the cookie base comes out of the oven, sprinkle the chocolate chips evenly over the top. The heat from the cookie will melt the chocolate.
- Let the chocolate melt for a few minutes. Allow the chocolate chips to sit for a couple of minutes to soften and melt slightly. This will make them easier to spread.
- Spread the melted chocolate evenly. Use a spatula to spread the melted chocolate into an even layer over the cookie base. Get every last bit of chocolate goodness!
- Sprinkle with marshmallows and graham crackers. Immediately sprinkle the mini marshmallows and crushed graham crackers evenly over the melted chocolate. Don’t skimp on the marshmallows or graham crackers – they’re what make these bars s’mores!
- Bake again for 3-5 minutes, or until the marshmallows are puffed and lightly golden. Return the pan to the oven and bake for another 3-5 minutes, or until the marshmallows are puffed and lightly golden brown. Keep a close eye on them, as they can burn quickly.
- Let cool completely before cutting. Remove from the oven and let the bars cool completely in the pan before cutting into squares. This is important, as the chocolate and marshmallows need time to set. If you used parchment paper, lift the bars out of the pan using the overhang.
- Cut into squares and enjoy! Cut the cooled s’mores cookie bars into squares and serve. Get ready for some serious s’mores bliss!
Success Tips for Perfect S’mores Cookie Bars
- Use softened butter. The butter needs to be softened to room temperature for proper creaming with the sugars. This creates air pockets that contribute to a light and tender cookie base. If you forget to soften the butter, you can microwave it for a few seconds at a time, but be careful not to melt it.
- Don’t overmix the dough. Overmixing develops the gluten in the flour, resulting in tough cookie bars. Mix until just combined.
- Press the dough evenly. Ensure the cookie dough is pressed evenly into the baking pan for uniform baking. Uneven dough can result in some parts of the bars being overbaked while others are underbaked.
- Watch the marshmallows carefully. Marshmallows can burn quickly, so keep a close eye on them during the second baking period. You want them to be puffed and lightly golden brown, not charred.
- Cool completely before cutting. This is crucial! The chocolate and marshmallows need time to set for clean cuts. If you try to cut them while they’re still warm, they’ll be a gooey mess.
Variations and Substitutions
Want to put your own spin on these S’mores Cookie Bars? Here are a few ideas to get you started:
- Different Chocolate: Use milk chocolate, dark chocolate, or even white chocolate chips instead of semi-sweet. Each type of chocolate will give the bars a slightly different flavor profile.
- Add Nuts: Sprinkle chopped pecans, walnuts, or almonds over the marshmallows and graham crackers for added crunch and flavor.
- Peanut Butter: Swirl peanut butter into the melted chocolate for a peanut butter s’mores twist. This is a decadent and delicious addition!
- Salted Caramel: Drizzle salted caramel sauce over the marshmallows and graham crackers before the second bake for a sweet and salty treat.
- Different Graham Crackers: Use chocolate graham crackers or cinnamon graham crackers for a unique flavor twist.
Making Ahead & Storage Instructions
These S’mores Cookie Bars are perfect for making ahead of time! You can bake the cookie base ahead of time and store it in an airtight container at room temperature for up to 2 days. When you’re ready to assemble the bars, simply top with the chocolate, marshmallows, and graham crackers, and bake as directed.
To store baked S’mores Cookie Bars, keep them in an airtight container at room temperature for up to 3 days. They’re also delicious chilled! Just be aware that the marshmallows might become a little firmer in the refrigerator.
Serving Suggestions
These S’mores Cookie Bars are delicious on their own, but here are a few ideas for taking them to the next level:
- Serve with a scoop of vanilla ice cream. The cold ice cream pairs perfectly with the warm, gooey s’mores bars.
- Drizzle with chocolate sauce or caramel sauce. Extra indulgence is always a good idea!
- Serve with a glass of cold milk. The classic s’mores pairing!
- Cut into smaller squares and serve as part of a dessert platter. Perfect for parties and gatherings.
More Delicious Dessert Recipes You’ll Love
If you’re a fan of easy and delicious dessert recipes, you’ve come to the right place! Be sure to check out some of my other favorites, like FIREWORKS OREO CHEESECAKE BARS for a festive and creamy treat, or maybe you are looking for something on the go? Try these Apple Pie Cookies. For another no-bake option, try my S’MORES BAR BLISS – it’s another campfire-inspired treat that’s perfect for summer. Or take a peek at these S’MORES CHEESECAKE, it is to die for and you will be the hit of the party. For a fun and interactive dessert, try my Caramel Apple Nachos – it’s a dessert game-changer! I have something for everyone! Each recipe is tried and true, guaranteed to bring joy to your kitchen and smiles to your loved ones’ faces.
Why I Love This Recipe
I truly adore this S’mores Cookie Bars recipe because it perfectly captures the essence of summer and childhood nostalgia. It’s a simple recipe that delivers big on flavor and fun. The combination of the chewy cookie base, the melted chocolate, the gooey marshmallows, and the crunchy graham crackers is simply irresistible. Plus, it’s so easy to make, even beginner bakers can nail it! But more than that, these bars bring back memories of campfires, laughter, and shared moments with family and friends. And that, to me, is what baking is all about: creating delicious treats that bring people together and evoke happy memories.
So go ahead, give this recipe a try! I promise you won’t be disappointed. Get ready to experience s’mores in a whole new way. These S’mores Cookie Bars are guaranteed to become a family favorite. Happy baking!
Can I make the cookie base ahead of time?
Yes! You can bake the cookie base ahead of time and store it in an airtight container at room temperature for up to 2 days. When you’re ready to assemble the bars, simply top with the chocolate, marshmallows, and graham crackers, and bake as directed.
What are some variations I can try with this recipe?
You can try using different chocolate (milk, dark, or white), adding nuts, swirling in peanut butter, drizzling with salted caramel, or using different graham crackers (chocolate or cinnamon).
How should I store the baked S’mores Cookie Bars?
To store baked S’mores Cookie Bars, keep them in an airtight container at room temperature for up to 3 days. They’re also delicious chilled, but the marshmallows might become firmer in the refrigerator.
Why is it important to cool the bars completely before cutting them?
Cooling completely before cutting is crucial because the chocolate and marshmallows need time to set for clean cuts. If you try to cut them while they’re still warm, they’ll be a gooey mess.
S’mores Cookie Bar Bliss
Equipment
- 9×13 inch baking pan
- Mixing Bowls (various sizes)
- Electric mixer (handheld or stand mixer)
- Measuring cups
- Measuring spoons
- Rubber spatula
- Parchment paper (optional)
- Whisk
- Oven
Ingredients
- ¾ cup granulated sugar
- ¾ cup packed light brown sugar
- 2 large eggs
- 1 teaspoon vanilla extract
- 2 ¼ cups all-purpose flour
- 1 teaspoon baking soda
- 1 teaspoon salt
- 3 cups mini marshmallows
- 1 ½ cups coarsely crushed graham crackers about 12 full sheets
Instructions
- Preheat your oven to 350°F (175°C).
- Grease a 9×13 inch baking pan or line it with parchment paper, leaving an overhang for easy removal.
- In a large mixing bowl, beat the softened butter, granulated sugar, and brown sugar together on medium speed until light and fluffy, about 3-4 minutes.
- Beat in the eggs one at a time, then stir in the vanilla extract. Make sure each egg is fully incorporated before adding the next.
- In a separate bowl, whisk together the flour, baking soda, and salt.
- Gradually add the dry ingredients to the wet ingredients in two additions, mixing on low speed until just combined. Be careful not to overmix.
- Press the cookie dough evenly into the bottom of the prepared baking pan.
- Bake for 20-25 minutes, or until the edges are golden brown and the center is set.
- Remove from the oven and immediately sprinkle with chocolate chips.
- Let the chocolate melt for a few minutes.
- Use a spatula to spread the melted chocolate into an even layer over the cookie base.
- Sprinkle the mini marshmallows and crushed graham crackers evenly over the melted chocolate.
- Bake again for 3-5 minutes, or until the marshmallows are puffed and lightly golden.
- Remove from the oven and let the bars cool completely in the pan before cutting into squares. If you used parchment paper, lift the bars out of the pan using the overhang.
- Cut the cooled s’mores cookie bars into squares and serve.
