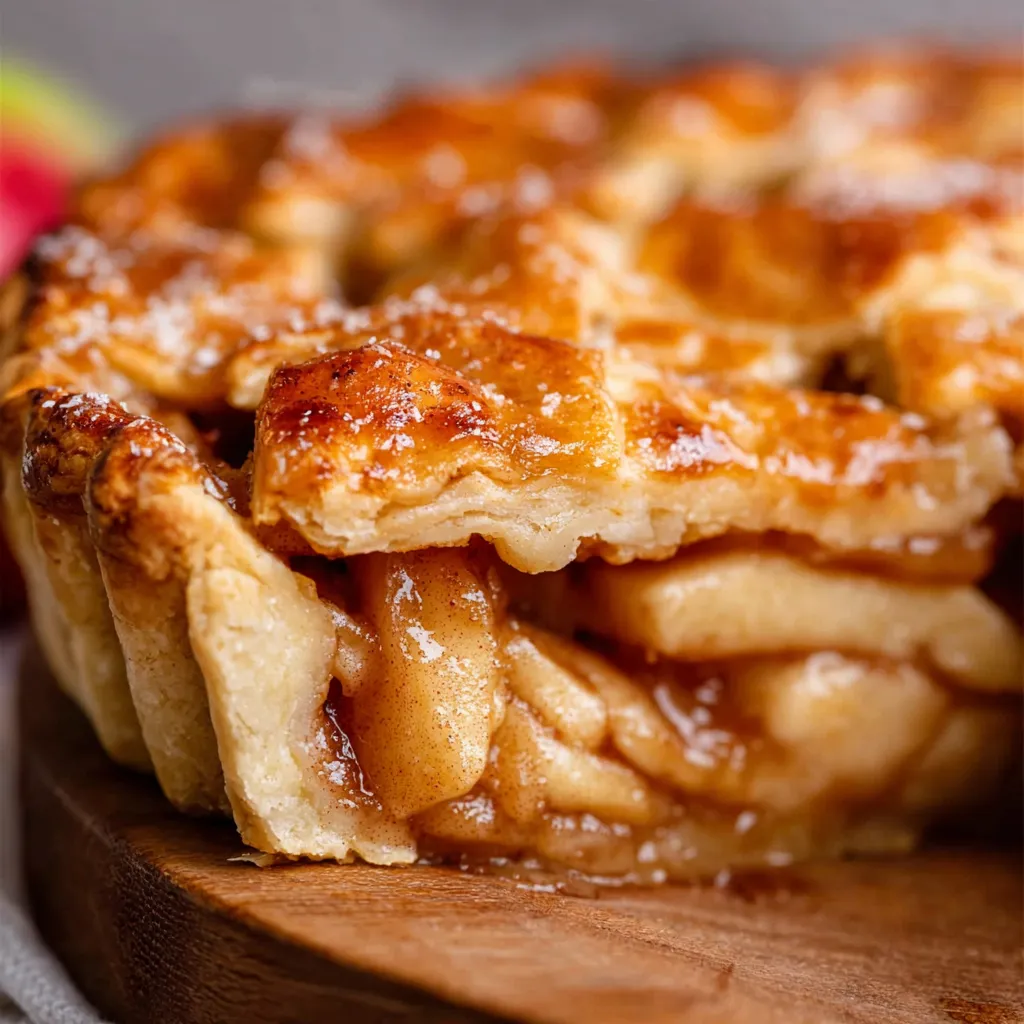
I can almost smell it now – the warm, comforting aroma of cinnamon and baked apples filling my grandmother’s kitchen. Every Thanksgiving, her apple pie was the centerpiece, a golden-crusted masterpiece that everyone raved about. I’ve spent years trying to recreate that magic, tweaking and perfecting her recipe. Today, I’m sharing all my secrets for the most amazing Best Apple Pie you’ll ever make!
The Quest for the Perfect Apple Pie: My Journey
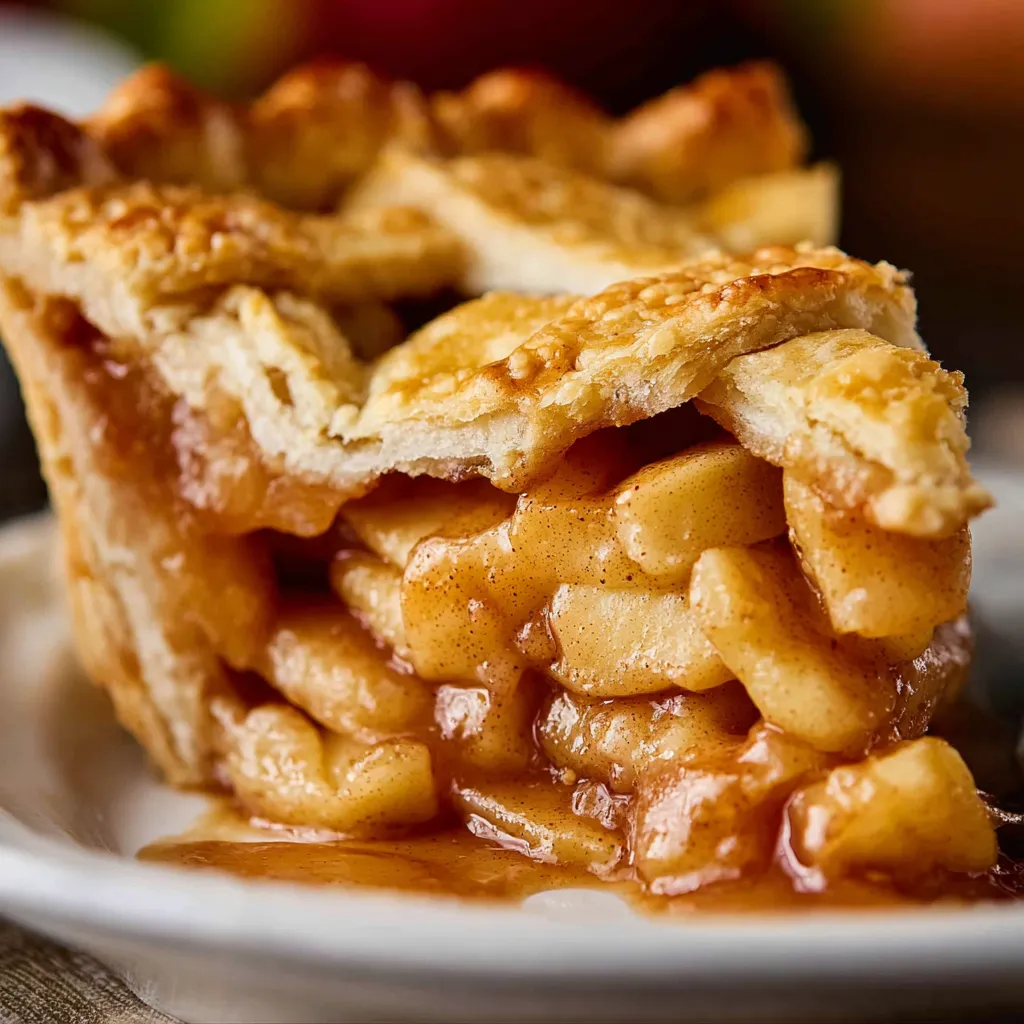
Let’s be honest, making an apple pie from scratch can seem a little daunting. There are a few components that need to come together just right: the crust, the filling, and the baking process itself. But trust me, with a little patience and my guidance, you’ll be pulling a gorgeous, mouthwatering pie out of your oven in no time. This isn’t just about following a recipe; it’s about creating an experience, a memory, a slice of pure comfort.
Why This Apple Pie Recipe is Different
You might be wondering, “What makes this apple pie recipe the best?” Well, I’ve spent countless hours experimenting with different types of apples, spices, and crust techniques to arrive at this particular combination. Here’s what sets it apart:
- The Crust: Flaky, tender, and buttery – everything a good pie crust should be. We’ll be using a blend of butter and shortening for the perfect texture.
- The Apples: A combination of sweet and tart apples for a balanced flavor. I’ll share my favorite varieties.
- The Spices: A warm blend of cinnamon, nutmeg, and a hint of allspice to enhance the apple flavor.
- The Secret Ingredient: A touch of lemon juice to brighten the flavors and prevent the apples from browning.
- The Baking Technique: A specific temperature and baking time to ensure a perfectly cooked crust and a bubbly, golden filling.
The Ultimate Apple Pie Recipe: A Step-by-Step Guide
Alright, let’s get baking! I’ve broken down the recipe into easy-to-follow steps, so you can feel confident every step of the way. Don’t worry if you’re a beginner; I’m here to guide you.
Part 1: Making the Perfect Pie Crust
This is often the trickiest part, but I promise it’s easier than you think! A good pie crust is all about keeping things cold and not overworking the dough.
- Combine Dry Ingredients: In a large bowl, whisk together 2 1/2 cups all-purpose flour, 1 teaspoon salt, and 1 tablespoon granulated sugar. This ensures that the salt and sugar are evenly distributed throughout the flour.
- Cut in the Fat: Add 1 cup (2 sticks) of cold, unsalted butter, cut into cubes, and 1/2 cup of cold shortening, also cut into cubes. Use a pastry blender or your fingertips to cut the fat into the flour until the mixture resembles coarse crumbs. You should still see small pieces of butter and shortening. This is crucial for creating those flaky layers.
- Add Cold Water: Gradually add 6-8 tablespoons of ice water, one tablespoon at a time, mixing gently after each addition. The dough should start to come together but still be slightly shaggy. Don’t add too much water! You want it to hold together, not be sticky.
- Form the Disks: Divide the dough in half and gently form each half into a disk. Wrap each disk tightly in plastic wrap and refrigerate for at least 2 hours, or preferably overnight. This allows the gluten to relax, resulting in a more tender crust.
- Roll Out the Dough: On a lightly floured surface, roll out one disk of dough into a 12-inch circle. Gently transfer the dough to a 9-inch pie plate. Trim any excess dough and crimp the edges as desired. Repeat with the second disk for the top crust. If you’re feeling fancy, get creative with your crimping!
Part 2: Crafting the Delicious Apple Filling
The filling is where the magic really happens! The combination of sweet and tart apples, warm spices, and a touch of lemon juice creates an explosion of flavor.
- Prepare the Apples: Peel, core, and slice 6-8 medium apples. I recommend using a combination of Granny Smith (for tartness) and Honeycrisp or Gala (for sweetness). You want slices that are about 1/4 inch thick.
- Combine Filling Ingredients: In a large bowl, combine the sliced apples, 3/4 cup granulated sugar, 1/4 cup all-purpose flour, 1 teaspoon ground cinnamon, 1/4 teaspoon ground nutmeg, 1/4 teaspoon ground allspice, 1 tablespoon lemon juice, and 2 tablespoons unsalted butter, cut into small pieces. Toss everything together until the apples are evenly coated. The lemon juice will prevent browning and add a bright flavor.
- Assemble the Pie: Pour the apple filling into the prepared pie crust. Dot the top of the filling with the remaining 2 tablespoons of butter.
- Top with Crust: Place the second rolled-out crust over the filling. Trim any excess dough and crimp the edges to seal. Cut several slits in the top crust to allow steam to escape. This prevents the crust from puffing up too much and cracking.
- Egg Wash (Optional): For a beautiful golden-brown crust, brush the top of the pie with an egg wash (1 egg beaten with 1 tablespoon of water). You can also sprinkle the crust with granulated sugar for extra sparkle.
Part 3: Baking Your Apple Pie to Perfection
The baking process is crucial for achieving a perfectly cooked crust and a bubbly, golden filling. Here’s how to do it:
- Preheat Oven: Preheat your oven to 425°F (220°C).
- Bake: Place the pie on a baking sheet (this will catch any drips) and bake for 15 minutes. Then, reduce the oven temperature to 375°F (190°C) and bake for an additional 45-50 minutes, or until the crust is golden brown and the filling is bubbly. If the crust starts to brown too quickly, you can tent it with aluminum foil.
- Cool Completely: Let the pie cool completely on a wire rack before slicing and serving. This is important because the filling will continue to set as it cools. If you cut into it too soon, it will be runny.
Success Tips for the Best Apple Pie Ever
Here are my top tips to ensure your apple pie turns out perfectly every time:
- Use Cold Ingredients: Cold butter, cold shortening, and ice water are essential for a flaky pie crust. Don’t skip this step!
- Don’t Overwork the Dough: Overworking the dough will develop the gluten, resulting in a tough crust. Mix the dough just until it comes together.
- Chill the Dough: Chilling the dough allows the gluten to relax, resulting in a more tender crust. Don’t skip the chilling time!
- Use a Combination of Apples: Using a mix of sweet and tart apples will create a more complex and balanced flavor.
- Let the Pie Cool Completely: Letting the pie cool completely allows the filling to set, preventing it from being runny.
Variations and Twists on the Classic Apple Pie
Once you’ve mastered the basic apple pie recipe, feel free to get creative and experiment with different variations! Here are a few ideas:
- Add Cheese: A slice of sharp cheddar cheese on top of a warm apple pie is a classic combination.
- Caramel Apple Pie: Drizzle caramel sauce over the apple filling before baking for a decadent treat. You could even make Caramel Apple Bars as a variation!
- Apple Crumble Pie: Top the apple filling with a buttery crumble topping instead of a second crust.
- Spiced Apple Pie: Add a pinch of ground cloves or ginger to the spice mixture for a warmer, more complex flavor.
- Mini Apple Pies: Use a muffin tin to make individual apple pies, perfect for parties or portion control. For smaller, even more fun options, check out Apple Pie Cookies!
Serving Suggestions for Your Apple Pie
Apple pie is delicious on its own, but it’s even better with a few accompaniments! Here are some of my favorite ways to serve it:
- Vanilla Ice Cream: A classic pairing that never fails to please.
- Whipped Cream: Light and fluffy whipped cream is the perfect complement to a warm slice of pie.
- Caramel Sauce: Drizzle warm caramel sauce over the pie for an extra touch of sweetness. Thinking of caramel makes me want to whip up some Caramel Apple Nachos too!
- Cinnamon Sugar: Sprinkle a mixture of cinnamon and sugar over the pie for a festive touch.
- A Cup of Coffee or Tea: The perfect warm beverage to enjoy with a slice of apple pie.
Making Apple Pie Ahead of Time
One of the great things about apple pie is that you can make it ahead of time! Here’s how:
- Make the Dough Ahead: The pie dough can be made up to 2 days in advance and stored in the refrigerator. Just be sure to wrap it tightly in plastic wrap.
- Assemble the Pie Ahead: You can assemble the entire pie (unbaked) up to 24 hours in advance. Store it in the refrigerator and bake it just before serving.
- Freeze the Pie: Unbaked apple pie can be frozen for up to 3 months. Wrap it tightly in plastic wrap and then in aluminum foil. When ready to bake, thaw the pie in the refrigerator overnight and bake as directed.
Other Apple Recipes You’ll Love
If you’re an apple lover like me, you’ll want to try these other delicious apple recipes too!
- Craving something a little different? You absolutely HAVE to try these Apple Crisp Mini Cheesecakes! They are a showstopper.
- For a cozy breakfast treat, try these Baked Apple Cider Donuts.
- If you’re looking for a quick and easy dessert, check out my recipe for Fried Peach or Apple Pies. They are absolutely irresistible!
In Conclusion: Your Apple Pie Awaits!
So there you have it – my ultimate guide to making the Best Apple Pie! I know it seems like a lot of steps, but I promise it’s worth it. Imagine the look on your family’s faces when you present them with this golden-crusted masterpiece. The smell of cinnamon and apples filling your home, the taste of sweet and tart filling melting in your mouth… It’s pure bliss. Now go ahead, get baking! I know you can do it, and I can’t wait to hear all about your apple pie success. Happy baking!
What makes this apple pie recipe different from others?
This recipe uses a specific blend of butter and shortening for a flaky crust, a combination of sweet and tart apples for balanced flavor, a warm spice blend of cinnamon, nutmeg, and allspice, lemon juice to brighten flavors, and a precise baking technique for a perfectly cooked crust and bubbly filling.
What types of apples are recommended for the filling?
The recipe recommends using a combination of Granny Smith apples (for tartness) and Honeycrisp or Gala apples (for sweetness).
How can I prevent the pie crust from browning too quickly?
If the crust starts to brown too quickly during baking, you can tent it with aluminum foil.
Can I make the apple pie ahead of time?
Yes, you can make the pie dough up to 2 days in advance, assemble the unbaked pie up to 24 hours in advance, or freeze the unbaked pie for up to 3 months.
Simply the Best Apple Pie
Equipment
- Large bowl
- Whisk
- Pastry blender or fingertips
- Measuring cups and spoons
- Plastic Wrap
- Rolling Pin
- 9-inch pie plate
- Baking Sheet
- Wire rack
- Knife or apple corer
- Peeler
Ingredients
- 2 ½ cups all-purpose flour
- 1 teaspoon salt
- 1 tablespoon granulated sugar
- ½ cup cold shortening, cut into cubes
- 6-8 tablespoons ice water
- 6-8 medium apples Granny Smith, Honeycrisp, or Gala
- ¾ cup granulated sugar
- ¼ cup all-purpose flour
- 1 teaspoon ground cinnamon
- ¼ teaspoon ground nutmeg
- ¼ teaspoon ground allspice
- 1 tablespoon lemon juice
- 4 tablespoons unsalted butter, cut into small pieces
- 1 tablespoon water optional, for egg wash
- Granulated sugar optional, for sprinkling
Instructions
- **Part 1: Making the Perfect Pie Crust**
- 1. Combine Dry Ingredients: In a large bowl, whisk together 2 1/2 cups all-purpose flour, 1 teaspoon salt, and 1 tablespoon granulated sugar.
- 2. Cut in the Fat: Add 1 cup (2 sticks) of cold, unsalted butter, cut into cubes, and 1/2 cup of cold shortening, also cut into cubes. Use a pastry blender or your fingertips to cut the fat into the flour until the mixture resembles coarse crumbs.
- 3. Add Cold Water: Gradually add 6-8 tablespoons of ice water, one tablespoon at a time, mixing gently after each addition. The dough should start to come together but still be slightly shaggy. Don’t add too much water!
- 4. Form the Disks: Divide the dough in half and gently form each half into a disk. Wrap each disk tightly in plastic wrap and refrigerate for at least 2 hours, or preferably overnight.
- 5. Roll Out the Dough: On a lightly floured surface, roll out one disk of dough into a 12-inch circle. Gently transfer the dough to a 9-inch pie plate. Trim any excess dough and crimp the edges as desired. Repeat with the second disk for the top crust.
- **Part 2: Crafting the Delicious Apple Filling**
- 1. Prepare the Apples: Peel, core, and slice 6-8 medium apples. I recommend using a combination of Granny Smith (for tartness) and Honeycrisp or Gala (for sweetness). Slice about 1/4 inch thick.
- 2. Combine Filling Ingredients: In a large bowl, combine the sliced apples, 3/4 cup granulated sugar, 1/4 cup all-purpose flour, 1 teaspoon ground cinnamon, 1/4 teaspoon ground nutmeg, 1/4 teaspoon ground allspice, 1 tablespoon lemon juice, and 2 tablespoons unsalted butter, cut into small pieces. Toss everything together until the apples are evenly coated.
- 3. Assemble the Pie: Pour the apple filling into the prepared pie crust. Dot the top of the filling with the remaining 2 tablespoons of butter.
- 4. Top with Crust: Place the second rolled-out crust over the filling. Trim any excess dough and crimp the edges to seal. Cut several slits in the top crust to allow steam to escape.
- 5. Egg Wash (Optional): For a golden-brown crust, brush the top of the pie with an egg wash (1 egg beaten with 1 tablespoon of water). You can also sprinkle the crust with granulated sugar.
- **Part 3: Baking Your Apple Pie to Perfection**
- 1. Preheat Oven: Preheat your oven to 425°F (220°C).
- 2. Bake: Place the pie on a baking sheet and bake for 15 minutes. Then, reduce the oven temperature to 375°F (190°C) and bake for an additional 45-50 minutes, or until the crust is golden brown and the filling is bubbly. If the crust starts to brown too quickly, tent it with aluminum foil.
- 3. Cool Completely: Let the pie cool completely on a wire rack before slicing and serving.
