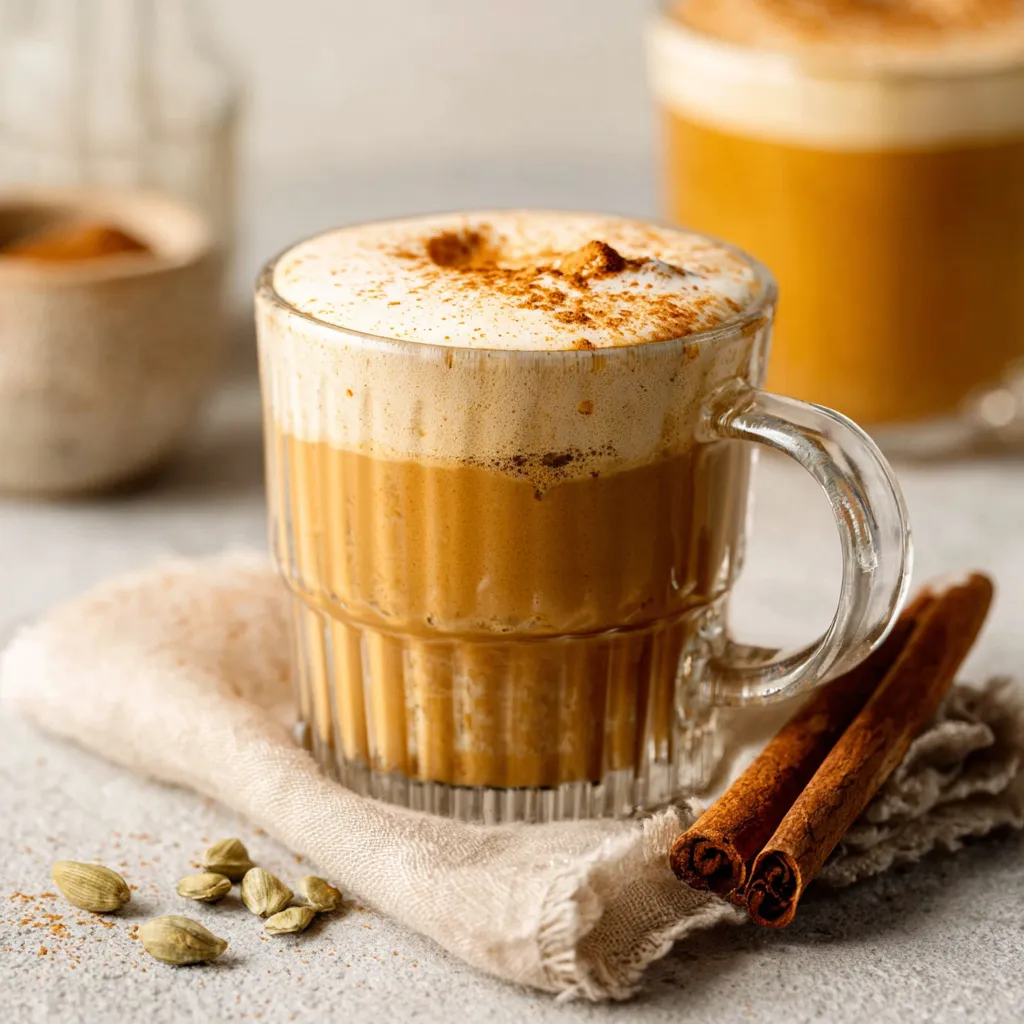
I can still remember the first time I tried a pumpkin spice latte. It was a crisp autumn day, the leaves were turning vibrant shades of red and gold, and the scent of cinnamon and nutmeg hung in the air. But the price tag at that fancy coffee shop? Ouch! That’s when I knew I had to find a way to recreate that cozy, comforting flavor at home, without breaking the bank. Today, I’m sharing all my secrets for the most incredible Homemade Pumpkin Creamer you’ll ever taste – it’s so good, you’ll never buy the store-bought stuff again!
Why Make Your Own Pumpkin Creamer?

Let’s be honest, the siren song of pumpkin spice is strong. But before you rush out to buy that sugary, artificial-tasting creamer from the store, consider this: making your own Homemade Pumpkin Creamer is not only incredibly easy, but it’s also much healthier, more customizable, and far more delicious! You control the ingredients, the sweetness, and the intensity of the pumpkin spice flavor. Plus, it’s a fun and rewarding kitchen project that will fill your home with the warm, inviting aroma of fall.
The Benefits of Homemade
- Healthier Ingredients: No artificial flavors, preservatives, or high fructose corn syrup. You know exactly what’s going into your creamer.
- Customizable Flavor: Adjust the sweetness, spice levels, and even add a touch of vanilla or maple syrup. The possibilities are endless!
- More Affordable: Save money by making a large batch of creamer for a fraction of the cost of store-bought versions.
- Superior Taste: The fresh, vibrant flavors of real pumpkin and spices simply can’t be beat.
- Impress Your Friends: Imagine serving up a steaming mug of coffee with your own homemade pumpkin creamer! You’ll be the star of the brunch table.
The Ultimate Homemade Pumpkin Creamer Recipe
Alright, let’s get down to business! This recipe is my absolute favorite, and I’ve tweaked it over the years to perfection. Don’t be intimidated – it’s surprisingly simple. I promise, once you taste the results, you’ll be hooked.
Ingredients You’ll Need:
- 2 cups heavy cream (or half-and-half for a lighter version)
- 1 cup milk (I prefer whole milk for richness)
- 1/2 cup pumpkin puree (make sure it’s 100% pumpkin, not pumpkin pie filling!)
- 1/4 cup granulated sugar (adjust to your sweetness preference)
- 2 tablespoons brown sugar (for a hint of molasses flavor)
- 2 teaspoons pumpkin pie spice
- 1 teaspoon vanilla extract
- Optional: 1/4 teaspoon ground cinnamon (for an extra boost of cinnamon flavor)
- Optional: 1-2 tablespoons maple syrup (for added sweetness and depth)
Step-by-Step Instructions:
- Combine the Ingredients: In a medium saucepan, whisk together the heavy cream, milk, pumpkin puree, granulated sugar, brown sugar, pumpkin pie spice, and vanilla extract. Make sure everything is well combined and there are no lumps of pumpkin.
- Heat Gently: Place the saucepan over medium heat. You want to warm the mixture slowly and gently, being careful not to boil it.
- Simmer (Don’t Boil!): Continue to heat the creamer, stirring frequently, until it’s heated through and the sugar is completely dissolved. This should take about 5-7 minutes. You’ll see small bubbles forming around the edges of the pan, but it shouldn’t be a rolling boil.
- Remove from Heat: Once the creamer is heated through, remove the saucepan from the heat.
- Cool Slightly: Let the creamer cool slightly for about 15-20 minutes. This will allow the flavors to meld together beautifully.
- Strain (Optional but Recommended): For the smoothest creamer possible, strain the mixture through a fine-mesh sieve lined with cheesecloth. This will remove any small bits of pumpkin or spice that may have escaped the whisk. (I usually skip this step if I’m in a hurry, and it’s still delicious!)
- Store: Pour the cooled creamer into an airtight container or glass jar. Store in the refrigerator for up to one week.
Serving Suggestions:
Now that you’ve made your amazing Homemade Pumpkin Creamer, it’s time to enjoy it! Here are a few of my favorite ways to use it:
- In Coffee: Of course! A splash of this creamer transforms a regular cup of coffee into a decadent fall treat.
- In Lattes: Make your own pumpkin spice latte at home by adding a shot of espresso and a dollop of whipped cream.
- In Tea: Add a spoonful to your favorite black or green tea for a warm and comforting beverage.
- In Hot Chocolate: Elevate your hot chocolate game with a swirl of pumpkin creamer.
- In Oatmeal or Yogurt: Add a touch of fall flavor to your breakfast by stirring in a spoonful of creamer.
- In Baking: Use it as a substitute for milk or cream in your favorite baking recipes, like scones or muffins.
Success Tips for Perfect Pumpkin Creamer
Want to ensure your Homemade Pumpkin Creamer turns out perfectly every time? Here are a few of my top tips:
- Use Real Pumpkin Puree: Don’t use pumpkin pie filling! It contains added sugars and spices that will throw off the flavor of your creamer.
- Don’t Overheat: Overheating the creamer can cause it to curdle. Keep the heat low and stir frequently.
- Adjust Sweetness to Taste: The amount of sugar in this recipe is a guideline. Feel free to adjust it to your personal preference. If you like a sweeter creamer, add more sugar or maple syrup.
- Use Fresh Spices: Freshly ground spices will give your creamer the most vibrant flavor. If your spices have been sitting in your pantry for a while, consider replacing them.
- Strain for a Smoother Texture: While not essential, straining the creamer through a fine-mesh sieve will remove any small bits of pumpkin or spice and result in a smoother, more luxurious texture.
Variations & Customizations:
The beauty of making your own Homemade Pumpkin Creamer is that you can customize it to your heart’s content! Here are a few ideas to get you started:
- Spiced Maple Pumpkin Creamer: Add 1-2 tablespoons of maple syrup to the recipe for a richer, more complex flavor.
- Vanilla Bean Pumpkin Creamer: Split a vanilla bean in half lengthwise and scrape the seeds into the cream mixture. The vanilla bean will infuse the creamer with a delicate vanilla flavor.
- Gingerbread Pumpkin Creamer: Add 1/4 teaspoon of ground ginger and 1/4 teaspoon of ground cloves to the recipe for a gingerbread-inspired twist.
- Dairy-Free Pumpkin Creamer: Substitute coconut milk or almond milk for the heavy cream and milk in the recipe. Just be aware that the flavor and texture will be slightly different.
- Boozy Pumpkin Creamer: Add a splash of your favorite liqueur, such as bourbon, rum, or Irish cream, to the cooled creamer for an extra-special treat.
Pairing Ideas: Beyond Coffee
While Homemade Pumpkin Creamer shines in a simple cup of coffee, don’t limit yourself! This versatile concoction can elevate so many other treats. Imagine drizzling it over a slice of warm Pumpkin Bread for an extra layer of autumnal goodness. Or, how about using it to soak your slices of bread before making Pumpkin French Toast? It would take your breakfast game to a whole new level! And speaking of breakfast, a dollop of this creamer would be divine on top of a stack of pancakes or waffles. But the possibilities don’t stop there. You could even use it as a secret ingredient in your favorite fall desserts. Think about adding it to the batter for Pumpkin Cookies with Cream Cheese Frosting for an extra boost of flavor and moisture. Or, swirl it into the filling for a Pumpkin Spice Cake Roll for a truly unforgettable treat. And for a show-stopping dessert, a generous swirl of homemade pumpkin creamer over a slice of Pumpkin Bread with Cream Cheese Frosting will make everyone swoon. Don’t forget to consider using it as a glaze for Mini Pumpkin Pies!
Troubleshooting: Common Issues and Solutions
Even the best recipes can sometimes present challenges. Here are a few common issues you might encounter when making Homemade Pumpkin Creamer, and how to fix them:
- Creamer is Too Thick: If your creamer is too thick, simply add a little more milk until it reaches your desired consistency.
- Creamer is Too Thin: If your creamer is too thin, you can simmer it for a few more minutes to allow it to thicken up slightly. Be careful not to overheat it.
- Creamer is Curdled: If your creamer curdles, it’s likely because it was overheated. Unfortunately, there’s no way to un-curdle it. However, you can still use it! The flavor will still be delicious, even if the texture isn’t perfect. Next time, be sure to keep the heat low and stir frequently.
- Creamer is Not Sweet Enough: If your creamer isn’t sweet enough, add more sugar or maple syrup to taste.
- Creamer is Too Spicy: If your creamer is too spicy, add a little more heavy cream or milk to dilute the spice.
Storage Instructions: Keep it Fresh
Proper storage is key to keeping your Homemade Pumpkin Creamer fresh and delicious. Here’s what you need to know:
- Cool Completely: Before storing, make sure the creamer is completely cooled to room temperature.
- Airtight Container: Pour the cooled creamer into an airtight container or glass jar.
- Refrigerate: Store the creamer in the refrigerator for up to one week.
- Shake Before Use: Before each use, give the creamer a good shake to redistribute the ingredients.
Frequently Asked Questions (FAQ)
Here are some frequently asked questions about making Homemade Pumpkin Creamer:
Q: Can I use canned pumpkin pie filling instead of pumpkin puree?
A: No, I don’t recommend it. Pumpkin pie filling contains added sugars and spices that will throw off the flavor of your creamer.
Q: Can I use a different type of milk?
A: Yes, you can use any type of milk you like. However, keep in mind that the flavor and texture of the creamer will be slightly different depending on the type of milk you use.
Q: Can I freeze pumpkin creamer?
A: While you *can* freeze pumpkin creamer, I don’t recommend it. Freezing and thawing can change the texture and make it a bit grainy. It’s best enjoyed fresh!
Q: How long does homemade pumpkin creamer last?
A: Homemade pumpkin creamer will last for up to one week in the refrigerator.
Q: Can I make a vegan version?
A: Yes! Substitute coconut milk or almond milk for the heavy cream and milk. You might also want to add a touch of coconut oil for richness.
Conclusion: Your Fall Flavor Adventure Awaits!
So there you have it – everything you need to create the most amazing Homemade Pumpkin Creamer you’ve ever tasted! It’s easy, customizable, and oh-so-delicious. It’s time to ditch the store-bought stuff and embrace the warm, comforting flavors of fall with your own homemade creation. I promise, once you experience the difference, you’ll never go back! Happy brewing!
What are the key benefits of making pumpkin creamer at home compared to buying it from the store?
Homemade pumpkin creamer is healthier because you control the ingredients, avoiding artificial flavors and preservatives. It’s also more customizable, allowing you to adjust sweetness and spice levels. Plus, it’s more affordable and offers a superior, fresher taste.
Can I use pumpkin pie filling instead of pumpkin puree in the recipe?
No, it’s not recommended to use pumpkin pie filling. It contains added sugars and spices that will alter the intended flavor of the creamer.
How long does homemade pumpkin creamer last, and how should I store it?
Homemade pumpkin creamer will last for up to one week in the refrigerator. Store it in an airtight container or glass jar after it has completely cooled.
What can I do if my homemade pumpkin creamer is too thick or too thin?
If the creamer is too thick, add a little more milk until it reaches your desired consistency. If it’s too thin, simmer it for a few more minutes to allow it to thicken, being careful not to overheat it.

Homemade Pumpkin Creamer: Better Than Starbucks
Equipment
- Medium saucepan
- Whisk
- Measuring cups
- Measuring spoons
- Fine-mesh sieve (optional)
- Cheesecloth (optional)
- Airtight container or glass jar
Ingredients
- 2 cups heavy cream or half-and-half
- 1 cup milk whole milk preferred
- ½ cup pumpkin puree 100% pumpkin
- ¼ cup granulated sugar
- 2 tablespoons brown sugar
- 2 teaspoons pumpkin pie spice
- 1 teaspoon vanilla extract
- ¼ teaspoon ground cinnamon optional
- 1-2 tablespoons maple syrup optional
Instructions
- Combine the Ingredients: In a medium saucepan, whisk together the heavy cream, milk, pumpkin puree, granulated sugar, brown sugar, pumpkin pie spice, and vanilla extract. Ensure everything is well combined and there are no lumps of pumpkin.
- Heat Gently: Place the saucepan over medium heat. Warm the mixture slowly and gently, being careful not to boil it.
- Simmer (Don’t Boil!): Continue to heat the creamer, stirring frequently, until it’s heated through and the sugar is completely dissolved. This should take about 5-7 minutes. Small bubbles should form around the edges of the pan, but it shouldn’t be a rolling boil.
- Remove from Heat: Once the creamer is heated through, remove the saucepan from the heat.
- Cool Slightly: Let the creamer cool slightly for about 15-20 minutes. This will allow the flavors to meld together beautifully.
- Strain (Optional but Recommended): For the smoothest creamer possible, strain the mixture through a fine-mesh sieve lined with cheesecloth. This will remove any small bits of pumpkin or spice.
- Store: Pour the cooled creamer into an airtight container or glass jar. Store in the refrigerator for up to one week. Shake before use.
