The Ultimate Pumpkin Crisp: A Step-by-Step Guide
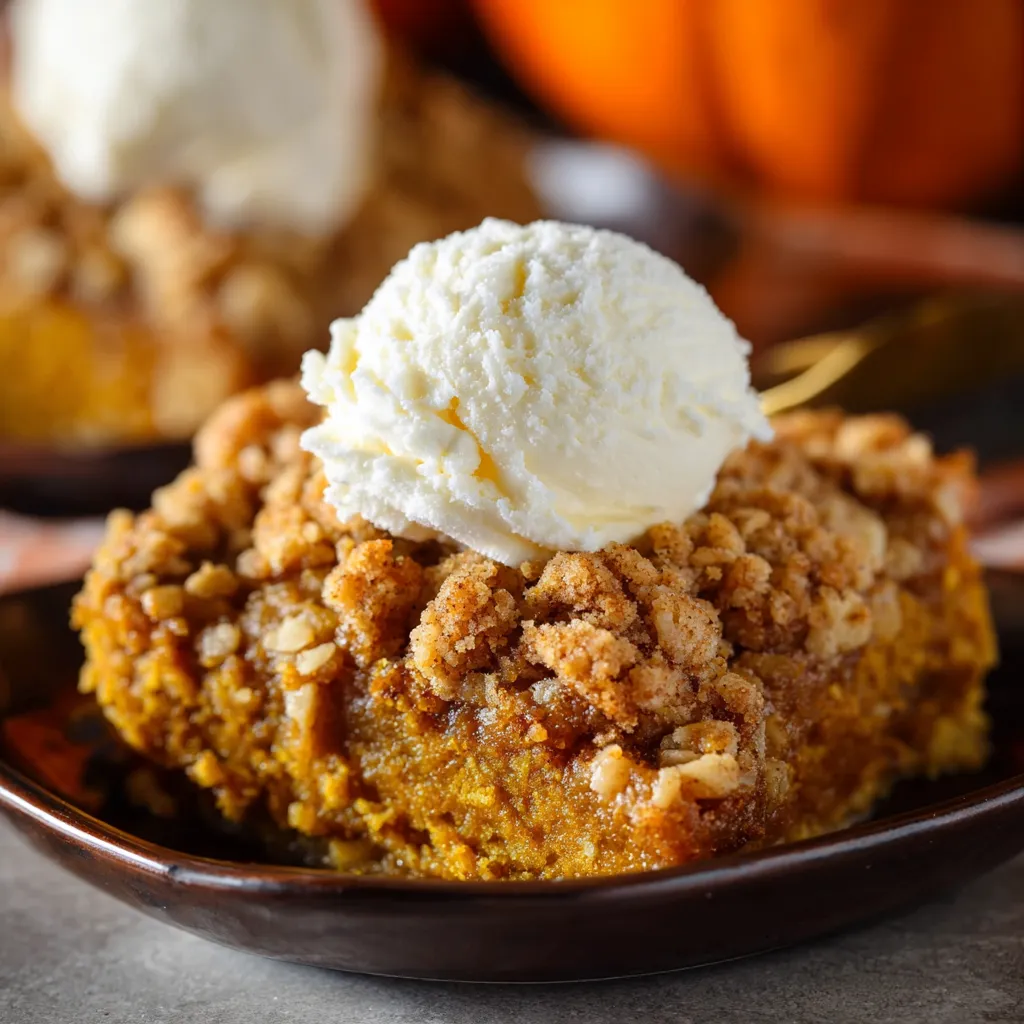 Get ready to experience pumpkin in a whole new way! This Pumpkin Crisp recipe isn’t just good; it’s *spectacular*. It’s the perfect balance of creamy pumpkin filling and a buttery, crunchy topping that will have everyone begging for seconds. We’re talking serious fall dessert goals here. So, grab your apron, and let’s get baking!
What Makes This Pumpkin Crisp So Special?
Before we dive into the recipe, let’s talk about what makes this Pumpkin Crisp stand out from the crowd. It’s not just about throwing some ingredients together; it’s about creating a symphony of flavors and textures. * **The Filling:** We’re using a combination of pumpkin puree, warm spices, and a touch of sweetness to create a filling that’s both comforting and flavorful. It’s not overly sweet, allowing the pumpkin flavor to really shine. * **The Topping:** This is where the magic happens! The buttery, oat-filled topping is what gives this crisp its signature crunch. It’s the perfect complement to the creamy filling, creating a textural contrast that’s simply divine. * **The Ease:** Despite its impressive flavor, this Pumpkin Crisp is surprisingly easy to make. It’s a great option for beginner bakers or anyone looking for a quick and easy dessert. Now that we’ve established why this recipe is so amazing, let’s get down to business!Ingredients You’ll Need
Before we begin, let’s gather our ingredients. Here’s what you’ll need for this delectable Pumpkin Crisp: For the Filling: * 1 (15-ounce) can pumpkin puree (not pumpkin pie filling!) * 1 (12-ounce) can evaporated milk * 1 cup granulated sugar * 1/2 cup packed light brown sugar * 2 large eggs * 2 tablespoons all-purpose flour * 1 teaspoon pumpkin pie spice * 1/2 teaspoon ground cinnamon * 1/4 teaspoon ground ginger * 1/4 teaspoon ground nutmeg * 1/4 teaspoon salt * 1 teaspoon vanilla extract For the Crisp Topping: * 1 cup all-purpose flour * 1 cup packed light brown sugar * 1 cup rolled oats (not instant) * 1/2 teaspoon ground cinnamon * 1/4 teaspoon salt * 1/2 cup (1 stick) cold unsalted butter, cut into cubesStep-by-Step Instructions
Alright, let’s get started! Follow these easy steps to create the perfect Pumpkin Crisp. 1. **Preheat your oven to 350°F (175°C).** Prepare a 9×13 inch baking dish by lightly greasing it with butter or cooking spray. 2. **In a large bowl, whisk together the pumpkin puree, evaporated milk, granulated sugar, and brown sugar.** Make sure everything is well combined. This will be the base of your creamy, dreamy filling. 3. **Add the eggs, one at a time, whisking well after each addition.** This ensures that the eggs are fully incorporated and helps to create a smooth, even texture. 4. **In a separate small bowl, whisk together the flour, pumpkin pie spice, cinnamon, ginger, nutmeg, and salt.** This spice blend is what gives the filling its warm, comforting flavor. 5. **Gradually add the dry ingredients to the wet ingredients, whisking until just combined.** Be careful not to overmix, as this can result in a tough filling. 6. **Stir in the vanilla extract.** Vanilla enhances all the other flavors and adds a touch of sweetness. 7. **Pour the pumpkin filling into the prepared baking dish.** Spread it evenly so that the crisp topping will have a nice, even base. 8. **Now, let’s make the crisp topping.** In a medium bowl, combine the flour, brown sugar, oats, cinnamon, and salt. Give it a good stir to make sure everything is evenly distributed. 9. **Add the cold butter cubes to the dry ingredients.** Using a pastry blender or your fingertips, cut the butter into the dry ingredients until the mixture resembles coarse crumbs. This is crucial for creating that perfect, crumbly topping. You want to see small pieces of butter throughout the mixture. 10. **Sprinkle the crisp topping evenly over the pumpkin filling.** Make sure to cover the entire surface so that every bite has that satisfying crunch. 11. **Bake for 45-55 minutes, or until the topping is golden brown and the filling is set.** A toothpick inserted into the center of the filling should come out clean. Keep an eye on it – ovens can vary, and you don’t want the topping to burn. 12. **Let the Pumpkin Crisp cool slightly before serving.** This allows the filling to set up a bit more and prevents you from burning your tongue!Serving Suggestions
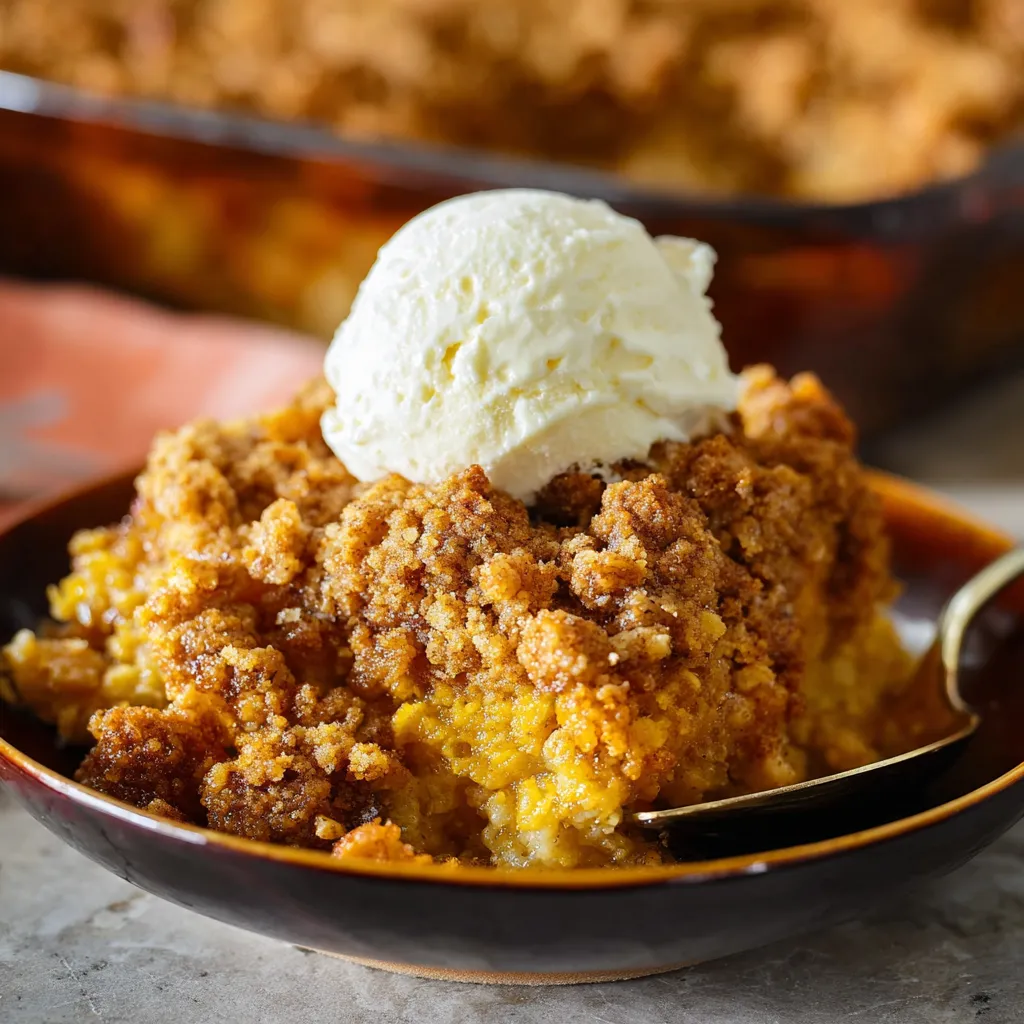
This Pumpkin Crisp is delicious on its own, but it’s even better with a few simple additions. Here are some of my favorite ways to serve it: * **With a scoop of vanilla ice cream:** The cold ice cream melts into the warm crisp, creating a truly decadent experience. * **With a dollop of whipped cream:** Light and airy whipped cream adds a touch of elegance and complements the flavors perfectly. * **Drizzled with caramel sauce:** For an extra touch of sweetness and richness, drizzle some warm caramel sauce over the top. * **With a sprinkle of chopped pecans:** Adds a nutty crunch that complements the flavors of the crisp.Pumpkin Crisp Success Tips
Want to guarantee a perfect Pumpkin Crisp every time? Here are my top tips for success: * **Don’t use pumpkin pie filling.** Make sure you use 100% pure pumpkin puree, not pumpkin pie filling, which already contains spices and sweeteners. * **Use cold butter for the topping.** Cold butter is essential for creating a crumbly, tender topping. If the butter is too soft, the topping will be greasy and dense. * **Don’t overbake the crisp.** Overbaking can result in a dry, tough filling and a burnt topping. Keep an eye on it and remove it from the oven when the topping is golden brown and the filling is set. * **Let it cool slightly before serving.** This allows the filling to set up and prevents it from being too runny. * **Make ahead:** You can assemble the crisp ahead of time and bake it just before serving. This is a great option for parties or holidays.Variations and Substitutions
Want to put your own spin on this Pumpkin Crisp recipe? Here are a few variations and substitutions you can try: * **Add nuts:** Stir chopped pecans, walnuts, or almonds into the crisp topping for added crunch and flavor. * **Use different spices:** Experiment with different spices, such as cardamom, cloves, or allspice, to create a unique flavor profile. * **Add chocolate chips:** Stir chocolate chips into the filling or sprinkle them over the topping for a chocolatey twist. * **Make it gluten-free:** Use gluten-free flour and gluten-free oats to make this recipe gluten-free. * **Use maple syrup:** Substitute maple syrup for some of the sugar in the filling for a more natural sweetness.Make-Ahead and Storage Instructions
This Pumpkin Crisp is a great make-ahead dessert. You can assemble the entire crisp (both filling and topping) and store it in the refrigerator for up to 24 hours before baking. When you’re ready to bake, simply remove it from the refrigerator and bake as directed. Leftover Pumpkin Crisp can be stored in the refrigerator for up to 3 days. To reheat, simply microwave it for a few seconds or bake it in a preheated oven at 350°F (175°C) until warmed through.Troubleshooting Tips
Even with the best recipes, things can sometimes go wrong. Here are a few common problems and how to fix them: * **Topping is burning:** If the topping starts to brown too quickly, tent the baking dish with aluminum foil to prevent it from burning. * **Filling is too runny:** Make sure you’re using 100% pure pumpkin puree and not pumpkin pie filling. Also, be sure to measure the ingredients accurately. * **Topping is too dry:** Add a tablespoon or two of melted butter to the topping to moisten it. * **Filling is too sweet:** Reduce the amount of sugar in the filling to your liking.More Delicious Pumpkin Recipes to Explore
If you’re a pumpkin lover like me, you’re always on the lookout for new and exciting ways to enjoy this versatile ingredient. Here are a few more of my favorite pumpkin recipes that I think you’ll love: * For a quick and easy breakfast treat, try my Pumpkin French Toast. It’s the perfect way to start a cozy fall morning. * If you’re craving something sweet and comforting, you can’t go wrong with Pumpkin Cookies with Cream Cheese Frosting. They are soft, chewy, and topped with a tangy cream cheese frosting. * For a show-stopping dessert that’s sure to impress, try my Pumpkin Spice Cake Roll. It’s surprisingly easy to make and always a crowd-pleaser. * For a classic fall treat, you should try my Pumpkin Bread. It’s moist, flavorful, and perfect for snacking or gifting. * If you’re looking for something a little more decadent, try my Pumpkin Bread with Cream Cheese Frosting. The creamy frosting is the perfect complement to the spiced pumpkin bread. * And if you’re in the mood for something completely different, be sure to check out my Apple Crisp Mini Cheesecakes. They are the perfect blend of apple crisp and cheesecake, and they are sure to be a hit at your next gathering.Why Pumpkin is the Perfect Fall Flavor
Let’s be honest, is it *really* fall without pumpkin? There’s something about the warm, earthy flavor of pumpkin that just screams autumn. But beyond its delicious taste, pumpkin is also incredibly versatile and packed with nutrients. * **Versatility:** From sweet treats to savory dishes, pumpkin can be used in so many different ways. It’s delicious in pies, breads, soups, stews, and even pasta sauces. * **Nutrient-Rich:** Pumpkin is a good source of vitamins A and C, as well as fiber and antioxidants. It’s a healthy and delicious way to add some extra nutrients to your diet. * **Comfort Food:** There’s just something inherently comforting about pumpkin. Its warm, familiar flavor evokes feelings of nostalgia and coziness. So, the next time you’re looking for a delicious and versatile ingredient to add to your fall recipes, don’t forget about pumpkin!Conclusion: Your Pumpkin Crisp Adventure Awaits!
And there you have it – the perfect Pumpkin Crisp recipe! I hope you’re feeling confident and excited to give this recipe a try. Remember, baking should be fun and relaxing, so don’t be afraid to experiment and put your own spin on it. Get ready to impress your friends and family with this show-stopping dessert. Happy baking, and enjoy every delicious bite!Can I use pumpkin pie filling instead of pumpkin puree?
No, the recipe specifically calls for 100% pure pumpkin puree, not pumpkin pie filling, as pumpkin pie filling already contains spices and sweeteners that will alter the flavor of the crisp.
How can I prevent the crisp topping from burning while baking?
If the topping starts to brown too quickly, tent the baking dish with aluminum foil to prevent it from burning.
Can I prepare the pumpkin crisp ahead of time?
Yes, you can assemble the entire crisp (both filling and topping) and store it in the refrigerator for up to 24 hours before baking. When ready, remove from the refrigerator and bake as directed.
What makes this pumpkin crisp recipe special?
This pumpkin crisp stands out due to its balanced filling of pumpkin puree and warm spices, a buttery, oat-filled topping for a signature crunch, and its ease of preparation, making it suitable for beginner bakers.
Perfect Pumpkin Crisp
Equipment
- 9×13 inch baking dish
- Large bowl
- Medium bowl
- Small bowl
- Whisk
- Pastry blender or fingertips
- Measuring cups and spoons
- Oven
- Toothpick
Ingredients
- 1 cup granulated sugar
- ½ cup packed light brown sugar
- 2 large eggs
- 2 tablespoons all-purpose flour
- 1 teaspoon pumpkin pie spice
- ½ teaspoon ground cinnamon
- ¼ teaspoon ground ginger
- ¼ teaspoon ground nutmeg
- ¼ teaspoon salt
- 1 teaspoon vanilla extract
- 1 cup all-purpose flour
- 1 cup packed light brown sugar
- 1 cup rolled oats not instant
- ½ teaspoon ground cinnamon
- ¼ teaspoon salt
Instructions
- Preheat your oven to 350°F (175°C). Lightly grease a 9×13 inch baking dish with butter or cooking spray.
- In a large bowl, whisk together the pumpkin puree, evaporated milk, granulated sugar, and brown sugar until well combined.
- Add the eggs, one at a time, whisking well after each addition to ensure they are fully incorporated.
- In a separate small bowl, whisk together the flour, pumpkin pie spice, cinnamon, ginger, nutmeg, and salt.
- Gradually add the dry ingredients to the wet ingredients, whisking until just combined. Be careful not to overmix.
- Stir in the vanilla extract.
- Pour the pumpkin filling into the prepared baking dish and spread it evenly.
- In a medium bowl, combine the flour, brown sugar, oats, cinnamon, and salt for the crisp topping. Stir to combine.
- Add the cold butter cubes to the dry ingredients. Using a pastry blender or your fingertips, cut the butter into the dry ingredients until the mixture resembles coarse crumbs.
- Sprinkle the crisp topping evenly over the pumpkin filling, covering the entire surface.
- Bake for 45-55 minutes, or until the topping is golden brown and the filling is set. A toothpick inserted into the center of the filling should come out clean.
- Let the Pumpkin Crisp cool slightly before serving.
