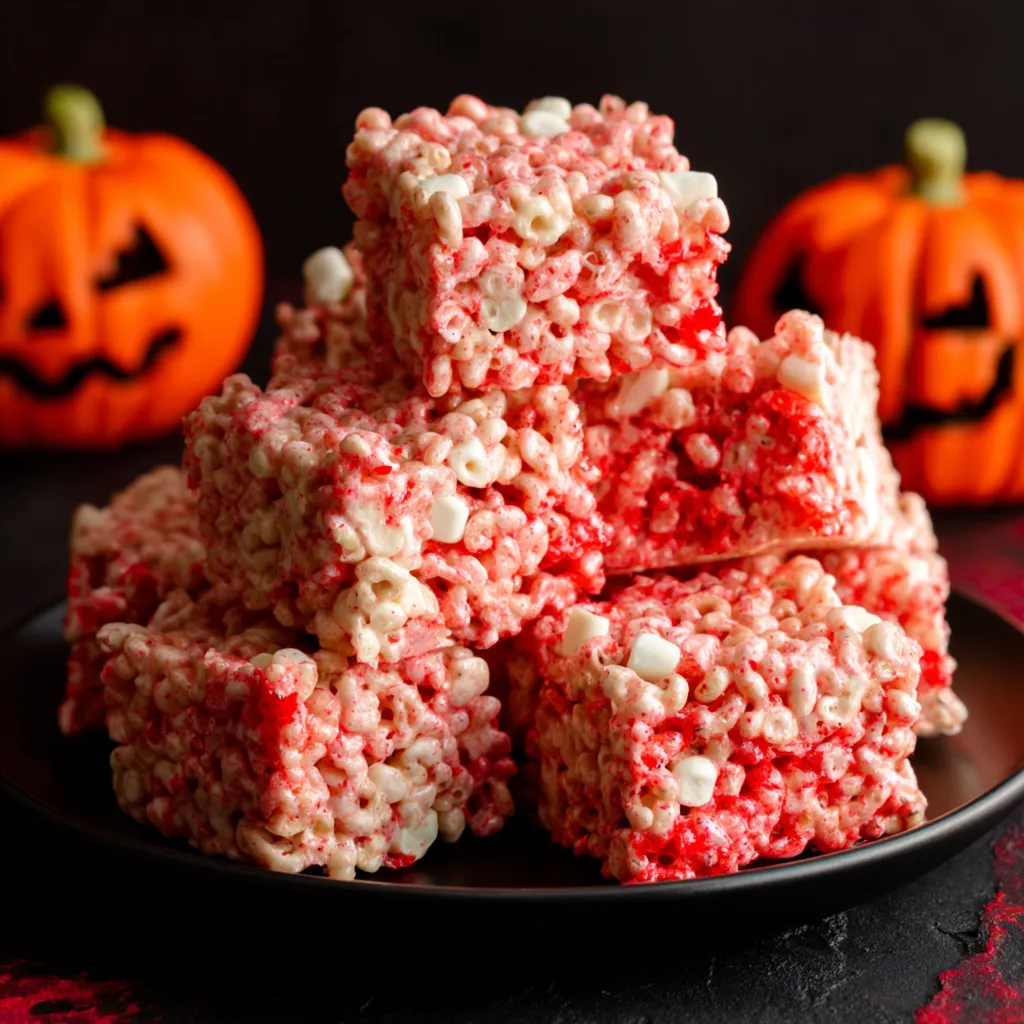
Halloween is just around the corner, and what better way to celebrate than with a spooky treat that’s both delicious and visually stunning? Ditch the same old candy and get ready to amaze your friends and family with these Spooky Marshmallow Rice Krispies Halloween Brains! They look incredibly realistic (in a creepy, fun way!), but they are surprisingly simple to make. Get ready to unleash your inner mad scientist and create a show-stopping dessert that everyone will be talking about.
Gathering Your Ghoulish Ingredients
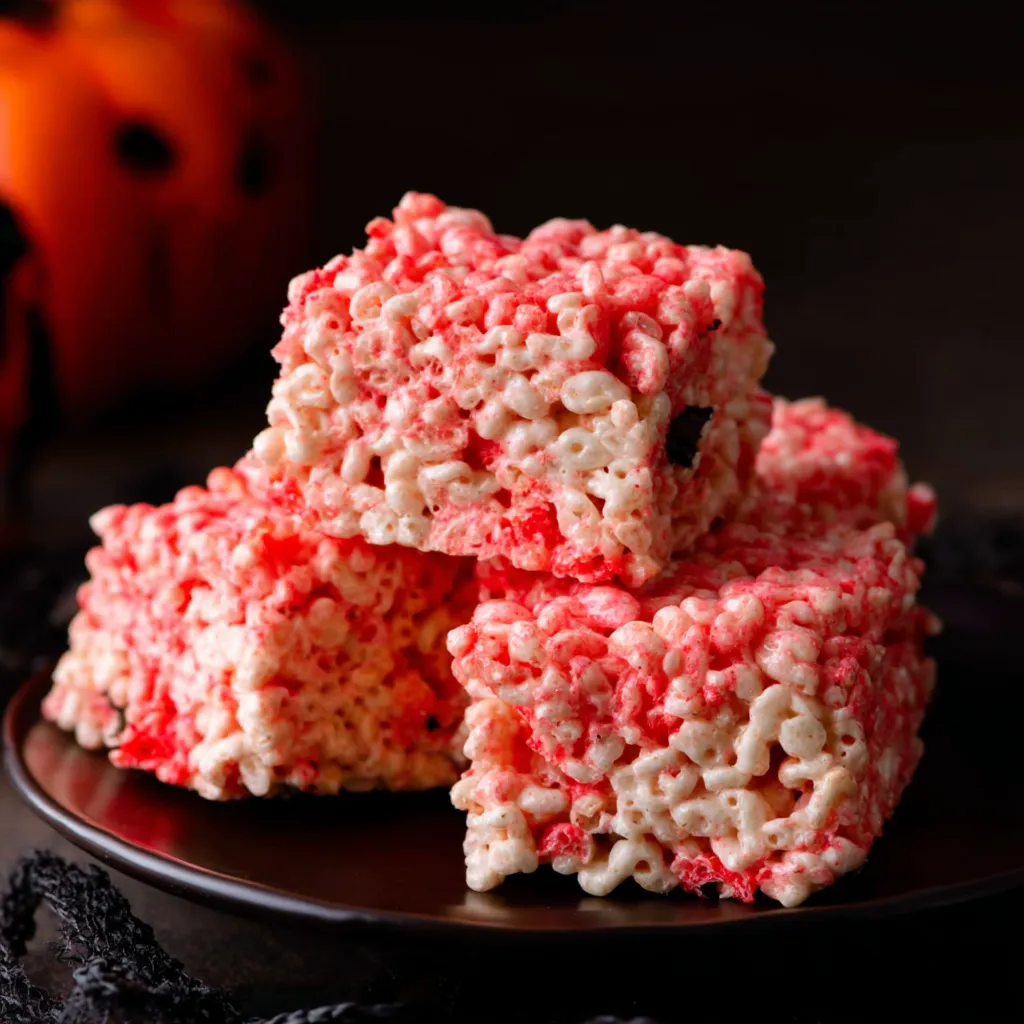
Before we embark on our brainy adventure, let’s make sure we have all the necessary ingredients on hand. Don’t worry, you probably have most of these in your pantry already!
For the Rice Krispies Brains:
- Rice Krispies Cereal: 6 cups – the foundation of our brains!
- Marshmallows: 10 oz (about 40 large) – for that gooey, bind-it-all-together goodness.
- Butter: 4 tablespoons – unsalted, for melting and adding richness.
- Pink Food Coloring: Gel or liquid – for achieving that realistic brainy hue.
- Red Food Coloring: Gel or liquid – for the extra “bloody” effect.
For the Extra Spooky Touches (Optional):
- Red Gel Icing: For outlining and adding veins.
- Edible Glitter: For a touch of eerie shimmer.
- Candy Eyeballs: Because why not?
Selecting Your Tools of Terror
Having the right equipment can make all the difference in crafting these brainy delights! Here’s what I recommend:
- Large Pot or Dutch Oven: For melting the marshmallows and mixing everything together.
- 9×13 Inch Baking Pan: To shape the Rice Krispies before sculpting.
- Parchment Paper: For lining the baking pan and preventing sticking.
- Mixing Spoon or Spatula: To stir and combine the ingredients.
- Plastic Wrap: To help shape the brains and keep your hands clean.
- Kitchen Knife: For gently cutting and shaping the brains.
Step-by-Step to Spooktacular Brains
Now for the fun part! Follow these instructions carefully, and you’ll have a batch of brainy treats in no time. Remember, don’t be afraid to get creative and add your own personal touch!
Preparing the Rice Krispies Mixture:
- Line your 9×13 inch baking pan with parchment paper. This prevents sticking and makes cleanup a breeze!
- In a large pot or Dutch oven, melt the butter over low heat.
- Add the marshmallows and stir constantly until completely melted. Be patient and keep stirring to prevent burning!
- Remove the pot from the heat. This is important! We don’t want to cook the Rice Krispies.
- Add the pink food coloring a few drops at a time, stirring until you reach your desired brainy pink hue. Remember, you can always add more, but you can’t take it away! A little red food coloring can deepen the shade, if desired.
- Add the Rice Krispies cereal and gently fold until evenly coated. Make sure all the cereal is coated with the marshmallow mixture.
Sculpting the Brains:
- Pour the Rice Krispies mixture into the prepared baking pan and press it down firmly and evenly.
- Let the mixture cool slightly for about 10-15 minutes. This will make it easier to handle.
- Once cooled slightly, gently cut out brain-sized portions using a kitchen knife. I find rectangles about 3×4 inches work well.
- Now for the fun part! Using your hands (covered with plastic wrap to prevent sticking!), gently shape each portion into a brain shape. Don’t worry about being perfect – brains aren’t perfectly symmetrical anyway! Form two rounded lobes and a slight indentation down the middle.
- Place the shaped brains on a parchment-lined baking sheet.
Adding the Spooky Details:
- Use red gel icing to outline the brains, creating a vein-like effect. Don’t be afraid to get creative with the vein patterns!
- If desired, sprinkle a little edible glitter over the brains for an eerie shimmer.
- For an extra touch of spookiness, carefully place candy eyeballs on the brains.
- Let the brains set completely for at least 30 minutes before serving. This will allow the icing to harden and the brains to hold their shape.
Troubleshooting Your Brainy Creations
Sometimes, even the best plans can go awry. Here are a few common issues you might encounter and how to solve them:
- Rice Krispies are too hard: You probably cooked the marshmallows for too long. Next time, make sure to melt them over low heat and remove the pot from the heat before adding the cereal.
- Rice Krispies are too sticky: You might have used too many marshmallows or not enough Rice Krispies. Make sure to use the correct proportions of ingredients.
- Brains are falling apart: The mixture wasn’t pressed firmly enough into the baking pan. Make sure to press it down firmly and evenly. Also, letting them cool completely before shaping is key.
Secrets to the Spookiest Brains Ever!
Want to take your Spooky Marshmallow Rice Krispies Halloween Brains to the next level? Here are a few extra tips and tricks I’ve learned over the years:
- Use Fresh Marshmallows: Fresh marshmallows melt more smoothly and result in a better texture.
- Don’t Overcook the Marshmallows: Overcooked marshmallows become hard and brittle. Melt them over low heat and stir constantly until just melted.
- Wet Your Hands: Lightly wetting your hands with water (or coating them with a small amount of butter) before shaping the brains will prevent the Rice Krispies mixture from sticking.
- Add a Flavor Boost: A teaspoon of vanilla extract or almond extract can add a delicious flavor to the Rice Krispies mixture.
- Get Creative with the Decoration: Use different colors of food coloring, sprinkles, or candy to create unique and spooky brain designs.
Variations for Every Ghoul
Not a fan of plain Rice Krispies? No problem! Here are a few variations to suit every taste:
- Chocolate Brains: Add 1/2 cup of cocoa powder to the Rice Krispies mixture for a chocolatey treat.
- Peanut Butter Brains: Add 1/2 cup of peanut butter to the Rice Krispies mixture for a nutty flavor.
- Caramel Brains: Drizzle caramel sauce over the finished brains for a sweet and gooey delight.
More Treats to Haunt Your Halloween
Looking for even more spooky and delicious Halloween recipes? Check out some of my other favorites! If you’re a fan of fall flavors, you absolutely HAVE to try these APPLE CIDER CHEESECAKE COOKIES! They’re bursting with apple cider goodness and creamy cheesecake filling. And for another pumpkin treat, don’t miss these PUMPKIN CREAM CHEESE COOKIES – they’re the perfect fall bite. For the adults, you can’t go wrong with a VAMPIRE BITE WINE SHAKE. It’s a festive and delicious way to celebrate Halloween! And if you’re looking for more cookie goodness, these FALL CHEESECAKE COOKIE BOMBS are always a huge hit, as are these GOOEY PUMPKIN S’MORES COOKIES. Finally, for a classic pumpkin flavor, you will not be disappointed with these PUMPKIN CINNAMON COOKIES.
Serving Suggestions for Maximum Scare Factor
Presentation is key when it comes to Halloween treats! Here are a few ideas for serving your Spooky Marshmallow Rice Krispies Halloween Brains:
- Brain Platter: Arrange the brains on a platter and surround them with gummy worms, candy bones, and other spooky treats.
- Brain Cupcakes: Place a brain on top of each cupcake for a spooky and delicious dessert.
- Brain Jars: Layer the brains in jars with whipped cream, chocolate shavings, and other toppings for a fun and interactive dessert.
So, there you have it! Your complete guide to making Spooky Marshmallow Rice Krispies Halloween Brains. With a little bit of effort and creativity, you can create a truly unforgettable Halloween treat that will impress your friends and family. Get ready to have a brainy good time!
What can I do if my Rice Krispies treats are too hard?
If your Rice Krispies are too hard, you likely overcooked the marshmallows. Next time, melt them over low heat and remove the pot from the heat before adding the cereal.
What ingredients are needed to make the Rice Krispies brains?
You’ll need Rice Krispies cereal, marshmallows, butter, pink food coloring, and red food coloring. Red gel icing, edible glitter, and candy eyeballs are optional additions for spookier details.
How do I prevent the Rice Krispies mixture from sticking to my hands when shaping the brains?
Lightly wet your hands with water, or coat them with a small amount of butter before shaping the brains. You can also use plastic wrap.
Are there any variations I can make to the Rice Krispies brains recipe?
Yes! You can add 1/2 cup of cocoa powder for chocolate brains, 1/2 cup of peanut butter for peanut butter brains, or drizzle caramel sauce over the finished brains for a caramel delight.
Spooky Marshmallow Rice Krispies Halloween Brains
Equipment
- 9×13 inch baking pan
- Large pot or Dutch oven
- Mixing spoon or spatula
- Parchment paper
- Kitchen knife
- Plastic Wrap
- Baking Sheet
- Measuring cups and spoons
- Small bowls for decorations
- Cooling rack (optional)
Ingredients
- 6 cups Rice Krispies cereal
- 10 oz marshmallows about 40 large
- 4 tablespoons unsalted butter
- Pink food coloring gel or liquid
- Red food coloring gel or liquid
- Red gel icing
- Edible glitter optional
- Candy eyeballs optional
- Cooking spray for plastic wrap, optional
Instructions
- Line a 9×13 inch baking pan with parchment paper.
- In a large pot or Dutch oven, melt the butter over low heat.
- Add the marshmallows and stir constantly until completely melted. Be patient and keep stirring to prevent burning.
- Remove the pot from the heat.
- Add the pink food coloring a few drops at a time, stirring until you reach your desired brainy pink hue. Add red food coloring to deepen the shade, if desired.
- Add the Rice Krispies cereal and gently fold until evenly coated. Make sure all the cereal is coated with the marshmallow mixture.
- Pour the Rice Krispies mixture into the prepared baking pan and press it down firmly and evenly.
- Let the mixture cool slightly for about 10-15 minutes.
- Once cooled slightly, gently cut out brain-sized portions using a kitchen knife (approximately 3×4 inches).
- Cover your hands with plastic wrap. Lightly spray the plastic wrap with cooking spray for less sticking.
- Shape each portion into a brain shape. Form two rounded lobes and a slight indentation down the middle.
- Place the shaped brains on a parchment-lined baking sheet.
- Use red gel icing to outline the brains, creating a vein-like effect.
- Sprinkle a little edible glitter over the brains for an eerie shimmer, if desired.
- Carefully place candy eyeballs on the brains, if desired.
- Let the brains set completely for at least 30 minutes before serving.
