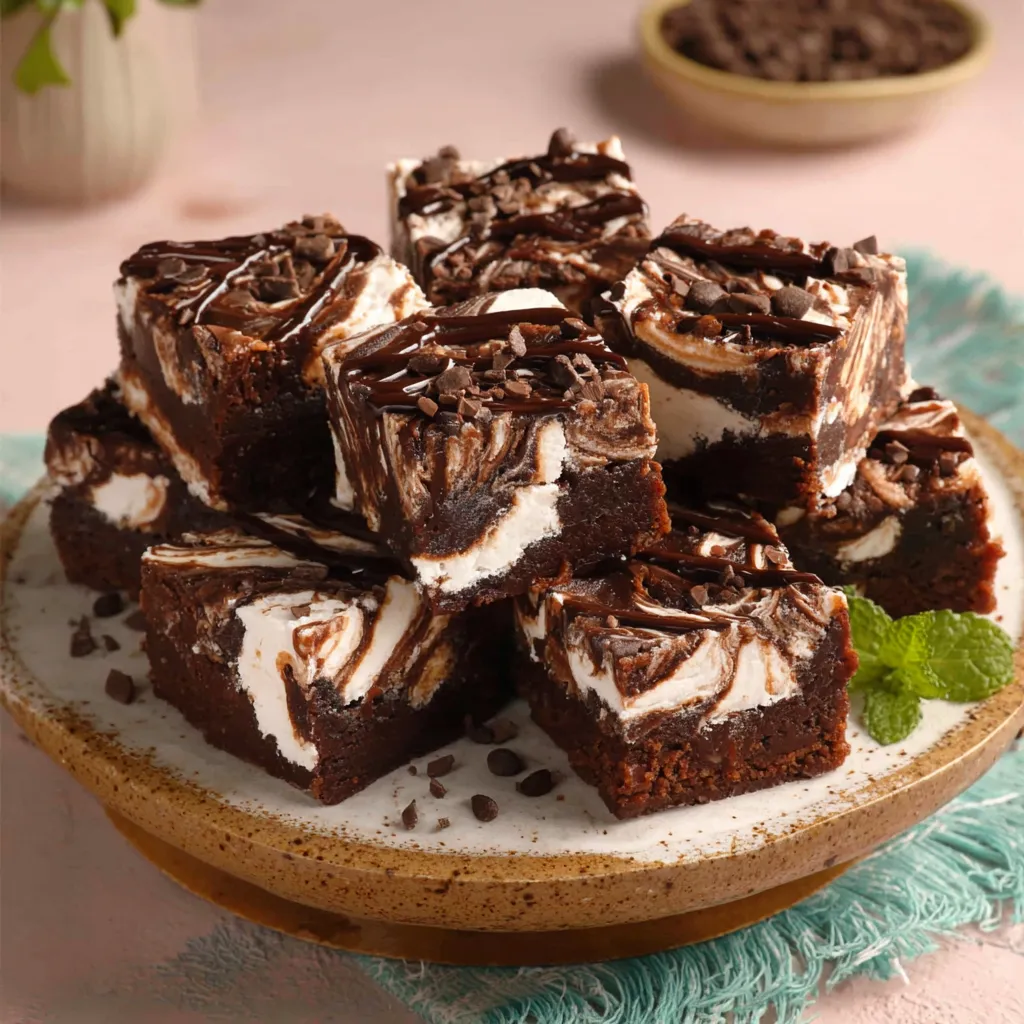
I remember my grandmother always making fudge around the holidays, and it was the absolute highlight of every Christmas gathering. There was always a mad dash to grab a piece before it was all gone, and the memory of that rich, chocolatey goodness still makes my mouth water today. Now, I’ve taken that classic fudge and elevated it with a whimsical twist: Marshmallow Swirl Fudge! Today, I’m sharing all my secrets for the most amazing Marshmallow Swirl Fudge you’ll ever make!
Unlocking the Secrets to Perfect Marshmallow Swirl Fudge
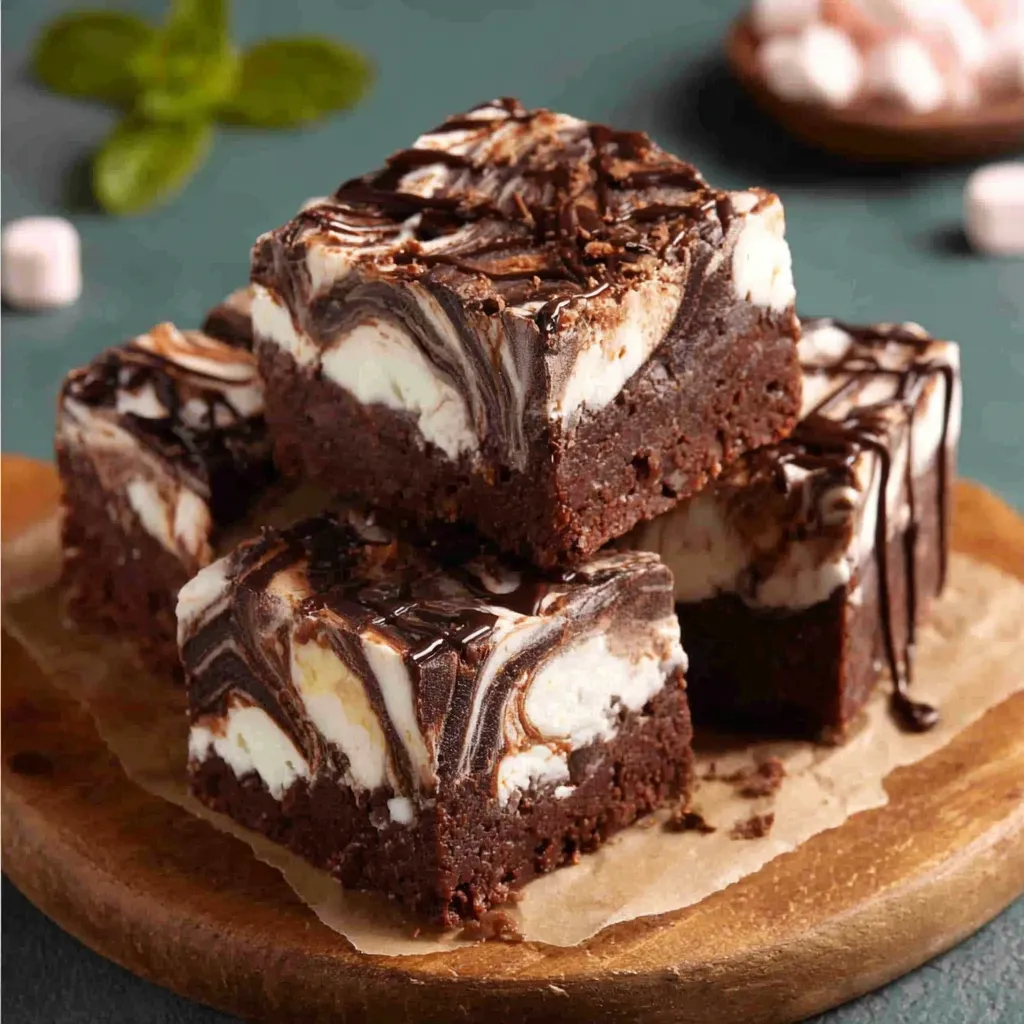
Okay, my friends, let’s talk about fudge! Not just any fudge, but *the* fudge – the one that’s so creamy, so decadent, and so visually stunning that it steals the show every single time. We’re diving headfirst into the world of Marshmallow Swirl Fudge, and I promise, even if you’ve never made fudge before, you can totally nail this recipe. I’m going to walk you through every step, sharing all my tips and tricks along the way. Get ready to impress your family and friends (or just yourself – no judgment here!) with this unbelievably delicious treat.
Why Marshmallow Swirl Fudge is the ULTIMATE Treat
So, why am I so obsessed with Marshmallow Swirl Fudge? Well, besides the obvious (it’s fudge!), it’s the perfect combination of textures and flavors. The rich, smooth chocolate fudge is perfectly complemented by the soft, pillowy swirls of marshmallow. It’s sweet, but not *too* sweet, and the visual appeal is just undeniable. Think of it as a blank canvas for your creativity – you can customize it with different extracts, nuts, or even sprinkles to make it your own signature creation. Plus, it’s surprisingly easy to make, which is always a win in my book!
The Marshmallow Swirl Fudge Recipe: Step-by-Step
Alright, let’s get down to business! Here’s the recipe, broken down into simple, easy-to-follow steps. Don’t be intimidated by the length – I’m just being thorough to ensure your success. Trust me, it’s easier than you think!
Ingredients You’ll Need:
- 3 cups granulated sugar
- ¾ cup (1 ½ sticks) unsalted butter, cut into pieces
- ⅔ cup evaporated milk
- 12 ounces semi-sweet chocolate chips
- 7 ounces marshmallow creme (one jar)
- 1 teaspoon vanilla extract
- Pinch of salt
Equipment You’ll Need:
- 9×13 inch baking pan
- Parchment paper
- Heavy-bottomed saucepan
- Wooden spoon or heat-resistant spatula
- Measuring cups and spoons
- Microwave-safe bowl (optional, for melting extra chocolate for drizzling)
Step-by-Step Instructions:
- Prepare the Pan: Line your 9×13 inch baking pan with parchment paper, leaving some overhang on the sides. This will make it super easy to lift the fudge out later.
- Combine Sugar, Butter, and Milk: In a heavy-bottomed saucepan, combine the sugar, butter, and evaporated milk. Using a heavy-bottomed pan is *crucial* to prevent scorching.
- Cook Over Medium Heat: Place the saucepan over medium heat and stir constantly until the butter is melted and the sugar is dissolved. This should take about 5-7 minutes.
- Bring to a Boil: Once the sugar is dissolved, bring the mixture to a full, rolling boil, stirring constantly. A “rolling boil” means the mixture is bubbling vigorously and you can’t stir it down.
- Boil for 5 Minutes: Continue boiling for *exactly* 5 minutes, stirring constantly. Use a timer! This is a critical step for achieving the right consistency. The mixture will thicken slightly.
- Remove from Heat: Immediately remove the saucepan from the heat.
- Add Chocolate Chips: Add the semi-sweet chocolate chips to the hot mixture.
- Stir Until Melted and Smooth: Stir continuously until the chocolate chips are completely melted and the mixture is smooth and glossy. This might take a minute or two. Be patient and keep stirring!
- Add Vanilla and Salt: Stir in the vanilla extract and a pinch of salt. The salt helps to balance the sweetness and enhance the chocolate flavor.
- Pour Half of the Fudge into the Pan: Pour half of the fudge mixture into the prepared baking pan and spread it evenly.
- Drop Marshmallow Creme by Spoonfuls: Drop spoonfuls of marshmallow creme over the top of the fudge layer.
- Pour Remaining Fudge Over Marshmallow: Gently pour the remaining fudge mixture over the marshmallow creme.
- Swirl the Marshmallow: Use a knife or skewer to swirl the marshmallow creme into the fudge. Don’t over-swirl, or the fudge will become one uniform color. You want to create beautiful, distinct swirls. Think of it like creating marble art!
- Optional: Drizzle with Extra Chocolate: For an extra touch of decadence, melt a small amount of chocolate chips in the microwave and drizzle it over the top of the fudge.
- Chill: Cover the pan with plastic wrap and chill in the refrigerator for at least 2 hours, or preferably overnight, to allow the fudge to set completely.
- Cut and Serve: Once the fudge is firm, lift it out of the pan using the parchment paper overhang. Cut it into squares and serve. Enjoy!
Success Tips for Perfect Fudge Every Time
Okay, you’ve got the recipe, but here are a few extra tips that will guarantee your Marshmallow Swirl Fudge is a resounding success. These are the “secrets” that separate good fudge from *amazing* fudge!
- Use a Heavy-Bottomed Saucepan: I cannot stress this enough! A heavy-bottomed saucepan distributes heat more evenly, preventing the fudge from scorching, which can ruin the flavor and texture.
- Stir Constantly While Boiling: This is another non-negotiable. Stirring prevents the fudge from sticking to the bottom of the pan and burning. Set a timer and dedicate your full attention to stirring for those 5 minutes.
- Don’t Overcook: Overcooking the fudge will result in a dry, crumbly texture. Stick to the 5-minute boiling time, and don’t be tempted to cook it longer.
- Use Quality Chocolate: The quality of your chocolate will directly impact the flavor of your fudge. I recommend using a good-quality semi-sweet chocolate for the best results.
- Chill Completely: Patience is key! Don’t try to cut the fudge before it’s fully chilled and set. This will result in a messy, sticky situation. Let it chill overnight for the best texture.
Variations to Make it Your Own
One of the best things about Marshmallow Swirl Fudge is how easily you can customize it to your liking. Here are a few ideas to get your creative juices flowing:
- Add Nuts: Stir in chopped walnuts, pecans, or almonds for added texture and flavor.
- Use Different Extracts: Experiment with different extracts like peppermint, almond, or even coffee extract.
- Add Sprinkles: Sprinkle the top of the fudge with festive sprinkles for a fun and colorful touch.
- Make it Minty: Add a few drops of peppermint extract and some crushed peppermint candies for a festive holiday treat.
- Peanut Butter Swirl: Instead of marshmallow creme, use peanut butter for a delicious peanut butter swirl fudge.
More Decadent Dessert Ideas
If you’re looking for more delicious dessert ideas, I’ve got you covered! Here are a few of my other favorite recipes that are guaranteed to satisfy your sweet tooth. And remember, just like this Marshmallow Swirl Fudge, they’re all designed to be easy and approachable for home bakers of all skill levels.
For a patriotic and fun treat, check out my FIREWORKS OREO CHEESECAKE BARS. They’re perfect for summer celebrations and are always a crowd-pleaser. Or, if you’re craving something with a campfire vibe, you absolutely have to try my NO-BAKE S’MORES BAR BLISS. It’s a quick and easy way to enjoy the classic s’mores flavor without having to light a fire.
And if you are looking for something easy and fruity you need to try the Strawberry Cheesecake Dump Cake. It is so easy and so incredibly delicious. A dessert that everyone will enjoy! Looking for cookies instead? My Peanut Butter Brownie Swirl Cookies are irresistible. The combination of peanut butter and brownie flavors is simply divine, and the swirl pattern makes them look extra special. Want something more elegant and impressive? Then be sure to try my Chocolate Swirl Cheesecake. It’s a showstopper that’s surprisingly easy to make!
Troubleshooting Tips
Even with the best recipes and instructions, sometimes things don’t go exactly as planned. Here are a few common fudge-making problems and how to solve them:
- Fudge is Grainy: This can happen if the sugar doesn’t fully dissolve or if the fudge is overcooked. Make sure to stir constantly while cooking and stick to the recommended boiling time. A tiny splash of lemon juice while cooking can sometimes help prevent graininess.
- Fudge is Too Soft: This usually means the fudge wasn’t cooked long enough or the ratio of ingredients was off. Make sure to boil the fudge for the full 5 minutes and use accurate measurements.
- Fudge is Too Hard: This usually means the fudge was overcooked. Make sure to stick to the recommended boiling time and use a heavy-bottomed saucepan to prevent scorching.
- Marshmallow Isn’t Swirling Properly: If the marshmallow is too thick, try warming it slightly in the microwave before dropping it onto the fudge. This will make it easier to swirl.
Make-Ahead & Storage Instructions
Marshmallow Swirl Fudge is a great make-ahead dessert, which is perfect for busy holidays or parties. Here’s how to store it and even freeze it for later:
- Storage: Store the fudge in an airtight container at room temperature for up to 1 week, or in the refrigerator for up to 2 weeks.
- Freezing: For longer storage, you can freeze the fudge. Wrap it tightly in plastic wrap and then place it in a freezer-safe bag or container. It can be frozen for up to 2-3 months. Thaw it in the refrigerator overnight before serving.
Final Thoughts: Your Fudge Journey Awaits
So there you have it – everything you need to know to make the most incredible Marshmallow Swirl Fudge. I know it might seem like a lot of steps, but I promise it’s worth the effort. The look on people’s faces when they taste this decadent treat is priceless, and knowing that you created something so delicious from scratch is incredibly rewarding. Don’t be afraid to experiment with different flavors and add-ins to make it your own signature creation. Now go forth, my friends, and conquer the world of fudge! Happy baking!
What makes using a heavy-bottomed saucepan so important for this fudge recipe?
A heavy-bottomed saucepan distributes heat more evenly, which prevents the fudge from scorching and ruining the flavor and texture.
How long should I boil the fudge mixture, and why is it important to be precise?
Boil the fudge mixture for exactly 5 minutes, stirring constantly. This is a critical step for achieving the right consistency; undercooking will result in soft fudge, while overcooking will make it dry and crumbly.
How do I store the Marshmallow Swirl Fudge to keep it fresh?
You can store the fudge in an airtight container at room temperature for up to 1 week, or in the refrigerator for up to 2 weeks. For longer storage, you can freeze it for up to 2-3 months, wrapped tightly in plastic wrap and placed in a freezer-safe bag.
What can I do if the marshmallow creme is too thick to swirl easily?
If the marshmallow creme is too thick, try warming it slightly in the microwave before dropping it onto the fudge. This will make it easier to swirl.
Easiest Marshmallow Swirl Fudge
Equipment
- 9×13 inch baking pan
- Parchment paper
- Heavy-bottomed saucepan
- Wooden spoon or heat-resistant spatula
- Measuring cups and spoons
- Microwave-safe bowl (optional, for melting extra chocolate)
- Timer
- Knife or skewer
- Plastic Wrap
Ingredients
- 3 cups granulated sugar
- ¾ cup 1 ½ sticks
- ⅔ cup evaporated milk
- 12 ounces semi-sweet chocolate chips
- 7 ounces marshmallow creme one jar
- 1 teaspoon vanilla extract
- Pinch of salt
- Optional: 2 ounces semi-sweet chocolate chips for drizzling
Instructions
- Prepare the Pan: Line your 9×13 inch baking pan with parchment paper, leaving some overhang on the sides.
- Combine Sugar, Butter, and Milk: In a heavy-bottomed saucepan, combine the sugar, butter, and evaporated milk.
- Cook Over Medium Heat: Place the saucepan over medium heat and stir constantly until the butter is melted and the sugar is dissolved (5-7 minutes).
- Bring to a Boil: Once the sugar is dissolved, bring the mixture to a full, rolling boil, stirring constantly.
- Boil for 5 Minutes: Continue boiling for exactly 5 minutes, stirring constantly. Use a timer!
- Remove from Heat: Immediately remove the saucepan from the heat.
- Add Chocolate Chips: Add the semi-sweet chocolate chips to the hot mixture.
- Stir Until Melted and Smooth: Stir continuously until the chocolate chips are completely melted and the mixture is smooth and glossy.
- Add Vanilla and Salt: Stir in the vanilla extract and a pinch of salt.
- Pour Half of the Fudge into the Pan: Pour half of the fudge mixture into the prepared baking pan and spread it evenly.
- Drop Marshmallow Creme by Spoonfuls: Drop spoonfuls of marshmallow creme over the top of the fudge layer.
- Pour Remaining Fudge Over Marshmallow: Gently pour the remaining fudge mixture over the marshmallow creme.
- Swirl the Marshmallow: Use a knife or skewer to swirl the marshmallow creme into the fudge. Don’t over-swirl.
- Optional: Drizzle with Extra Chocolate: Melt a small amount of chocolate chips in the microwave and drizzle it over the top of the fudge.
- Chill: Cover the pan with plastic wrap and chill in the refrigerator for at least 2 hours, or preferably overnight, to allow the fudge to set completely.
- Cut and Serve: Once the fudge is firm, lift it out of the pan using the parchment paper overhang. Cut it into squares and serve.
