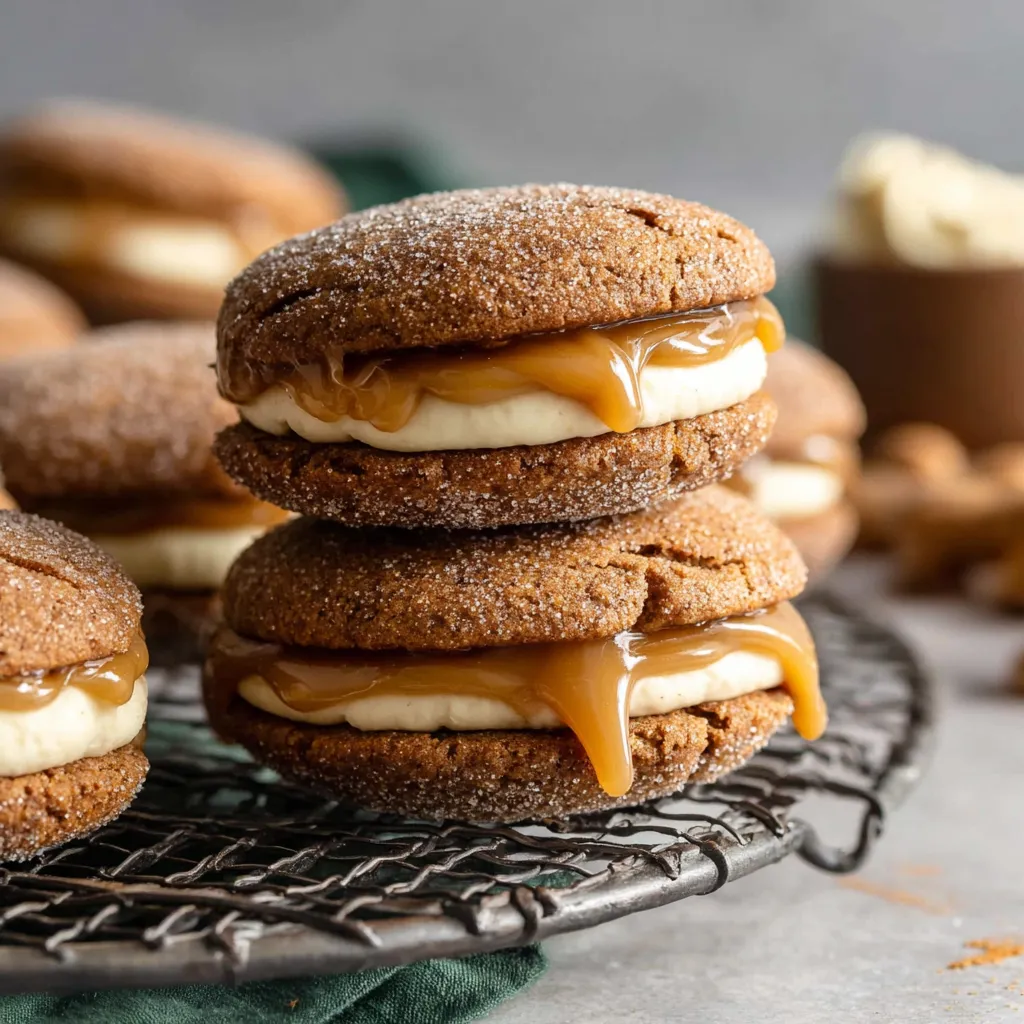
Fall is here, and what better way to celebrate than with a treat that embodies all the cozy flavors of the season? Tired of the same old pumpkin spice everything? Let’s shake things up with Apple Cider Whoopie Pies- Fall’s Best Treat! These delightful, hand-held cakes are soft, spiced, and filled with a luscious cream cheese frosting that will make your taste buds sing. Get ready to bake your way to autumn bliss with this easy-to-follow recipe that’s guaranteed to impress.
Gathering Your Heavenly Ingredients

Here is everything you’ll need to create these little pockets of fall joy:
For the Apple Cider Cake Layers:
- 2 ½ cups all-purpose flour: The backbone of our tender cakes.
- 1 teaspoon baking soda: For lift and lightness.
- 1 teaspoon baking powder: Works with the baking soda for the perfect rise.
- 1 teaspoon ground cinnamon: Adds warmth and spice.
- ½ teaspoon ground nutmeg: A touch of nutty goodness.
- ½ teaspoon ground ginger: For a subtle kick.
- ½ teaspoon salt: Balances the sweetness and enhances the flavors.
- ¾ cup (1 ½ sticks) unsalted butter, softened: Creates a moist and rich texture.
- 1 ½ cups granulated sugar: For sweetness and structure.
- 2 large eggs: Binds the ingredients together.
- 1 cup apple cider, reduced to ½ cup: The star of the show, concentrated for maximum flavor.
- 1 teaspoon vanilla extract: Enhances the overall flavor profile.
For the Cream Cheese Filling:
- 8 ounces cream cheese, softened: The creamy base of our decadent filling.
- ½ cup (1 stick) unsalted butter, softened: Adds richness and stability.
- 3-4 cups powdered sugar: For sweetness and structure. Adjust to your liking.
- 1 teaspoon vanilla extract: Complements the cream cheese flavor.
- 2-4 tablespoons milk or heavy cream: To achieve the desired consistency.
Step-by-Step to Apple Cider Whoopie Pie Perfection
Let’s get down to the fun part! Don’t be intimidated; I’ll guide you through every step.
Making the Apple Cider Cake Layers:
- Preheat your oven to 375°F (190°C). Line two baking sheets with parchment paper or silicone baking mats. This is crucial for easy release and prevents sticking!
- In a medium bowl, whisk together the flour, baking soda, baking powder, cinnamon, nutmeg, ginger, and salt. Make sure everything is evenly distributed for consistent flavor.
- In a large bowl, cream together the softened butter and granulated sugar until light and fluffy. This usually takes about 3-5 minutes with an electric mixer. Don’t rush this step; it’s important for the texture.
- Beat in the eggs one at a time, then stir in the reduced apple cider and vanilla extract. The batter might look a little curdled at this point, but don’t worry; it will come together when you add the dry ingredients.
- Gradually add the dry ingredients to the wet ingredients, mixing until just combined. Be careful not to overmix, as this can lead to tough cakes.
- Drop rounded tablespoons of batter onto the prepared baking sheets, leaving about 2 inches between each. They will spread a little as they bake.
- Bake for 8-10 minutes, or until the edges are lightly golden and a toothpick inserted into the center comes out clean.
- Let the cakes cool on the baking sheets for a few minutes before transferring them to a wire rack to cool completely.
Whipping Up the Dreamy Cream Cheese Filling:
- In a large bowl, beat together the softened cream cheese and butter until smooth and creamy.
- Gradually add the powdered sugar, one cup at a time, beating until fully incorporated. Start with 3 cups and add more to achieve your desired sweetness and consistency.
- Stir in the vanilla extract.
- Add milk or heavy cream, one tablespoon at a time, until the filling reaches a smooth and spreadable consistency. You want it to be thick enough to hold its shape but soft enough to spread easily.
Assembling Your Masterpieces:
- Once the cake layers are completely cool, flip half of them over so the flat sides are facing up.
- Spoon or pipe a generous amount of cream cheese filling onto the flat side of each cake.
- Top with the remaining cake layers, flat-side down, to create a sandwich.
- Gently press the tops and bottoms together to distribute the filling evenly.
Why Apple Cider Makes All The Difference
You might be wondering, “Why go through the extra step of reducing the apple cider?” Trust me, it’s worth it! Reducing the cider concentrates the apple flavor, giving these whoopie pies a truly authentic and intense apple taste. If you skip this step, the flavor will be much more subtle, and you won’t get that wonderful burst of apple that makes these treats so special.
Troubleshooting Tips for Whoopie Pie Wonders
Sometimes, baking doesn’t always go according to plan. Here are a few common issues and how to fix them:
- Flat cakes: This could be due to overmixing the batter or using baking powder that is past its expiration date. Make sure to mix until just combined and always check the date on your baking powder.
- Dry cakes: Overbaking is the usual culprit here. Keep a close eye on the cakes while they’re in the oven and remove them as soon as a toothpick comes out clean.
- Filling too soft: Add more powdered sugar, a tablespoon at a time, until the filling reaches your desired consistency. Chill the filling in the refrigerator for 30 minutes to help it firm up.
- Filling too stiff: Add a little more milk or heavy cream, a teaspoon at a time, until the filling becomes smooth and spreadable.
Variations to Make It Your Own
This recipe is fantastic as is, but feel free to experiment and put your own spin on it! Here are a few ideas:
- Add chopped nuts: Stir chopped pecans or walnuts into the cake batter for added texture and flavor.
- Spice it up: Add a pinch of ground cloves or allspice to the cake batter for a warmer, more complex flavor.
- Caramel drizzle: Drizzle caramel sauce over the assembled whoopie pies for an extra touch of sweetness and decadence.
- Apple pie filling: Incorporate some cooked and cooled apple pie filling into the cream cheese frosting for an even more intense apple flavor. You can find a similar delicious apple experience in our APPLE COBBLER recipe.
Serving Suggestions and Storage Secrets
These Apple Cider Whoopie Pies are best enjoyed fresh, but they can be stored in an airtight container in the refrigerator for up to 3 days. Bring them to room temperature before serving for the best flavor and texture. They’re perfect for fall gatherings, potlucks, or simply enjoying with a cup of coffee or tea on a chilly afternoon.
Beyond Whoopie Pies: More Fall Baking Adventures
Now that you’ve conquered these amazing Apple Cider Whoopie Pies, why not try some other fall-inspired recipes? For a breakfast treat, consider the PUMPKIN CINNAMON ROLL PERFECTION. Or, if you’re looking for an appetizer, the PUMPKIN CHEESE BALL PERFECTION is always a crowd-pleaser. And if you’re craving a cookie, don’t miss the PUMPKIN S’MORES COOKIE HEAVEN. Finally, the CINNAMON APPLE CRUMB HEAVEN is another great choice for apple lovers.
So there you have it – everything you need to bake up a batch of these irresistible Apple Cider Whoopie Pies. I know you’ll love them as much as I do! Happy baking, my friend!
Why is it important to reduce the apple cider for the whoopie pies?
Reducing the apple cider concentrates the apple flavor, providing a more intense and authentic apple taste in the whoopie pies. Skipping this step results in a much more subtle apple flavor.
What can I do if my cream cheese filling is too soft?
If your cream cheese filling is too soft, add more powdered sugar, a tablespoon at a time, until it reaches your desired consistency. Chilling the filling in the refrigerator for 30 minutes can also help it firm up.
What are some variations I can make to the Apple Cider Whoopie Pie recipe?
You can add chopped nuts (like pecans or walnuts) to the cake batter, incorporate a pinch of ground cloves or allspice for a warmer flavor, drizzle caramel sauce over the assembled whoopie pies, or mix cooked and cooled apple pie filling into the cream cheese frosting.
How should I store the Apple Cider Whoopie Pies?
The Apple Cider Whoopie Pies are best enjoyed fresh, but they can be stored in an airtight container in the refrigerator for up to 3 days. Bring them to room temperature before serving for the best flavor and texture.

Apple Cider Whoopie Pies
Equipment
- Measuring cups and spoons
- Mixing bowls (medium and large)
- Electric mixer (hand or stand)
- Whisk
- Parchment paper or silicone baking mats
- Baking sheets (2)
- Rubber spatula
- Wire rack
- Spoon or piping bag
- Saucepan (for reducing cider)
- Toothpick
Ingredients
- 2 ½ cups all-purpose flour
- 1 teaspoon baking soda
- 1 teaspoon baking powder
- 1 teaspoon ground cinnamon
- ½ teaspoon ground nutmeg
- ½ teaspoon ground ginger
- ½ teaspoon salt
- ¾ cup 1 ½ sticks
- 1 ½ cups granulated sugar
- 2 large eggs
- 1 cup apple cider
- 1 teaspoon vanilla extract
- 8 ounces cream cheese, softened
- ½ cup 1 stick
- 3-4 cups powdered sugar
- 1 teaspoon vanilla extract
- 2-4 tablespoons milk or heavy cream
Instructions
- Preheat your oven to 375°F (190°C). Line two baking sheets with parchment paper or silicone baking mats.
- In a saucepan, reduce 1 cup of apple cider to ½ cup. This concentrates the flavor.
- In a medium bowl, whisk together the flour, baking soda, baking powder, cinnamon, nutmeg, ginger, and salt.
- In a large bowl, cream together the softened butter and granulated sugar until light and fluffy (3-5 minutes).
- Beat in the eggs one at a time, then stir in the reduced apple cider and vanilla extract.
- Gradually add the dry ingredients to the wet ingredients, mixing until just combined. Do not overmix.
- Drop rounded tablespoons of batter onto the prepared baking sheets, leaving about 2 inches between each.
- Bake for 8-10 minutes, or until the edges are lightly golden and a toothpick inserted into the center comes out clean.
- Let the cakes cool on the baking sheets for a few minutes before transferring them to a wire rack to cool completely.
- For the filling, in a large bowl, beat together the softened cream cheese and butter until smooth and creamy.
- Gradually add the powdered sugar, one cup at a time, beating until fully incorporated. Start with 3 cups and add more to achieve your desired sweetness and consistency.
- Stir in the vanilla extract.
- Add milk or heavy cream, one tablespoon at a time, until the filling reaches a smooth and spreadable consistency. It should be thick enough to hold its shape but soft enough to spread easily.
- Once the cake layers are completely cool, flip half of them over so the flat sides are facing up.
- Spoon or pipe a generous amount of cream cheese filling onto the flat side of each cake.
- Top with the remaining cake layers, flat-side down, to create a sandwich.
- Gently press the tops and bottoms together to distribute the filling evenly.
- Serve immediately or store in the refrigerator.
