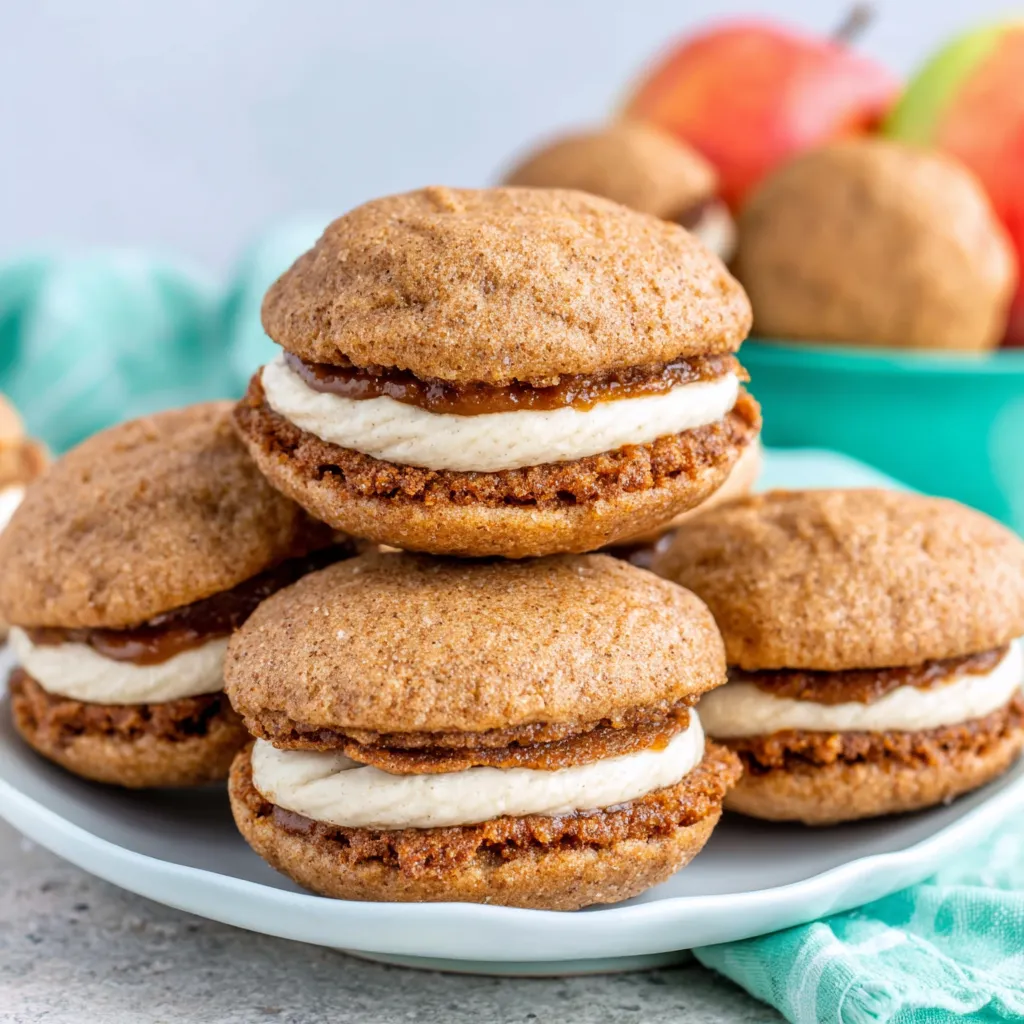
Are you ready to fall head-over-heels for the most delightful autumn dessert imaginable? Forget pumpkin spice everything for a moment, and let’s talk about apple cider! These Apple Cider Whoopie Pies – Fall’s Sweetest Treat combine the cozy warmth of apple cider with the nostalgic charm of whoopie pies, resulting in a treat that’s guaranteed to become a family favorite. Together, we’ll bake up a batch of these soft, spiced cakes filled with a creamy, dreamy frosting that’s pure autumn bliss.
Gathering Your Heavenly Ingredients
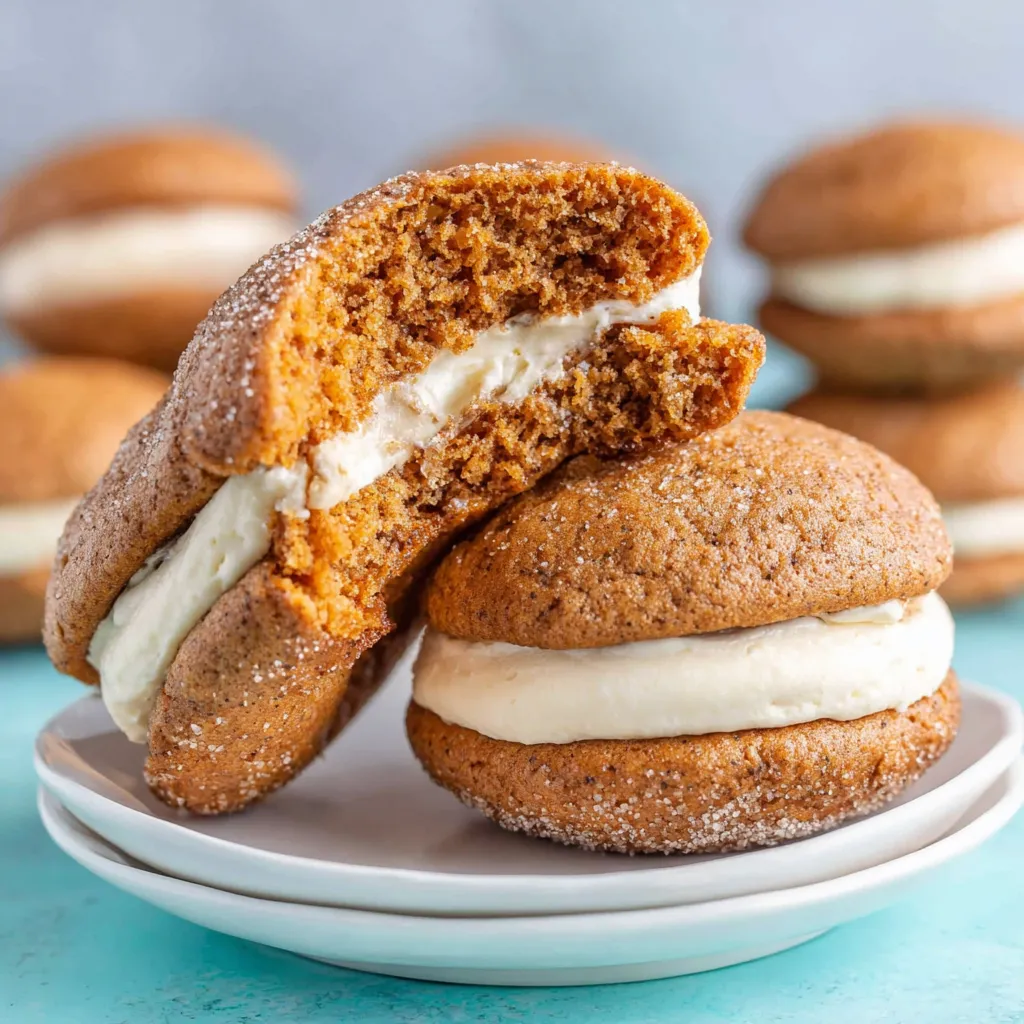
Before we begin our baking adventure, let’s make sure we have all the right ingredients. Don’t worry, most of these are pantry staples! I’ve broken it down for you so it’s super clear. We got this!
For the Apple Cider Cake Layers:
- 2 1/2 cups all-purpose flour
- 1 teaspoon baking powder
- 1/2 teaspoon baking soda
- 1 teaspoon ground cinnamon
- 1/2 teaspoon ground nutmeg
- 1/4 teaspoon ground cloves
- 1/2 teaspoon salt
- 1 cup (2 sticks) unsalted butter, softened
- 1 1/2 cups granulated sugar
- 2 large eggs
- 1 teaspoon vanilla extract
- 1 cup apple cider, reduced to 1/2 cup (see instructions below)
- 1/2 cup sour cream
For the Cream Cheese Filling:
- 8 ounces cream cheese, softened
- 1/2 cup (1 stick) unsalted butter, softened
- 3 cups powdered sugar
- 1 teaspoon vanilla extract
- Pinch of salt
Step-by-Step to Whoopie Pie Perfection
Okay, my friend, it’s time to get baking! Don’t be intimidated; I’ll walk you through every step. Remember, baking is a journey, not a race!
Part 1: Reducing the Apple Cider (Crucial!)
- Pour 1 cup of apple cider into a small saucepan.
- Bring to a simmer over medium heat.
- Simmer gently, uncovered, until reduced to 1/2 cup. This will concentrate the apple flavor. Be patient; it usually takes about 15-20 minutes.
- Let cool completely before using in the cake batter. This is important!
Part 2: Making the Apple Cider Cake Layers
- Preheat your oven to 375°F (190°C). Line two baking sheets with parchment paper or silicone baking mats. This will prevent sticking and make cleanup a breeze.
- In a medium bowl, whisk together the flour, baking powder, baking soda, cinnamon, nutmeg, cloves, and salt. Set aside. This ensures even distribution of spices in your cake.
- In a large bowl (or the bowl of a stand mixer), cream together the softened butter and sugar until light and fluffy. This usually takes about 3-5 minutes. Don’t rush this step; it’s key to a tender cake.
- Beat in the eggs one at a time, then stir in the vanilla extract. Make sure each egg is fully incorporated before adding the next.
- In a small bowl, whisk together the cooled reduced apple cider and sour cream. This adds moisture and tang to the cake.
- Gradually add the dry ingredients to the wet ingredients, alternating with the apple cider mixture, beginning and ending with the dry ingredients. Mix until just combined. Do not overmix! Overmixing develops the gluten in the flour, resulting in a tough cake.
- Drop rounded tablespoons of batter onto the prepared baking sheets, leaving about 2 inches between each cookie. I like to use a cookie scoop for uniform size.
- Bake for 8-10 minutes, or until the edges are lightly golden and a toothpick inserted into the center comes out clean. Watch them carefully; they can burn quickly!
- Let the cake layers cool on the baking sheets for a few minutes before transferring them to a wire rack to cool completely.
Part 3: Whipping Up the Cream Cheese Filling
- In a large bowl (or the bowl of a stand mixer), beat the softened cream cheese and butter until smooth and creamy. Make sure both are at room temperature to avoid lumps.
- Gradually add the powdered sugar, one cup at a time, beating well after each addition.
- Stir in the vanilla extract and salt.
- Beat until the filling is light and fluffy.
Part 4: Assembling Your Masterpiece
- Once the cake layers are completely cool, match them up by size.
- Turn one cake layer flat-side up and spread a generous amount of cream cheese filling on top.
- Top with another cake layer, flat-side down, to create a sandwich.
- Repeat with the remaining cake layers and filling.
- Serve immediately or chill for later. Chilling allows the flavors to meld together even more!
Why This Recipe is a Fall MUST-MAKE
These aren’t just any whoopie pies. The concentrated apple cider flavor in the cake layers is what sets them apart. Reducing the cider is a game-changer; it intensifies the apple taste without making the batter too thin. Trust me, it’s worth the extra step! Plus, the combination of warm spices like cinnamon, nutmeg, and cloves perfectly complements the apple cider, creating a symphony of autumn flavors in every bite.
Troubleshooting Tips & Tricks (Because Life Happens!)
- Cake layers are too dry? Make sure you’re not overbaking them. Ovens can vary, so start checking for doneness at 7 minutes. Also, ensure your butter isn’t *too* soft when creaming it with the sugar. If it’s melted, it can affect the texture.
- Filling is too soft? Add more powdered sugar, a tablespoon at a time, until you reach your desired consistency.
- Cake layers are sticking to the pan? Always use parchment paper or silicone baking mats. If you don’t have either, grease and flour your baking sheets well.
- Apple cider not reducing? Be patient! It takes time. Make sure you’re using a wide saucepan to allow for more surface area for evaporation.
Variations to Make It Your Own!
Want to get creative? Here are a few ideas to customize your Apple Cider Whoopie Pies:
- Add chopped nuts: Stir chopped pecans or walnuts into the cake batter or sprinkle them on top of the finished whoopie pies.
- Caramel drizzle: Drizzle caramel sauce over the filled whoopie pies for an extra touch of sweetness.
- Apple pie filling: Add a spoonful of apple pie filling to the center of the cream cheese filling for an extra layer of apple flavor.
- Spiced cream cheese filling: Add a pinch of cinnamon or nutmeg to the cream cheese filling for a warmer, spicier flavor.
Storage Secrets for Freshness
These whoopie pies are best enjoyed within 2-3 days. Store them in an airtight container in the refrigerator. The cream cheese filling will keep them fresh and moist. Before serving, let them sit at room temperature for a few minutes to soften the filling slightly.
Beyond Whoopie Pies: Exploring Fall Flavors
If you’re a fan of fall baking like I am, you might also enjoy my recipe for APPLE CIDER CHEESECAKE COOKIES. They’re little bites of heaven that capture the essence of autumn in every mouthful! Or perhaps you’d like to bake up a batch of PUMPKIN CREAM CHEESE COOKIES? For a showstopping dessert, give FALL CHEESECAKE COOKIE BOMBS a try. They are always a crowd-pleaser! If you love s’mores, then GOOEY PUMPKIN S’MORES COOKIES are the perfect recipe. You may also enjoy APPLE CIDER WHOOPIE MAGIC or APPLE CIDER CHEESECAKE.
Final Thoughts: Your Autumn Baking Adventure Awaits
So there you have it – a recipe for Apple Cider Whoopie Pies that’s guaranteed to bring a smile to your face. Don’t be afraid to experiment with the variations and make them your own. Happy baking, and may your kitchen be filled with the sweet aroma of autumn!
Why is it important to reduce the apple cider before adding it to the cake batter?
Reducing the apple cider concentrates the apple flavor without making the batter too thin, which is key to the overall taste of the Apple Cider Whoopie Pies.
How should I store the Apple Cider Whoopie Pies to keep them fresh?
Store the whoopie pies in an airtight container in the refrigerator for up to 2-3 days. The cream cheese filling helps keep them fresh and moist. Let them sit at room temperature for a few minutes before serving to soften the filling.
What can I do if my cream cheese filling is too soft?
If your cream cheese filling is too soft, add more powdered sugar, one tablespoon at a time, until you reach your desired consistency.
Can I customize the Apple Cider Whoopie Pies?
Yes, you can! The recipe suggests adding chopped nuts, a caramel drizzle, apple pie filling to the center, or spices like cinnamon or nutmeg to the cream cheese filling.
Apple Cider Whoopie Pies
Equipment
- Small saucepan
- Measuring cups and spoons
- Medium bowl
- Large bowl
- Whisk
- Stand mixer or electric hand mixer
- Baking sheets
- Parchment paper or silicone baking mats
- Cookie scoop or tablespoon
- Wire rack
- Rubber spatula
- Airtight container
Ingredients
- 2 ½ cups all-purpose flour
- 1 teaspoon baking powder
- ½ teaspoon baking soda
- 1 teaspoon ground cinnamon
- ½ teaspoon ground nutmeg
- ¼ teaspoon ground cloves
- ½ teaspoon salt
- 1 ½ cups granulated sugar
- 2 large eggs
- 1 teaspoon vanilla extract
- 1 cup apple cider, reduced to 1/2 cup
- ½ cup sour cream
- 8 ounces cream cheese, softened
- 3 cups powdered sugar
- Pinch of salt
Instructions
- **Part 1: Reducing the Apple Cider**
- 1. Pour 1 cup of apple cider into a small saucepan.
- 2. Bring to a simmer over medium heat.
- 3. Simmer gently, uncovered, until reduced to 1/2 cup. This will concentrate the apple flavor (about 15-20 minutes).
- 4. Let cool completely before using in the cake batter.
- **Part 2: Making the Apple Cider Cake Layers**
- 1. Preheat your oven to 375°F (190°C). Line two baking sheets with parchment paper or silicone baking mats.
- 2. In a medium bowl, whisk together the flour, baking powder, baking soda, cinnamon, nutmeg, cloves, and salt.
- 3. In a large bowl (or the bowl of a stand mixer), cream together the softened butter and sugar until light and fluffy (about 3-5 minutes).
- 4. Beat in the eggs one at a time, then stir in the vanilla extract.
- 5. In a small bowl, whisk together the cooled reduced apple cider and sour cream.
- 6. Gradually add the dry ingredients to the wet ingredients, alternating with the apple cider mixture, beginning and ending with the dry ingredients. Mix until just combined. Do not overmix!
- 7. Drop rounded tablespoons of batter onto the prepared baking sheets, leaving about 2 inches between each cookie.
- 8. Bake for 8-10 minutes, or until the edges are lightly golden and a toothpick inserted into the center comes out clean.
- 9. Let the cake layers cool on the baking sheets for a few minutes before transferring them to a wire rack to cool completely.
- **Part 3: Whipping Up the Cream Cheese Filling**
- 1. In a large bowl (or the bowl of a stand mixer), beat the softened cream cheese and butter until smooth and creamy.
- 2. Gradually add the powdered sugar, one cup at a time, beating well after each addition.
- 3. Stir in the vanilla extract and salt.
- 4. Beat until the filling is light and fluffy.
- **Part 4: Assembling Your Masterpiece**
- 1. Once the cake layers are completely cool, match them up by size.
- 2. Turn one cake layer flat-side up and spread a generous amount of cream cheese filling on top.
- 3. Top with another cake layer, flat-side down, to create a sandwich.
- 4. Repeat with the remaining cake layers and filling.
- 5. Serve immediately or chill for later.
